These Cheddar Chive Biscuits are incredibly fluffy and tender with flaky layers, and are loaded with cheddar cheese and fresh chives. They're baked until golden brown and best when slathered with butter!

Jump to:
Ingredients

- All purpose flour: AP flour works best for this recipe and is my usual go-to. I haven't tried any other flour varieties so cannot promise an outcome!
- Baking powder: This provides all the rise in the biscuits. Make sure yours isn't expired, and if it's been open for more than 6mo do a test to make sure it's still active; here's how to do that.
- Salt: I always use kosher salt.
- Butter: Unsalted butter is the way to go here. Kerrygold is my favorite if you're able to use that. If you only have salted butter, just don't add as much additional salt.
- Buttermilk: This gives the biscuits a little tang and reacts with the baking powder to get that lift. Full fat buttermilk is ideal but not a requirement.
- Honey: I love adding a little bit of honey when I use buttermilk, it gives them the faintest sweet taste without being sweet.
- Cheddar cheese: Sharp cheddar cheese is best, but regular cheddar cheese will also be fine! If you can, get it from the block and grate it yourself.
- Chives: Fresh chives chopped really finely are the perfect mild onion-y flavor. If you can only get green onions/scallions that is fine, just make sure you chop them really finely and don't use the whites (they are too onion-y of a flavor here).
Step by step instructions
The key to a great easy cheddar biscuit is to not overwork the dough, so make sure to keep that in mind as you go through the steps! Also keep your butter and buttermilk in the fridge until right before you use them.
1. Make the dry mixture. In a large bowl mix together the flour, baking powder, and salt.
2. Mix in the grated butter. To the flour mixture, gently mix in the butter until combined. Do this gently - you don't want huge butter clumps, you want it to stay relatively grated in size.
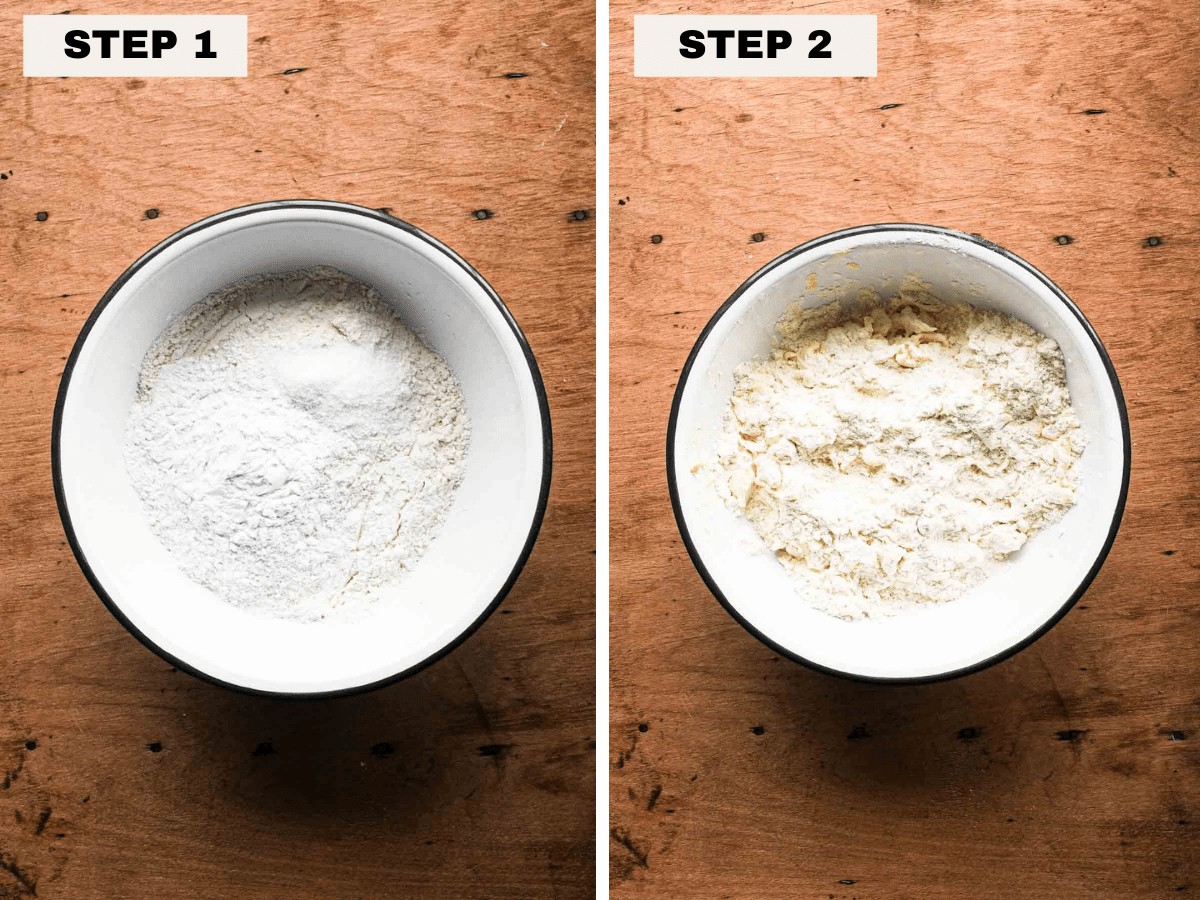
3. Add the cheese and chives. To the same mixture, gently mix in the cheddar and chives until combined.
4. Combined the buttermilk and honey. In a measuring cup or small bowl, mix together the honey and buttermilk. It may be a little clumpy but that's ok.
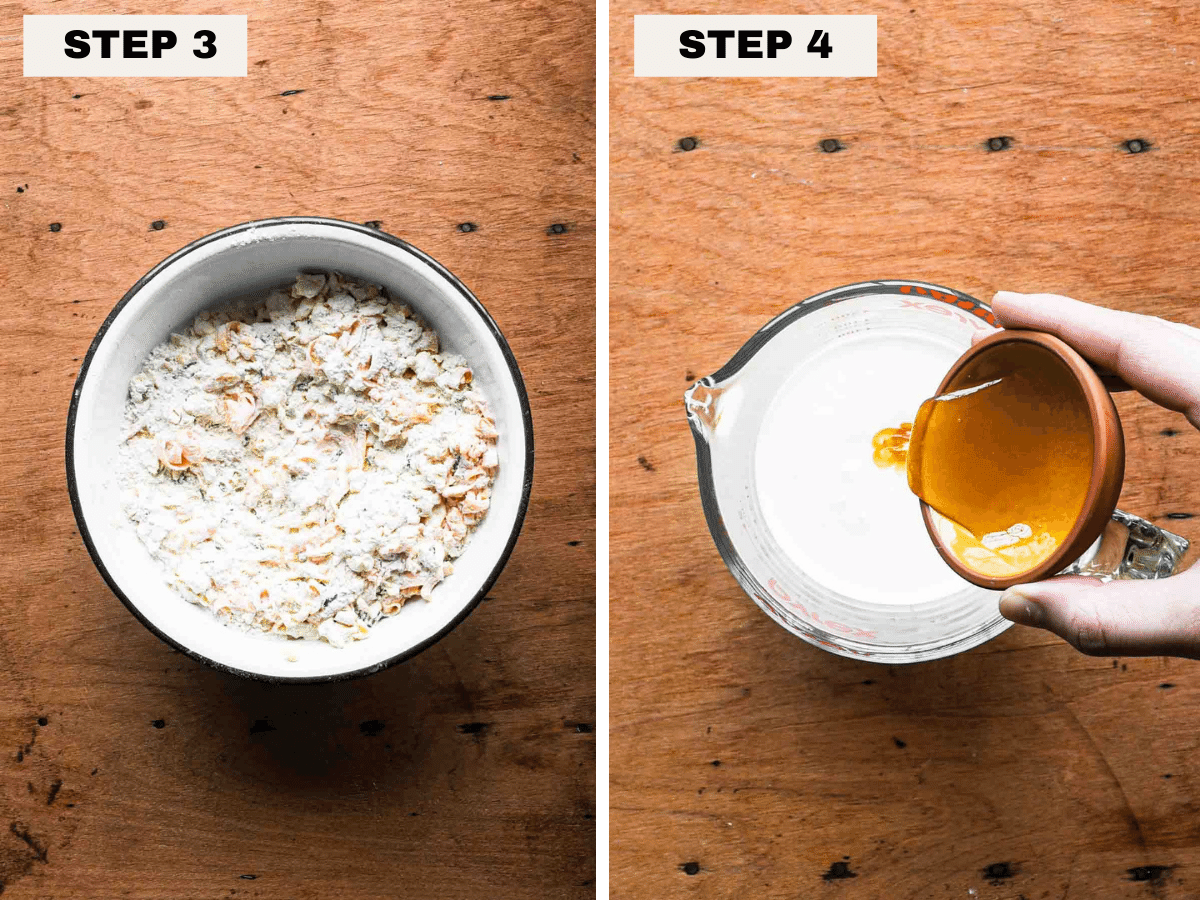
5. Add the wet to the flour mixture. Add the buttermilk honey mixture into the bowl with the flour mixture. Gently stir with a wooden spoon until it just starts to come together. Then pour it out onto a floured surface.
6. Form the biscuit dough (add more flour throughout this step if it's sticking too much). Carefully work the mixture together until a dough forms. It'll be a bit sticky, but if it seems overly sticky then sprinkle some more flour on. Flatten it out to about 1" and then fold the sides into each other. Flatten it out again and fold the sides over once more. Then do a final flattening to 1" thick.


7. Cut the biscuits out. Using your biscuit cutter, go straight down and straight back up in the dough as many times as you can (do not turn the cutter, this will prevent it from rising properly). Form the scraps back into a 1" thick disk and repeat - you should be able to get 10 biscuits total.
8. Bake. Transfer the biscuits to a parchment-lined baking sheet about ¼ inch apart. Brush the tops of the biscuits with melted butter and bake at 425℉ for 20-25 minutes until golden.

If you're looking for something a bit simpler than the traditional biscuit route, try these 3-Ingredient Drop Biscuits instead.
Tips and tricks
- Grate your butter: A lot of biscuit recipes call to cut butter into the dough using a pastry cutter or your fingers - I find that it's much easier to just use a coarse grater and grate the butter. You get a great size and it's really easy to work into the flour this way. It'll be easier to grate if you put it in the freezer for a little bit.
- Keep the butter and buttermilk COLD: Cold butter and buttermilk is key for flaky biscuits! Keep them in the fridge (or freezer for the butter) until right before you use them.
- Make your own buttermilk: If you can't find buttermilk, you can make your own by combining 1 cup of whole milk with 1 tablespoon white vinegar or lemon juice. Stir and let it sit for at least 5 minutes.
- Grate your own cheese: Ideally you are able to find a block of cheese and grate the cheese yourself on a coarse grater, but if you frankly don't want to be bothered with that, pre-shredded in this instance is fine.
- Handle the dough as little as possible: The warmth of your hands could melt the butter a bit, and we want the butter cold so that it melts only when baked to get those flaky layers. So handle the dough as little as possible.
- Work the dough with your hands: It may seem counterintuitive to use your hands as opposed to a rolling pin to flatten out the dough because your hands are warmer and are more likely to heat up and melt the butter. BUT when you use your hands to flatten it out you have way more control in the pressure. You don't want to apply too much pressure because it'll tighten up the layers too much.
- Don't skip the folds! Folding the dough over itself twice really helps get those super flaky layers.
- Alternate biscuit cutters: While a biscuit cutter is best to get those crisp edges, there are some other household items you can use to cut your biscuits - a glass, a tin or can, a cookie cutter, or even just a knife and make the biscuits into squares.
- Do not twist the biscuit cutter: When you're cutting out the biscuits make sure you go straight up and down and do not twist the biscuit cutter. If you twist it'll almost "seal" the edges and prevent them from rising as much as they can.
- Bake the biscuits close to one another: You want to bake the biscuits ¼ inch - ½ inch away from each other because when they touch while baking they encourage each other to rise higher.
Serving cheddar chive biscuits
You can serve these cheddar chive biscuits completely by themselves with a little pat of salted butter and they are WONDERFUL. But if you're looking to serve them alongside something, here are some ideas:
- You can slice them in half and use them as the vehicle for a breakfast egg sandwich
- You can serve them alongside a delicious soup or stew
- They can be a great substitute for a traditional bread on a holiday such as Thanksgiving, Christmas, or Easter.
FAQs
Yes! You can freeze them either before or after baking in an air-tight freezer friendly bag. If you're freezing them before, skip the step of brushing melted butter on top.
The best way is to heat them in a 350℉ oven for 10-15 minutes.
Bake at 425℉ (same as if you baked them right away) for about 25-30 minutes - keep an eye on them and when they're golden they are good to go.
They are best stored in the fridge in an air-tight container for about 4-5 days.
They are best reheated in the oven at 350℉ for about 5-10 minutes. You can also reheat them in the microwave but they'll lose a bit of their crispiness.
📖 Recipe
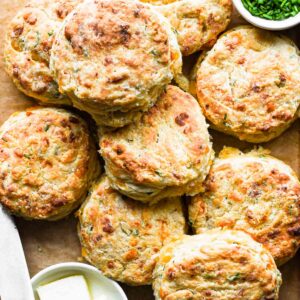
Cheddar Chive Biscuits
Ingredients
- 2 ½ cups all-purpose flour
- 1 ½ tablespoon baking powder
- 1 teaspoon kosher salt
- ½ cup unsalted butter grated
- 1 cup buttermilk
- 2 teaspoon honey
- 1 cup sharp cheddar cheese grated (roughly 4oz in a block)
- ¼ cup fresh chives chopped
- 2 tablespoon unsalted butter melted
Instructions
- Preheat your oven to 425℉.
- In a large bowl mix together the flour, baking powder, and salt.
- To the flour mixture, gently mix in the butter until combined. Do this gently - you don't want huge butter clumps, you want it to stay relatively grated in size.
- To the same mixture, gently mix in the cheddar and chives until combined.
- In a measuring cup or small bowl, mix together the honey and buttermilk. The honey may clump up a little but but mix it into the buttermilk best you can (I found this pretty easy when using a fork).
- Add the buttermilk honey mixture into the bowl with the flour mixture. Gently stir with a wooden spoon until it just starts to come together. Then pour it out onto a floured surface.
- Carefully work the mixture together with your hands until a dough forms. It'll be a bit sticky, but if it seems overly sticky then sprinkle some more flour on. Flatten it out to about 1" and then fold the sides into each other. Flatten it out again and fold the sides over once more. Then do a final flattening to 1" thick.
- Using your biscuit cutter, go straight down and straight back up in the dough as many times as you can (do not turn the cutter, this will prevent it from rising properly). Form the scraps back into a 1" thick disk and repeat - you should be able to get 10 biscuits total.
- Transfer the biscuits to a parchment-lined baking sheet about ¼ inch apart and brush the tops of the biscuits with melted butter.
- Bake at 425℉ for 20-25 minutes until golden.













Leave a Reply