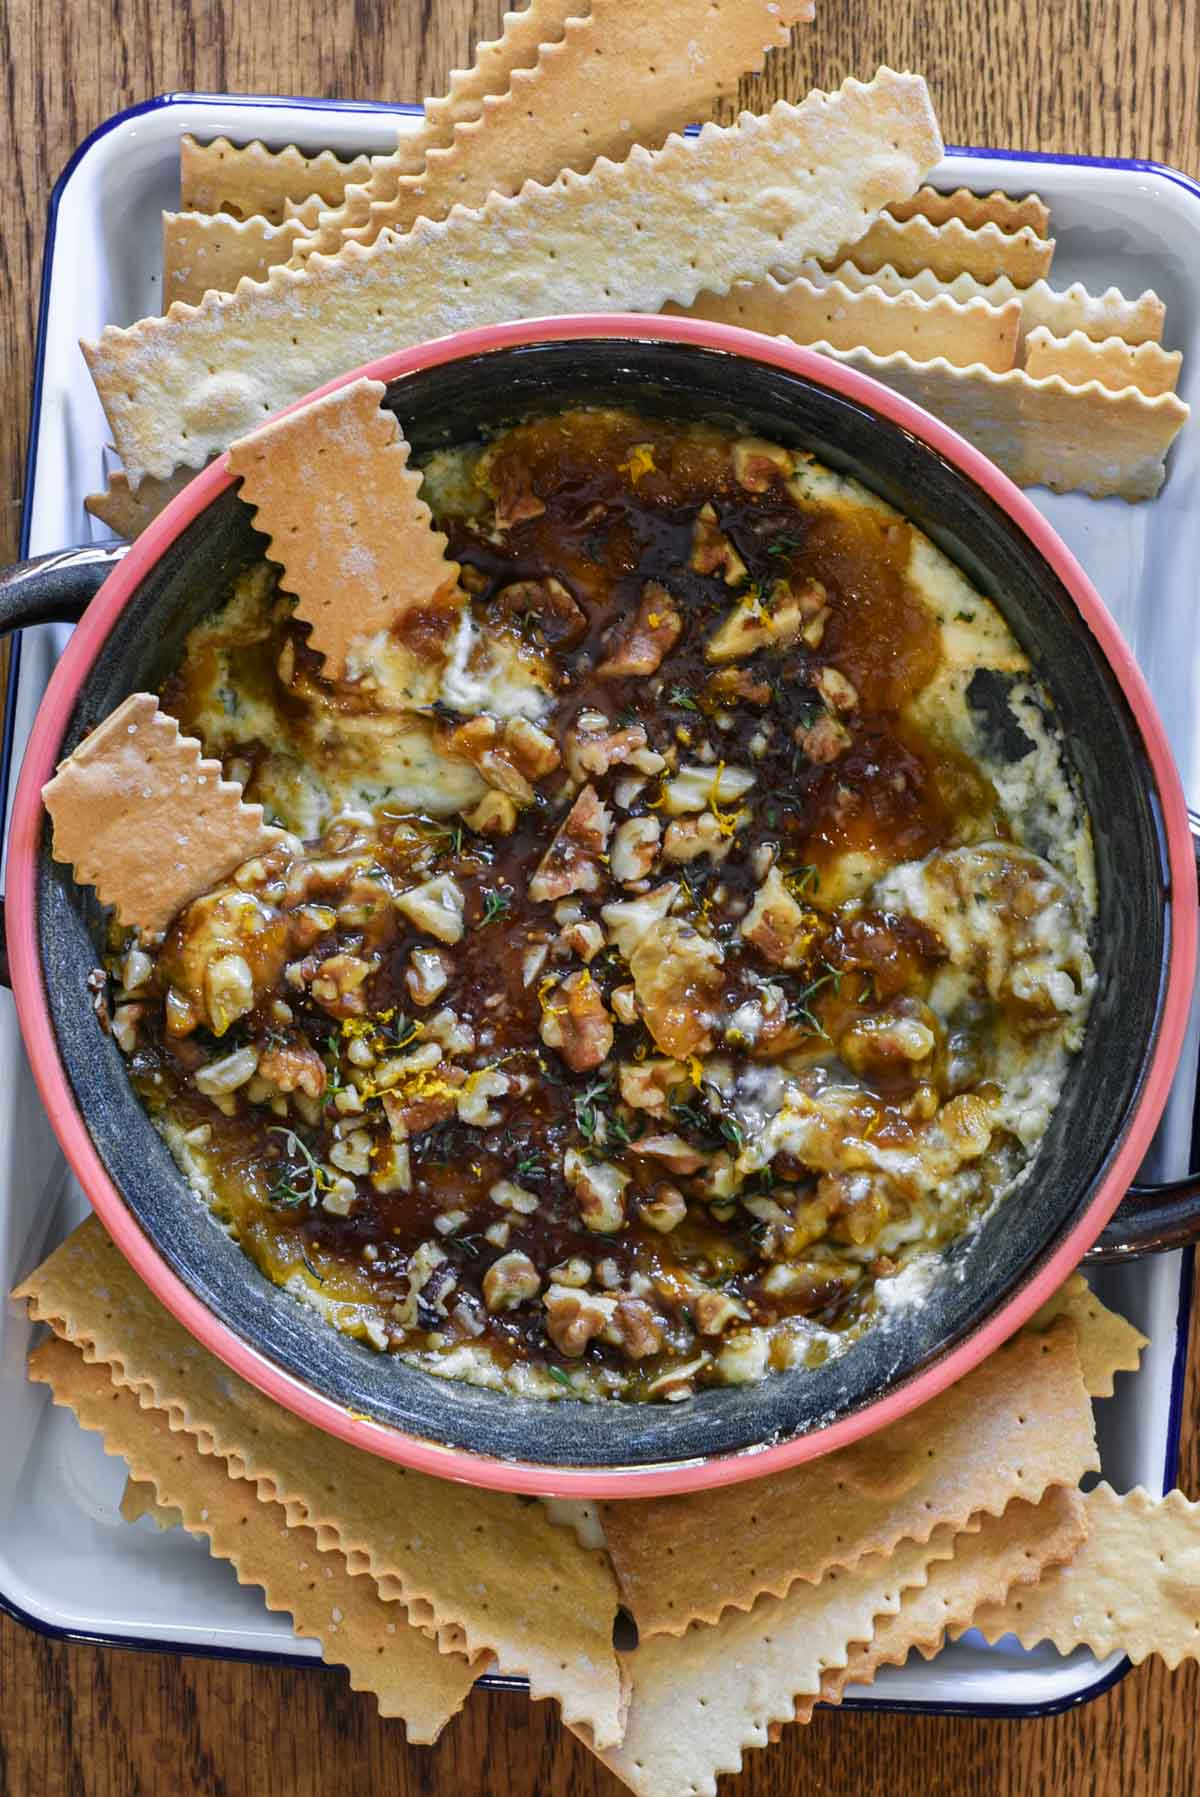
This Boursin Dip with Jam recipe is great to have in your back pocket; it’s a super easy appetizer to throw together for last-minute parties or cheese boards, and has a lot of flavor. It uses Garlic & Herb Boursin as the base then is topped with caramelized onion jam, fig jam, walnuts, thyme, honey, orange zest, and honey. So you have some sweet, some savory, some zesty, some nutty, some salty – all the good things.
Ingredients
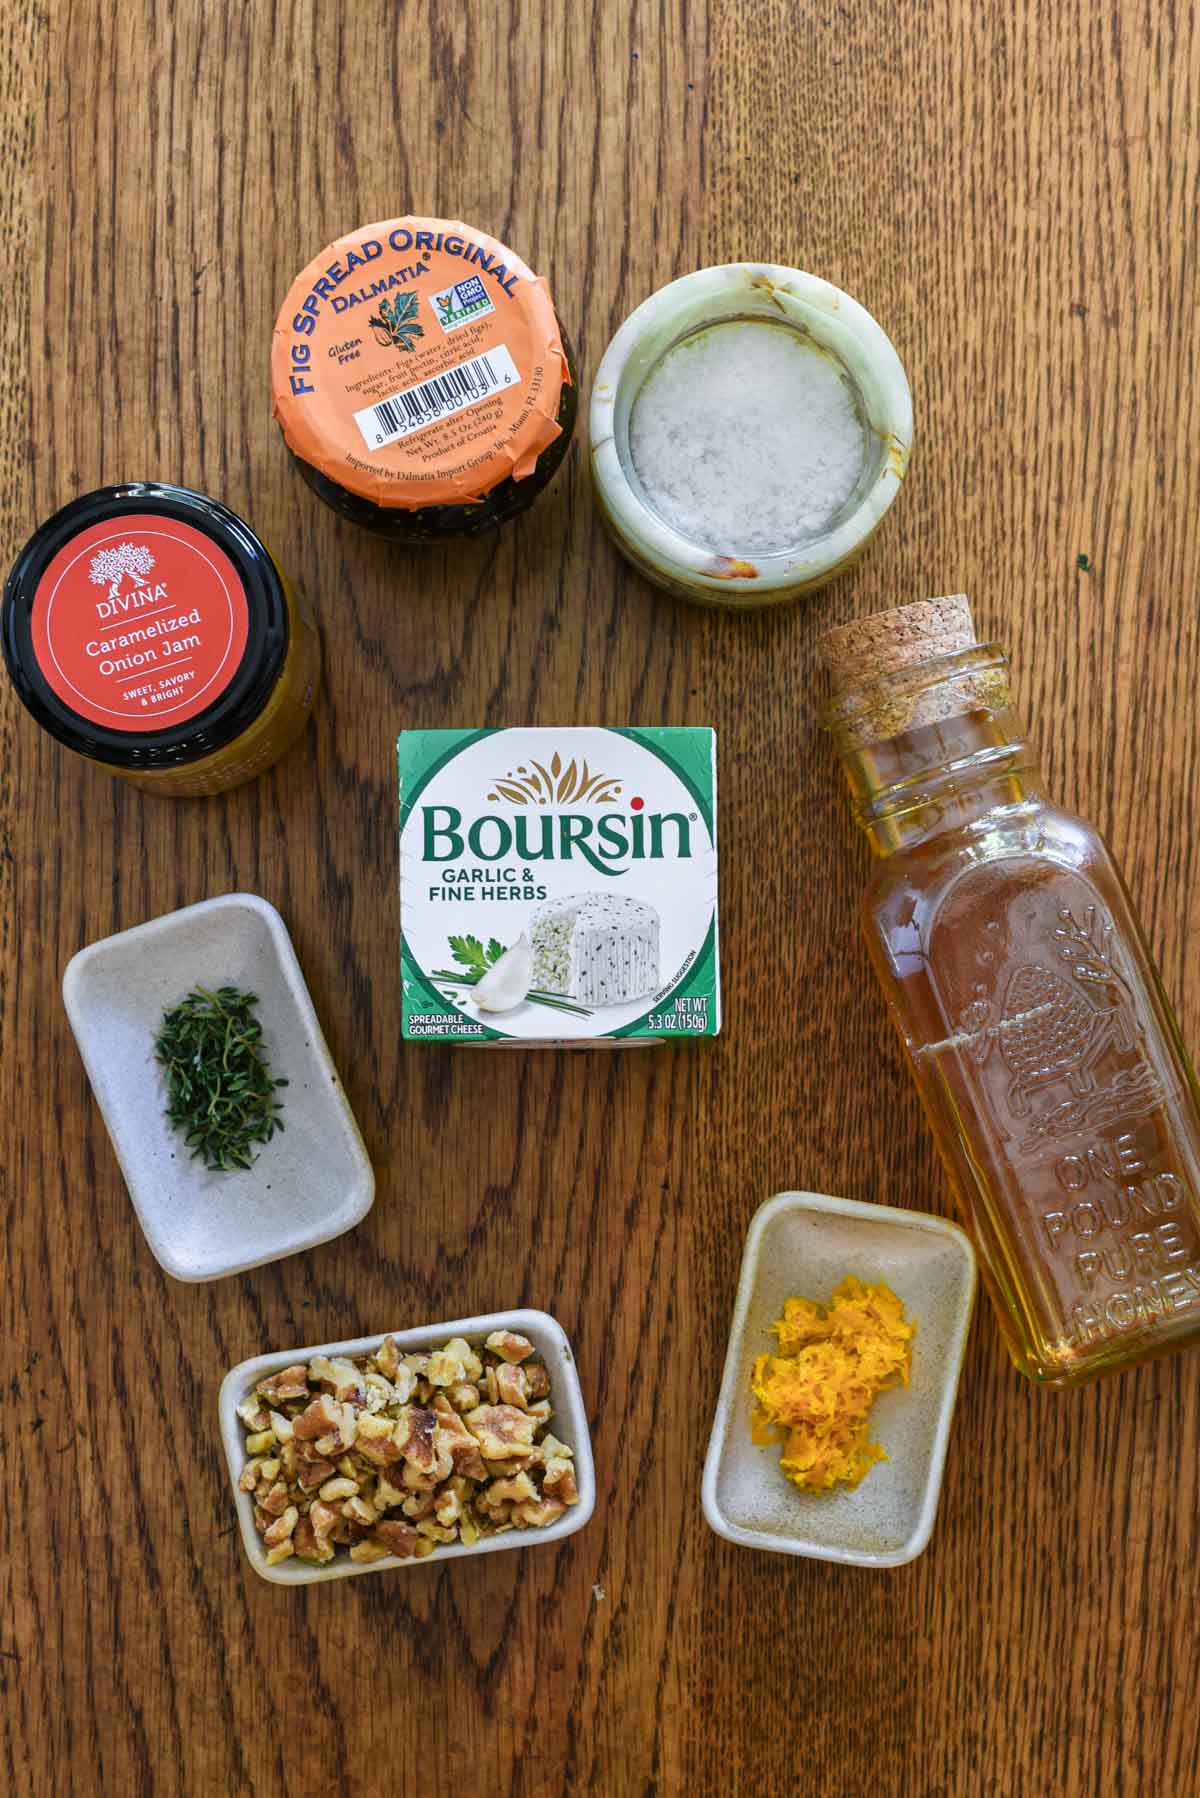
- Boursin: Creamy, savory Boursin cheese is the base – the garlic & herb flavor specifically. Plain would also work perfectly fine.
- Caramelized onion jam: A pantry shortcut that I love and try to have on hand at all times; usually found by the nicer cheeses in your grocery store.
- Fig jam: A classic that isn’t too sweet. You could also use cranberry jam. The key here is to not have something overly fruity or sweet like a raspberry or blueberry jam.
- Thyme: Fresh thyme brings an earthy herbaceousness.
- Walnuts: Chopped raw walnuts for some crunch and nuttiness.
- Honey: To round out the sweetness in a non-artificial way.
- Orange zest: An acidic citrusy pop of flavor.
- Salt: A pinch of flaky sea salt to serve to balance everything out.
Ingredient substitutions
- Boursin: If you can't find Boursin, Alouette Garlic & Herbs spreadable cheese is the best substitute.
- Raw walnuts: You can substitute roasted and salted walnuts for raw walnuts. However, if you do, add them after you bake the dip so they don’t burn. You could also substitute pistachios.
- Honey: Substitute a drizzle of hot honey if you want a little kick.
- Caramelized onion jam: Substitute homemade caramelized onions. Just be mindful that truly caramelizing onions takes at least 1 hour. Anything less and they are really just heavily sautéd.
How to make Boursin Cheese Dip
This delicious Boursin appetizer comes together so quickly and simply –

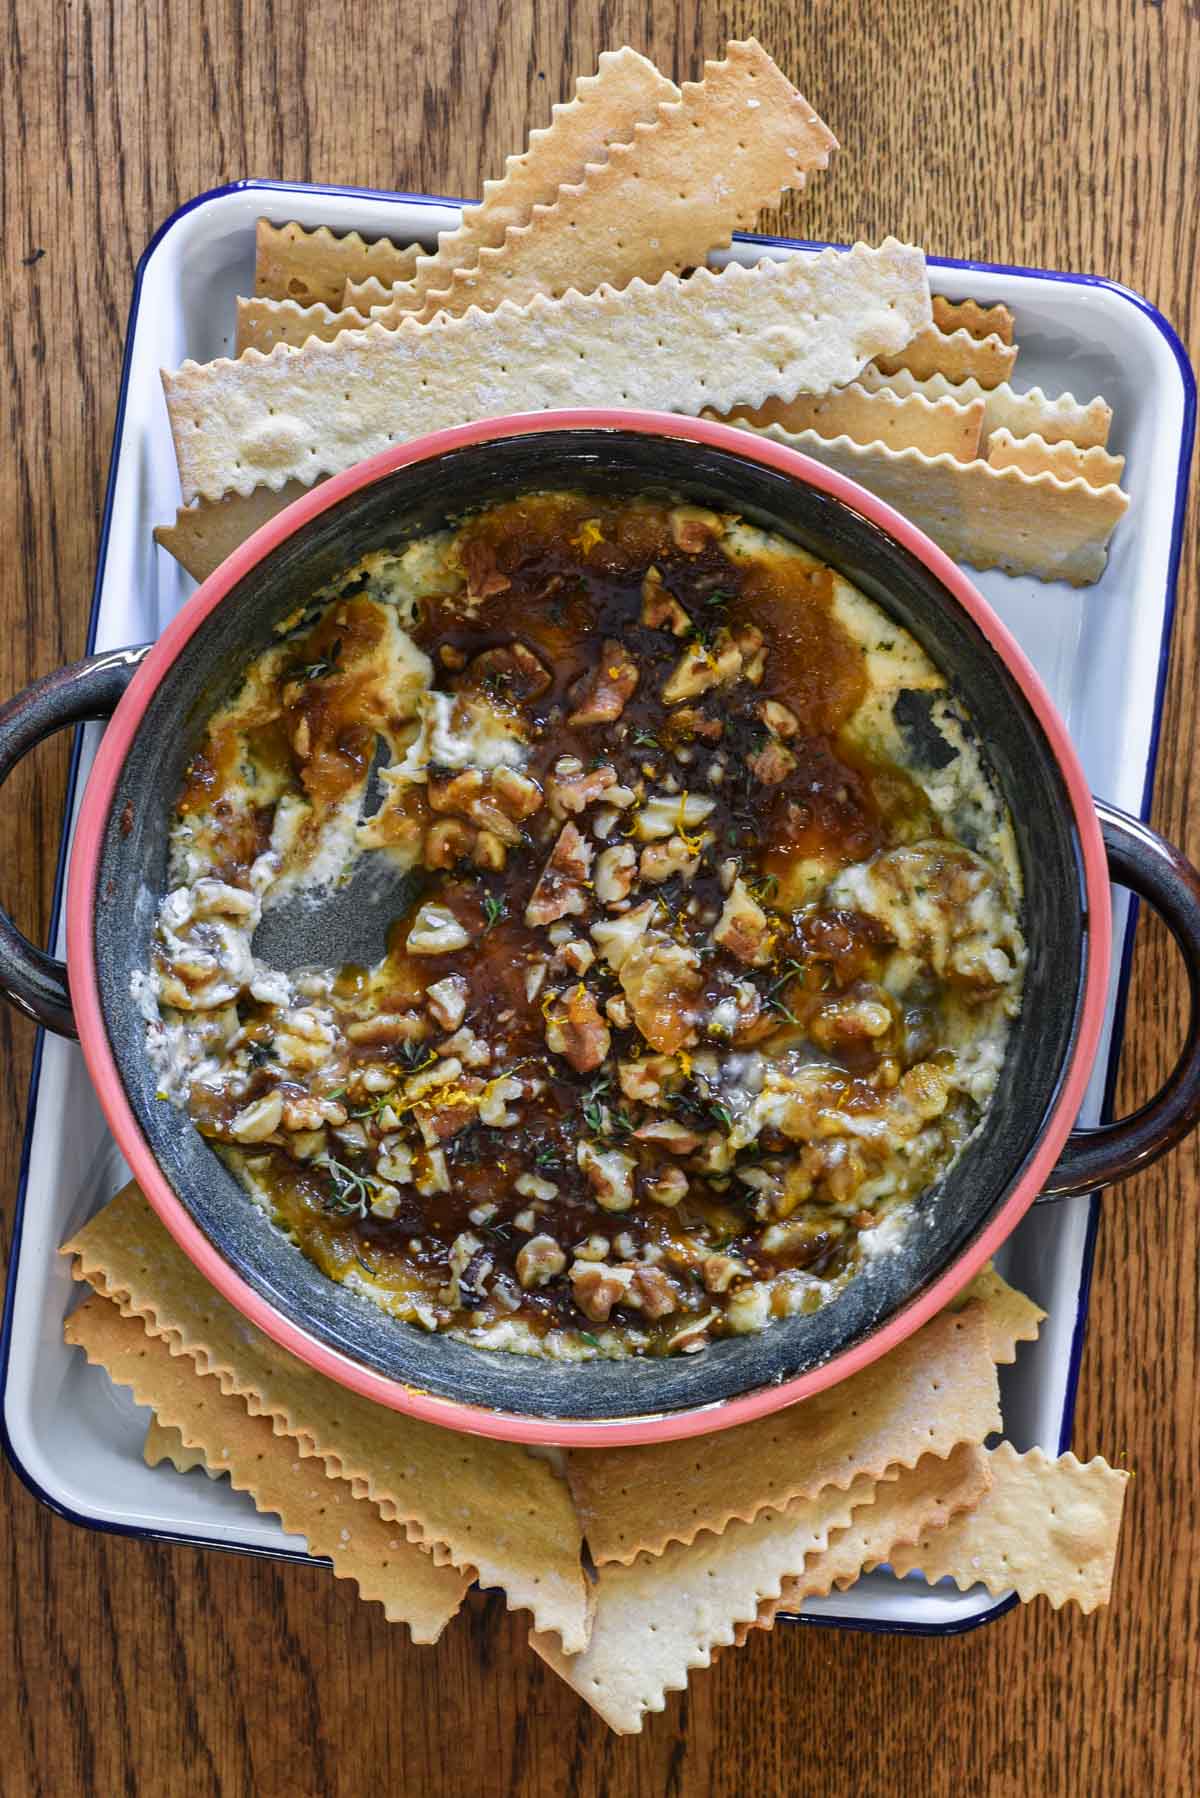
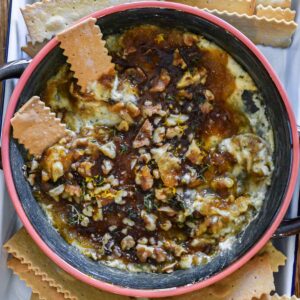
1. Layer. In a small oven-safe baking dish, layer the Boursin cheese, caramelized onion jam, fig jam, and walnuts.

2. Bake. Bake at 350°F for 15 minutes.

3. Add remaining toppings. When it comes out of the oven sprinkle the thyme, orange zest, and salt over top, and do a light drizzle of honey.
Tips and tricks
- Letting the Boursin cheese come to room temperature a little bit makes it easier to spread. Regardless, I find using the back of a spoon the easiest tool to spread it out.
- If you’re really short on time or oven space you don’t need to bake the dip. However, when you do, the cheese melts and gets really nice and creamy so it’s definitely recommended.
Make ahead directions
You can prepare this recipe in advance by layering the cheese and jams and setting it aside in the fridge. When you’re about 15-20 minutes out from wanting to serve, sprinkle the walnuts over top and bake it. Once baked, simply finish with the thyme, orange zest, salt, and honey.
How to serve Boursin dip
I prefer to serve this Boursin and Jam dip with crispy crackers, pita chips, or toasted baguette slices. You want something with a crunch that is somewhat mild so as to not add another flavor into the mix.
FAQs
Boursin is a French Gournay cheese made of cow’s milk. It has a thick, spreadable texture.
The key here is that it’s a spreadable cheese. As mentioned above, the best 1:1 substitute would be Alouette Garlic & Herbs spreadable cheese or Laughing Cow cheese. Alternatively, you could use goat cheese which will be a little tangier, ricotta cheese which will be more mild, or an herbed cream cheese (although cream cheese should be a last resort in my opinion).
The Boursin brand actually sells a dairy-free version.
Did you make this recipe? Leave a rating and review below and tag me on social!
📖 Recipe
Boursin Dip with Jam
Ingredients
- 1 block Boursin Garlic & Herb spreadable cheese
- ⅓ cup caramelized onion jam
- ⅓ cup fig jam
- ⅓ cup chopped raw walnuts
- 1 tablespoon fresh thyme
- 1 teaspoon honey
- 1 tsp orange zest
- Pinch flaky sea salt
Instructions
- Layer. In a small oven-safe baking dish, layer the Boursin cheese, caramelized onion jam, fig jam, and walnuts.
- Bake. Bake at 350°F for 10-15 minutes.
- Add remaining toppings. When it comes out of the oven sprinkle the thyme, orange zest, and salt over top, and do a light drizzle of honey.