• Recipes
  • Contact
  • About
  • Shop

Cozy Cravings

menu icon
go to homepage
  • RECIPES
  • ABOUT
  • CONTACT
  • SUBSCRIBE
    • Facebook
    • Instagram
    • Pinterest
  • subscribe
    search icon
    Homepage link
    • RECIPES
    • ABOUT
    • CONTACT
    • SUBSCRIBE
    • Facebook
    • Instagram
    • Pinterest
  • ×
    Home

    One Pot Spicy Cajun Shrimp and Rice Pilaf

    Finished shrimp and rice dish in a bowl with a napkin.

    This One Pot Spicy Cajun Shrimp and Rice Pilaf is an incredibly flavorful dish that comes together in under 45 minutes (including marinating time!). It's an impressive dinner recipe with a kick of heat that keeps you digging in.

    [feast_advanced_jump_to]

    Ingredients

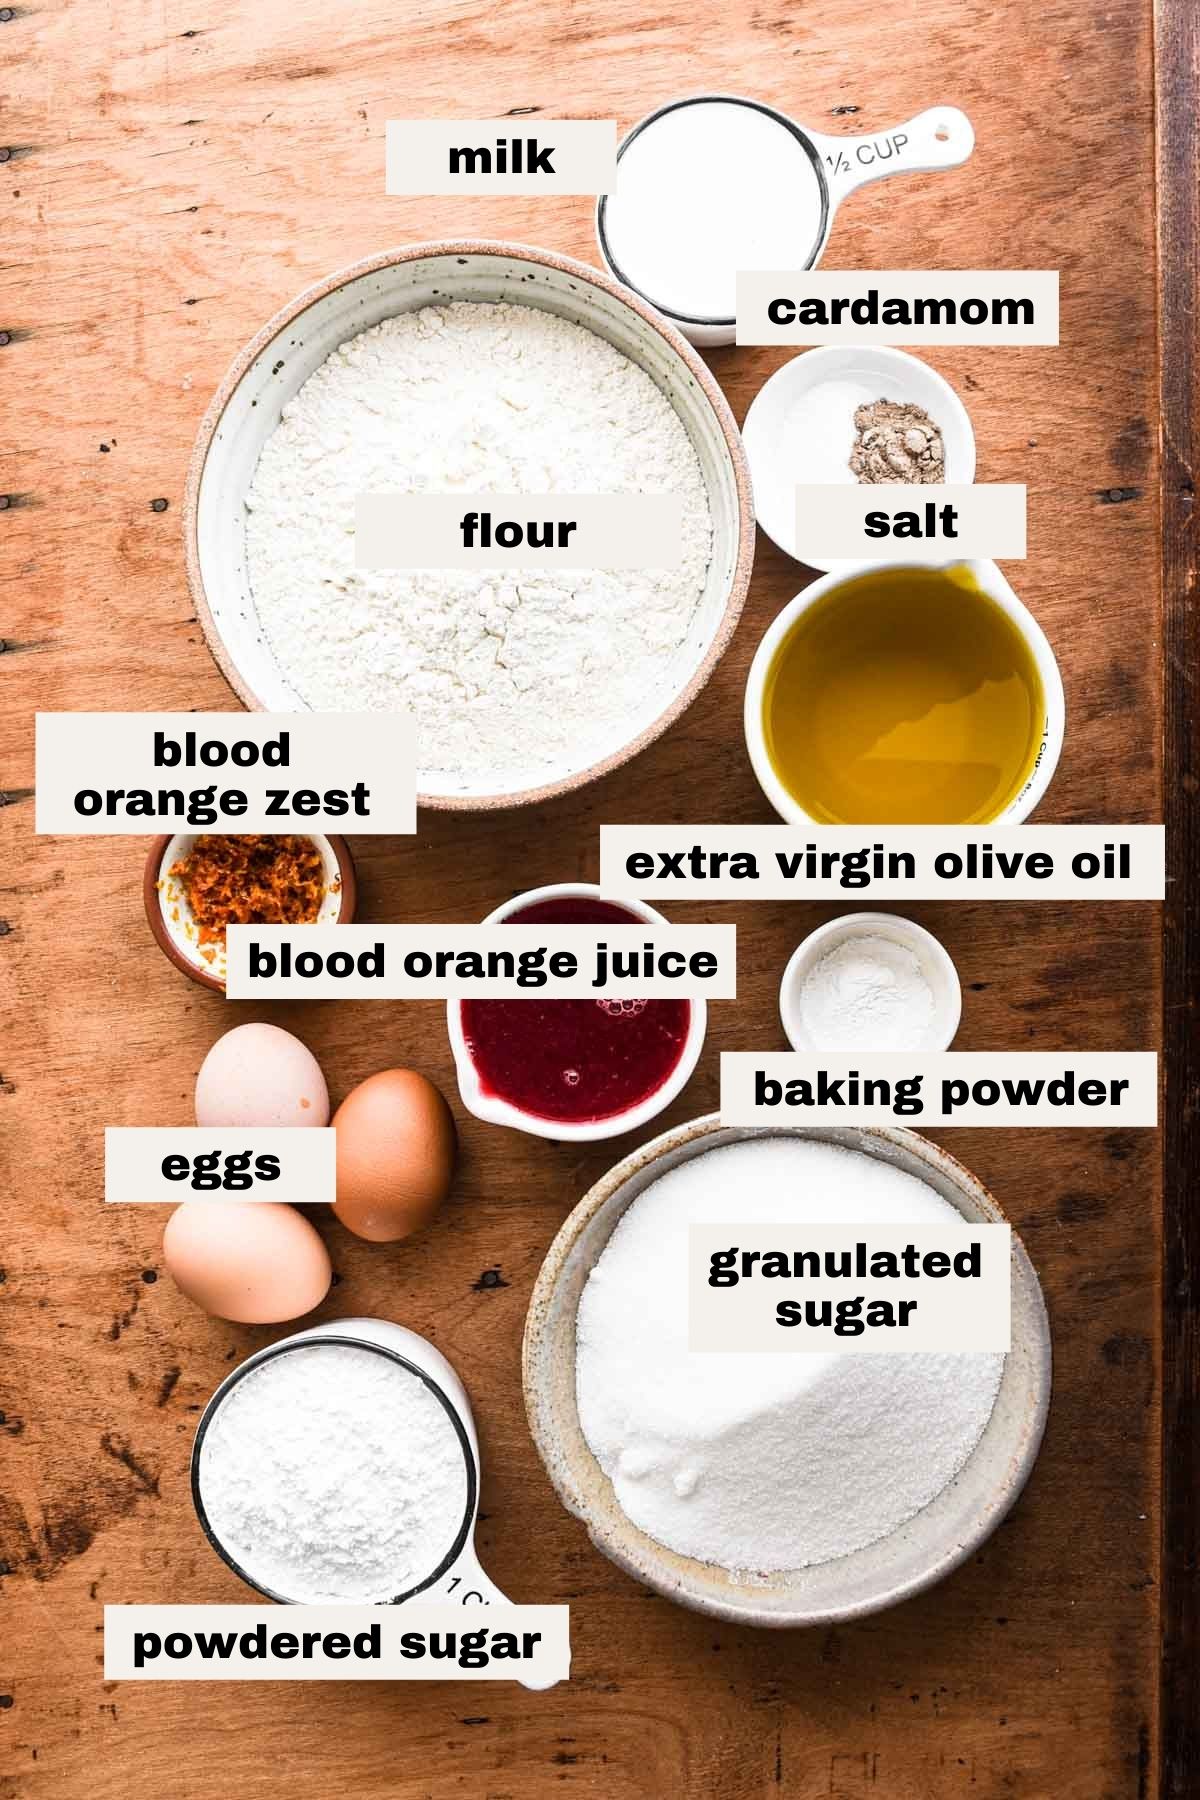
    This spicy cajun shrimp and rice dish uses mostly ingredients you likely have in your pantry:

    • Shrimp: fresh or frozen work! You want peeled and deveined.
    • Cajun seasoning: you can make your own or buy store-bought. I used store bought because it's easier.
    • Red pepper flakes: cajun seasoning has a little kick but this is SPICY cajun shrimp so we need a bit more and that's where red pepper flakes come in!
    • Fresh garlic: there's garlic powder in the cajun seasoning but fresh garlic adds more great flavor.
    • Rice & orzo: these make up the rice pilaf mixture. long grain white rice is best.
    • Onion powder & garlic powder: to season the rice pilaf.
    • Chicken broth: cooking the rice and orzo in chicken broth adds so much flavor. If you don't have chicken broth you can use vegetable broth or just water.
    • Fresh parsley: fresh parsley brings a fresh element to the dish

    Full list in the recipe card below

    Step by step instructions

    Just a few quick steps before you have this delicious spicy cajun shrimp and rice pilaf dish on the table!

    Overview

    • Marinate the shrimp
    • Cook the shrimp and set it aside
    • Toast the orzo in butter
    • Add the rice, spices, and chicken broth and cook until rice is done
    • Stir in parsley and serve with shrimp on top

    Detailed instructions

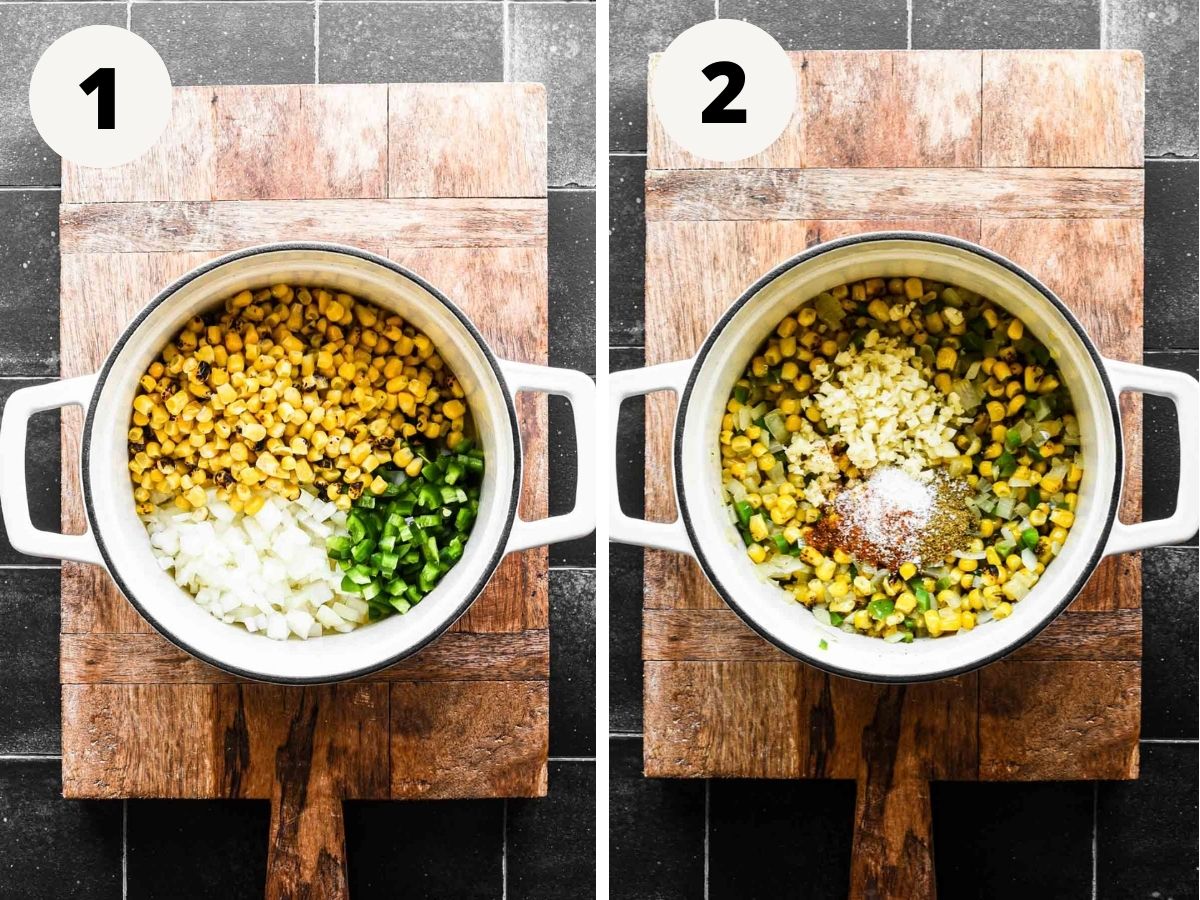
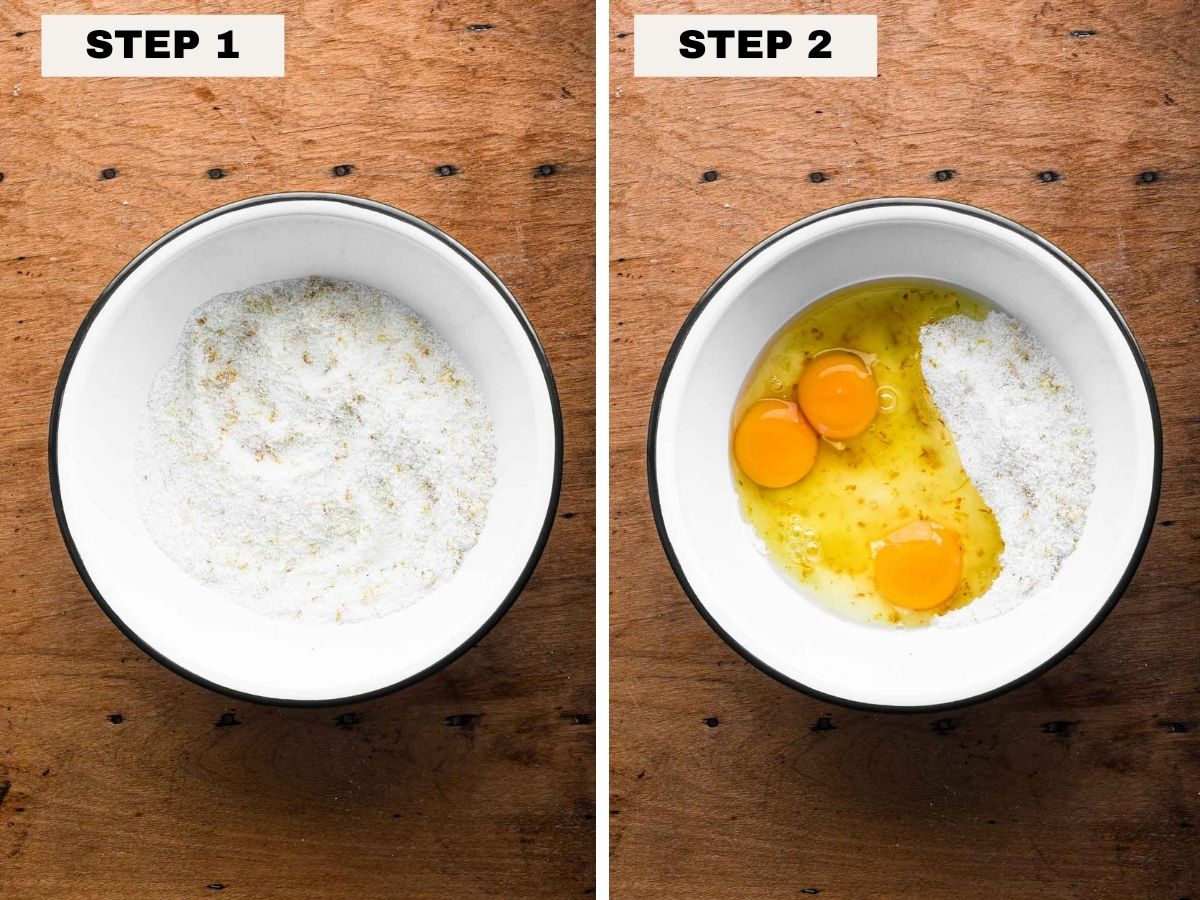
    1. Marinate the shrimp. Add the shrimp, cajun seasoning, red pepper flakes, chopped garlic, and olive oil to a bowl. Marinate in the fridge for at least 15 minutes or up to 2 hours.

    2. Cook the shrimp. Heat the butter over medium heat in a large skillet. When the butter is melted and starting to sizzle, add the shrimp (ideally in one layer) and cook 2-3 minutes on both sides. The shrimp is done cooking when it's no longer translucent. Using a slotted spoon remove the shrimp and set it aside. Don't wipe the skillet clean.

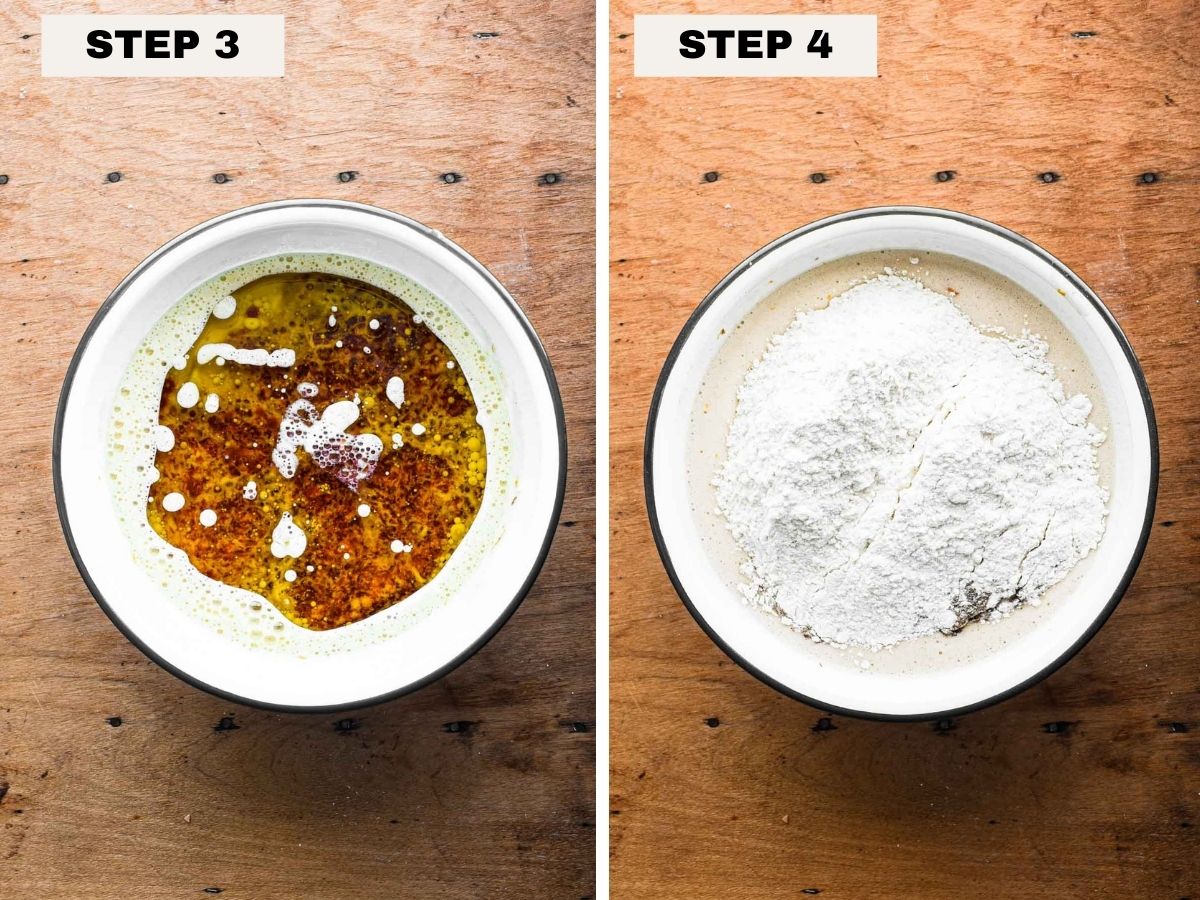
    3. Toast the orzo. To the same skillet melt the remaining butter and toast the orzo for about 3 minutes until lightly golden.

    4. Add the rice and spices. To the orzo add the rice, onion powder, garlic powder, salt, pepper. Mix to combine.

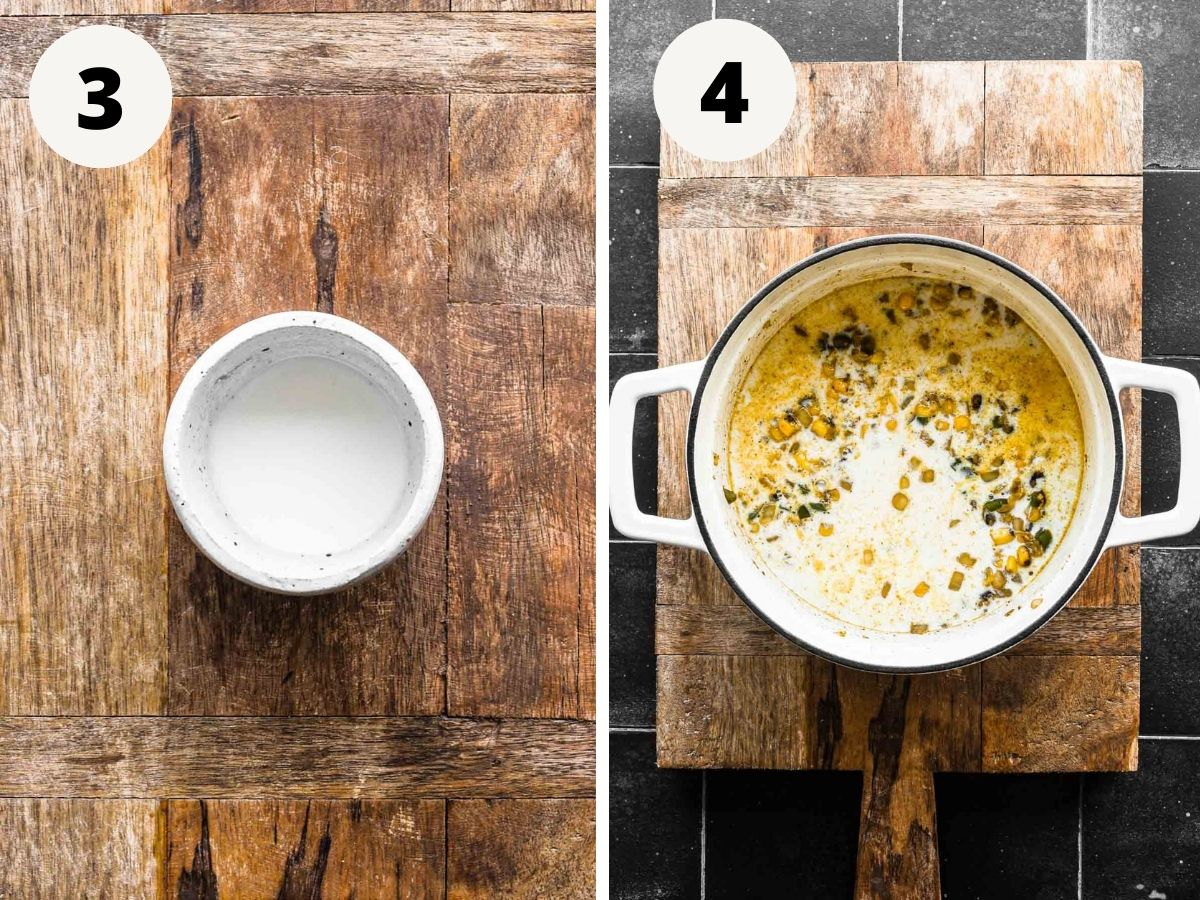
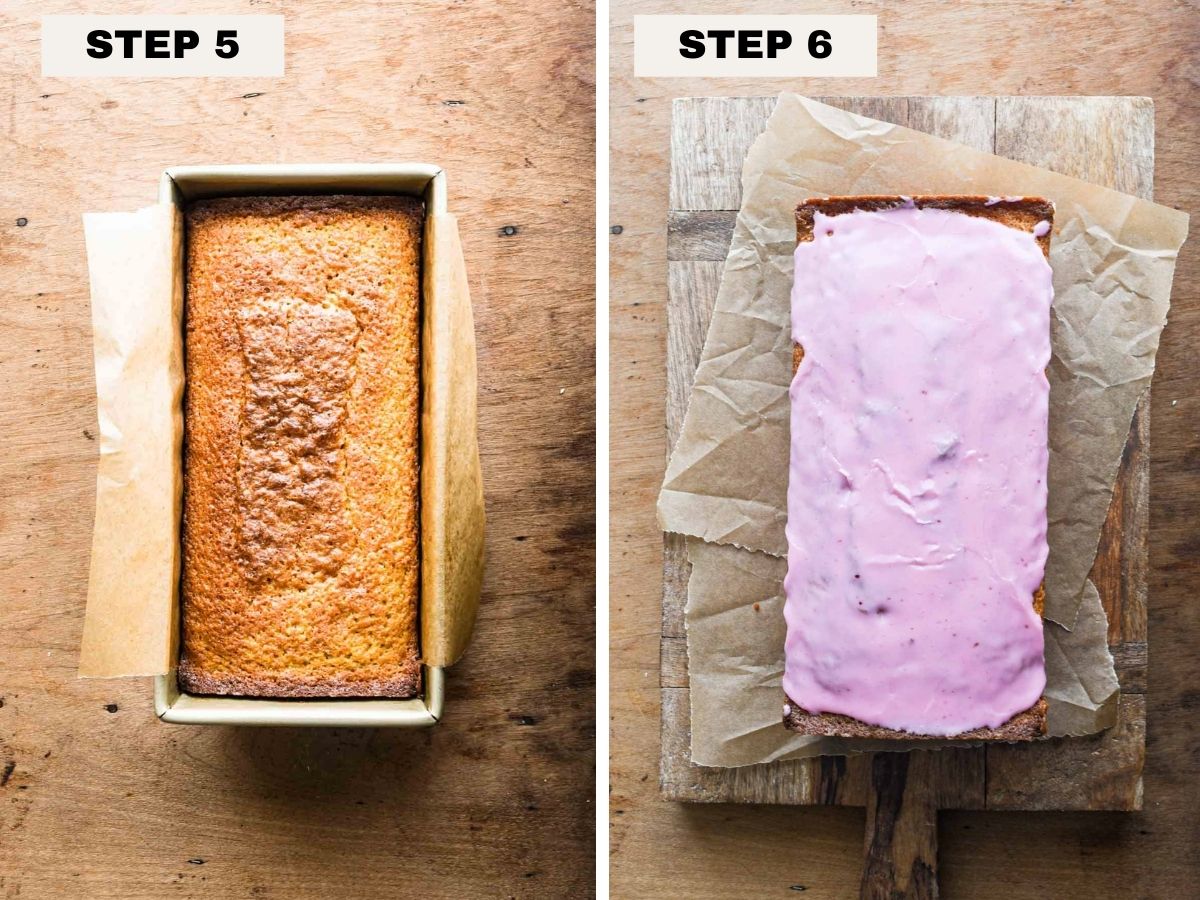
    5. Add the broth and cook. Add the broth, bring to a simmer and cook for about 20 minutes until the rice is cooked through. If the broth evaporates too quickly lower the heat a bit and add more broth (or water) ¼ cup at a time.

    6. Finish with parsley. To the finished rice, stir in the fresh chopped parsley.

    Tips and tricks

    • The best shrimp to use: wild caught, fresh never frozen, shelled and deveined shrimp are best. You can also use frozen shrimp. Obviously you aren't always going to get all of these variables, so really just get what you're used to and what is available to you.
      • How to defrost frozen shrimp: put the shrimp in a sealed bag then submerge in a bowl of cold water for about 10-20 minutes. Make sure the shrimp stay submerged so put a plate over or use a cup to weigh them down.
    • Make it less or more spicy: if you want to make it less spicy lessen the amount of red pepper flakes or omit entirely. If you want to go the other way and make it spicier, add more red pepper flakes.
    • Add meat: you can easily add some sausage to this, would be delicious. Brown it in the skillet after you cook the shrimp and before you toast the orzo.
    • Leave the tails on your shrimp: it's ideal to leave the tails on your shrimp as you cook them because it adds a ton of flavor. If your shrimp don't have the tails it's no big deal.
    • Rinse your rice! It's really important to rinse your rice before cooking it to remove the starches. This will help make sure it's nice and fluffy and doesn't stick together.
    • What to do if your broth is absorbed or evaporates before your rice is cooked: do not worry!! if you have the heat up a smidge to high it's likely for this to happen. Just add more broth about ¼ cup at a time. Water is also fine if you've run out of broth.

    What to serve with this dish

    Since this cajun shrimp is on the spicy side, you want to serve it with something to cool it off. Some dishes that would be great:

    • A nice big salad (Caesar salad is always a winner)
    • Garlic bread
    • Roasted veggies with a yogurt sauce
    • Herby potato salad

    FAQs

    What is in cajun seasoning?

    Most cajun seasonings are a mixture of paprika, cayenne powder, garlic powder, onion powder, black pepper, thyme, oregano, and salt.

    What's the origin of cajun seasoning/food?

    It originated with Acadian immigrants who had initially lived in Canada but fled to the South in the 18th century. More details here.

    Can I prep in advance?

    You can start marinating the shrimp up to 2 hours in advance. Everything else is best served fresh.

    How do I store leftovers?

    Air tight container in the fridge for up to 4 days!

    How do I reheat leftovers?

    In the microwave for a few minutes until warmed through.

    How long can frozen shrimp stay thawed in the fridge?

    Once thawed, shrimp can stay in the fridge for up to 2 days.

    How do I peel and devein shrimp?

    To peel: holding the tail of the shrimp, bend it enough to gently crack the shell then pull the shell off the shrimp. It's ok if the tail comes off but there's extra flavor in there so try to leave it on if you can.

    To devein: using a pairing knife, cut a little slit in the back (top) of the shrimp. Take your knife and run it across the top inside the slit to pull out the vein.

    Do I need to devein shrimp?

    No, it is completely fine to eat the shrimp with the vein still there. It's just personal preference.

    More shrimp recipes

    • Maple soy shrimp
    • Spicy garlic butter shrimp


    📖 Recipe

    Finished shrimp and rice dish in a bowl with a napkin.

    Spicy Cajun Shrimp and Rice Pilaf Skillet

    This One Pot Spicy Cajun Shrimp and Rice Pilaf is an incredibly flavorful dish that comes together in under 45 minutes (including marinating time!). It's an impressive dinner recipe with a kick of heat that keeps you digging in.
    5 from 5 votes
    Print Pin Rate
    Prep Time: 15 minutes minutes
    Cook Time: 30 minutes minutes
    Total Time: 40 minutes minutes
    Servings: 2 servings

    Ingredients

    Cajun shrimp:

    • 1 lb fresh shrimp
    • 1 tablespoon Cajun seasoning
    • ½ teaspoon red pepper flakes
    • 4 cloves garlic chopped
    • 2 tablespoon olive oil
    • 2 tablespoon butter

    Rice Pilaf:

    • 2 tablespoon butter
    • ½ cup orzo
    • ½ cup long grain white rice rinsed and drained
    • ½ teaspoon onion powder
    • ½ teaspoon garlic powder
    • ¼ teaspoon salt
    • ¼ teaspoon pepper
    • 2 cups chicken broth
    • 2 tablespoon fresh parsley chopped

    Instructions

    • Add the shrimp, cajun seasoning, red pepper flakes, chopped garlic, and olive oil to a bowl. Marinate in the fridge for at least 15 minutes or up to 2 hours.
    • Heat the butter over medium heat in a large skillet. When the butter is melted and starting to sizzle, add the shrimp (ideally in one layer) and cook 2-3 minutes on both sides. The shrimp is done cooking when it's no longer translucent. Using a slotted spoon remove the shrimp and set it aside. Don't wipe the skillet clean.
    • To the same skillet melt the remaining butter and toast the orzo for about 3 minutes until lightly golden.
    • To the orzo add the rice, onion powder, garlic powder, salt, pepper. Mix to combine.
    • Add the broth, bring to a simmer and cook for about 20 minutes until the rice is cooked through. If the broth evaporates too quickly lower the heat a bit and add more broth (or water) ¼ cup at a time.
    • To the finished rice, stir in the fresh chopped parsley.

    Nutrition Estimate

    Calories: 834kcal | Carbohydrates: 74g | Protein: 42g | Fat: 41g | Saturated Fat: 17g | Polyunsaturated Fat: 3g | Monounsaturated Fat: 17g | Trans Fat: 1g | Cholesterol: 351mg | Sodium: 2646mg | Potassium: 595mg | Fiber: 4g | Sugar: 3g | Vitamin A: 3324IU | Vitamin C: 7mg | Calcium: 189mg | Iron: 3mg
    Course: Dinner
    Cuisine: cajun
    Keyword: cajun, rice pilaf, Shrimp, spicy shrimp
    Author: Haley

    Skillet Chicken Parmesan Meatballs

    Chicken parmesan meatballs in a skillet freshly baked.

    These Skillet Chicken Parmesan Meatballs are an incredibly easy Italian dinner dish made in one skillet and just about 30 minutes. Cheesy, tender meatballs seared to perfection then baked with marinara sauce and mozzarella cheese.

    [feast_advanced_jump_to]

    Ingredients

    • Ground chicken: one of the main ingredients! Comes together into a meatball so well and really takes on the flavor of the added ingredients.
    • Egg: a binder for the meatballs.
    • Garlic: grated garlic in meatballs is so underrated - you'll love this!
    • Parmesan cheese: fresh grated parmesan cheese gives so much flavor to meatballs.
    • Breadcrumbs: I prefer Italian seasoned breadcrumbs as an easy way to get some more delicious flavor in there.
    • Parsley: never enough fresh herbs! Fresh chopped parsley gets added into the meatballs and sprinkled on top.
    • Marinara sauce: a jar of whatever your favorite sauce is.
    • Mozzarella cheese: shredded or sliced, either works!

    Ingredient substitutions

    One of the great things about these chicken parm meatballs is how customizable they are - below are some ingredient swaps you can make if you need to.

    • Instead of ground chicken: you can use ground turkey, pork, or beef
    • Instead of fresh grated garlic: you can use ⅛ teaspoon garlic powder per garlic clove
    • Instead of parmesan cheese: you can use pecorino romano
    • Instead of Italian seasoned breadcrumbs: you can use plain breadcrumbs, but add 1 teaspoon dried Italian seasoning. If you only have panko that works too.

    Step by step instructions

    In just a few quick and pretty easy steps you can have a delicious meal of chicken parmesan meatballs ready to serve!

    Overview:

    • Combine the chicken, egg, garlic, parmesan cheese, ¼ cup parsley, breadcrumbs, salt, and pepper to make the meatballs.
    • Form 8-10 large meatballs and sear in olive oil on medium heat.
    • Add the sauce, top with cheese, and bake for about 10 minutes until cooked through and the cheese is melted.

    Detailed steps:

    1. Make the meatballs. Mix together the chicken, egg, garlic, parmesan cheese, parsley, breadcrumbs, salt, and pepper until just combined.

    2. Form meatballs. Form about 8-10 large meatballs with the mixture (can use a large cookie scoop).

    3. Sear the meatballs. In a large skillet (preferably cast iron) heat 2 tablespoon olive oil on medium heat. Sear all sides of the meatballs for about 2-3 minutes per side.

    4. Add the sauce. To the skillet with the meatballs carefully add the marinara sauce.

    5. Add the cheese. Sprinkle the shredded mozzarella evenly over top of the sauce and meatballs.

    6. Bake. Put the skillet right into the oven and bake at 350℉ for about 10 minutes until the cheese melts and the chicken is cooked to 165℉. Top with fresh parsley.

    How to serve

    These meatballs are so delicious with a variety of dishes, but a few of my favorite ways to serve are:

    • Over creamy polenta
    • Over pasta
    • With a nice big hearty salad
    • With bread (garlic bread is even better!) to soak up the sauce
    • With roasted veggies such as broccoli or zucchini

    Tips and tricks

    • Use a large (10-12") oven-safe skillet, preferably cast iron! Cast iron will help get nice browning on the meatballs and keep everything at a good warm temperature even after you take it out of the oven.
      • If you do not have a skillet that is oven safe, sear the meatballs then transfer to a baking dish and add the marinara and mozzarella, then bake according to directions.
    • Don't put the meatballs too close together. If they are too close you risk steaming them instead of searing them and will have a harder time getting that nice browning.
    • Make smaller meatballs. If you want to make more but smaller meatballs, that's totally fine, just watch the cooking time so you don't over bake them. Sear each side for 1-2 minutes only.
    • Use a cookie scoop to shape the meatballs. I like to use one of the large cookie scoops to shape the meatballs, it's way way way easier.
    • Bake instead of pan fry - if you want to avoid the splatter that is inevitable with pan-frying, you can bake the meatballs start to finish - about ¾ of the way through add the sauce and cheese. Just note, they will not be as crispy as if you were to pan fry.
    • Air fry instead of pan fry - to avoid the extra grease, you can air fry the meatballs for their initial cook, and then finish them in the oven. I have not tried this, but something like spray them with cooking spray and air fry at 350℉ for 12-15 minutes would likely work.

    FAQs

    Can I freeze this recipe?

    Yes! you can freeze the meatballs either before or after baking and they will be good for about 2-3 months.

    If before, arrange them on a lined baking sheet and freeze until solid (so they don't stick together) then transfer to a freezer safe bag/container.

    If after baking, pan fry them then allow them to come to room temperature before freezing.

    How do I reheat frozen meatballs?

    If you have not baked them yet, let them sit out of the freezer for a few minutes to lose the chill. Then pan fry or bake according to recipe directions and add a few minutes to ensure they are cooked through.

    If you have cooked them, they can go straight in the oven with the sauce for about 10 minutes then top with cheese and bake for another 5-10.

    Can I make these dairy free?

    You can try using dairy free cheese, although I have not tried it.

    How do I store this recipe?

    To store leftovers allow the dish to come to room temperature then transfer to an air-tight container and keep in the fridge for up to 4-5 days.

    Can I keep this warm in a crockpot?

    Sure can!

    Is chicken parmesan really Italian?

    Not quite - Chicken Parmesan (also known as Chicken Parmigiana) was technically invented in the US by Italian-American immigrants. So while it wasn't necessarily invented in Italy, it was still created by Italians. More on this here.

    Similar recipes

    If you're looking for something similar to chicken parmesan meatballs but meat free, try these Spinach and Pesto Stuffed Shells or this Vegetarian Baked Ziti.

    📖 Recipe

    Chicken parmesan meatballs in a skillet freshly baked.

    Skillet Chicken Parmesan Meatballs

    These Skillet Chicken Parmesan Meatballs are an incredibly easy Italian dinner dish made in one skillet and just about 30 minutes. Cheesy, tender meatballs seared to perfection then baked with marinara sauce and mozzarella cheese.
    5 from 4 votes
    Print Pin Rate
    Prep Time: 10 minutes minutes
    Cook Time: 20 minutes minutes
    Total Time: 30 minutes minutes
    Servings: 3 servings

    Ingredients

    • 1 lb ground chicken
    • 1 large egg
    • 3 cloves garlic grated
    • ¼ cup grated parmesan cheese
    • ¼ cup fresh parsley chopped
    • ¼ cup Italian breadcrumbs
    • 1 teaspoon kosher salt
    • ½ teaspoon black pepper
    • 2 tablespoon olive oil
    • 1 jar marinara sauce
    • 1 ½ cups shredded mozzarella
    • 2 tablespoon parsley to serve

    Instructions

    • Preheat the oven to 350℉.
    • Mix together the chicken, egg, garlic, parmesan cheese, parsley, breadcrumbs, salt, and pepper until just combined.
    • Form about 8-10 large meatballs with the mixture (can use a large cookie scoop).
    • In a large oven-safe skillet (preferably cast iron) heat 2 tablespoon olive oil on medium heat. Sear all sides of the meatballs for about 2-3 minutes per side.
    • To the skillet with the meatballs carefully add the marinara sauce.
    • Sprinkle the shredded mozzarella evenly over top of the sauce and meatballs.
    • Put the skillet right into the oven and bake at 350℉ for about 10 minutes until the cheese melts and the chicken is cooked to 165℉. Top with fresh parsley.

    Video

    Nutrition Estimate

    Calories: 624kcal | Carbohydrates: 23g | Protein: 48g | Fat: 39g | Saturated Fat: 14g | Polyunsaturated Fat: 5g | Monounsaturated Fat: 17g | Trans Fat: 1g | Cholesterol: 236mg | Sodium: 2597mg | Potassium: 1623mg | Fiber: 4g | Sugar: 9g | Vitamin A: 2179IU | Vitamin C: 27mg | Calcium: 442mg | Iron: 5mg
    Course: Dinner
    Cuisine: Italian
    Keyword: Chicken meatballs, chicken parmesan, Chicken parmesan meatballs, Meatballs
    Author: Haley

    Spicy Jalapeño Corn Queso Dip

    Close up shot of queso in a bowl surrounded by chips.

    This Spicy Jalapeño Corn Queso Dip is a silky smooth cheese sauce dip loaded with spicy jalapeños, fire roasted corn, spices, and two kinds of cheeses. It is made with fresh grated sharp cheddar and monterey jack for the perfect creamy texture and bold cheesy flavor (without cream cheese!). A great appetizer to share for any kind of gathering.

    [feast_advanced_jump_to]

    Ingredients

    This spicy queso dip has some truly delicious ingredients that each bring something special. Below are the main ones:

    • Cheese: Two delicious creamy cheeses - sharp cheddar and monterey jack.
    • Jalapeño: This brings the spiciness to the dish. You can keep or remove the seeds depending on how spicy you like it (the seeds will add more spice).
    • Corn: Fire roasted frozen corn is my go-to for this because the fire roasted adds great flavor. You can use regular frozen corn or even canned corn (make sure you drain and rinse it if that's the case).
    • Onion & Garlic: Flavor!! These bring so much to the table.
    • Spices: Cumin and cayenne pepper for sooo much flavor.
    • Whole milk: This is the base of the cheese sauce. Whole milk is important because it thickens up well. I would not recommend subbing for a different kind of milk.
    • Corn starch: This helps thicken up the queso just the right amount.

    Ingredient substitutions

    • Cheese: If you don't have or don't like one of the cheeses called for in this recipe, consider regular cheddar, pepper jack, or even gruyere.
    • Jalapeño: If you want to completely omit the spice but still want the pepper flavor you can swap a poblano pepper instead of the jalapeño.
    • Onion & Garlic: You can use onion/garlic powder instead.
      • 1 clove of garlic = ¼ teaspoon garlic powder
      • 1 small onion = 1 teaspoon onion powder

    Step by step instructions

    Spicy Jalapeño Corn Queso Dip is surprisingly easy to make and will definitely impress whoever you serve it to!

    Overview

    1. Melt the butter and sauté the onion, jalapeño, and corn until softened.
    2. Add the garlic and spices.
    3. Make a corn starch slurry (equal parts corn starch + water)
    4. Add the milk and corn starch slurry. Bring to a light simmer on medium-low heat.
    5. Cook a few minutes until slightly thickened.
    6. Take off the heat and mix in the cheese in 3 parts.

    Detailed instructions

    1. Sauté the vegetables. In a heavy-bottomed pot (cast iron is great!) melt the butter over medium heat. Once it's melted, add the chopped onion, jalapeño, and frozen corn. Sauté for 5-10 minutes until it's all softened up.

    2. Add the garlic and spices. To the same pot, add the garlic, cumin, cayenne, salt, and pepper. Sauté for about 2 minutes until fragrant.

    3. Make a corn starch slurry. In a small bowl, add the corn starch and equal parts water. Mix until combined.

    4. Add the milk and slurry. Turn the pot down to medium and add the milk and corn starch slurry. Mix well to combine and bring to a very light simmer.

    5. Cook until thickened. Bring up to a very lightly simmer until the milk mixture thickens slightly - should take only a few minutes once it's at a light simmer. It's done when you can streak your finger through it on a spoon and it doesn't immediately run back together.

    6. Add the cheese. Take the mixture off the heat and stir in the cheese in 3 increments until fully combined. Serve immediately.

    What to serve with queso

    Queso is a great Mexican appetizer and is even better when paired with the below:

    • Tortilla chips
    • Raw veggies
    • Tortillas
    • Guacamole
    • Pico de gallo
    • Salsa (like this Mango Habanero Salsa)
    • Burritos
    • Tacos
    • Beer/margaritas

    Tips and tricks

    Below are some tips and tricks to help make sure your cheesy queso turns out just right.

    • Use a heavy bottomed pot: I used an enameled cast iron 2QT pot.
    • Shred your own cheese: Pre-shredded cheese has additives and often corn starch which will thicken the queso too much.
    • Make it spicier: If you want it to be spicer, you can add some dashes of your favorite hot sauce.
    • Make it less spicy: Make sure you remove the seeds from the jalapeños if you want it to be less spicy. You can even omit the cayenne pepper.
    • Add meat: If you want to add meat some ground chorizo or beef would be great. Just cook it separately and drain the fat before adding to the queso. Mix in the meat once the cheese is all mixed in and melted.
    • Once you add the milk keep the heat low: Make sure you keep the heat on low or medium/low once you add the milk otherwise your risk it scorching.
    • Make your own tortilla chips: Making your own is so easy and rewarding. Heat neutral oil over medium heat, slice tortillas, add to the oil until crisp, transfer to a paper towel lined plate, sprinkle with salt.
    • Keep it warm: the second this dip is off the heat it starts to thicken/harden, so it's best to keep it warm until right before you are about to serve. This is also why it helps to use cast iron because it retains the heat well.
    • If it's too thick: add a splash of milk.
    • If it's too thin: add some more cheese.

    FAQs

    Can I make this queso in a crock pot?

    You need to make it on the stovetop through thickening the milk, and then can transfer to a crock pot to add the cheese.

    How do I store queso?

    It's best stored in the fridge in an air tight container.

    How long does leftover queso last?

    In the fridge it will last up to 3 days.

    How do I reheat queso?

    It's easiest to reheat it in the microwave in 30-second increments, stirring between each until warmed through. Add a splash of milk if it's too thick.

    Can I prep this in advance?

    You can prep through sautéing the veggies + adding the garlic and spices. Stop before you make the slurry and add the milk.

    Can I freeze queso?

    Honestly, I wouldn't recommend it.

    What is queso?

    Queso translated means cheese. So queso dip is loosely cheese dip. More formally chile con queso and actually has Texan roots. Background on queso here.

    The difference between this and queso fundito is that queso fundito is more straightforward just melted cheese often with other ingredients such as peppers or onions.

    📖 Recipe

    Close up shot of queso in a bowl surrounded by chips.

    Spicy Jalapeño Corn Queso Dip

    This Spicy Jalapeño Corn Queso Dip is a silky smooth cheese sauce dip loaded with spicy jalapeños, fire roasted corn, spices, and two kinds of cheeses. It is made with fresh grated sharp cheddar and monterey jack for the perfect creamy texture and bold cheesy flavor (without cream cheese!). A great appetizer to share for any kind of gathering.
    5 from 3 votes
    Print Pin Rate
    Prep Time: 15 minutes minutes
    Cook Time: 15 minutes minutes
    Total Time: 30 minutes minutes
    Servings: 8 people

    Ingredients

    • 1 tablespoon unsalted butter
    • 1 small yellow onion diced
    • 2 jalapeños seeded and diced (⅓ cup)
    • 1 ½ cups frozen fire roasted corn
    • 4 cloves garlic minced
    • 1 teaspoon cumin
    • 1 teaspoon cayenne pepper
    • 1 tablespoon corn starch
    • 1 tablespoon water
    • 1 ½ cups whole milk
    • 8 oz shredded sharp cheddar cheese
    • 4 oz shredded monterey jack cheese
    • 1 teaspoon kosher salt
    • ½ teaspoon black pepper

    Instructions

    • In a heavy-bottomed pot (cast iron is great!) melt the butter over medium heat. Once it's melted, add the chopped onion, jalapeño, and frozen corn. Sauté for 5-10 minutes until it's all softened up.
    • To the same pot, add the garlic, cumin, cayenne, salt, and pepper. Sauté for about 2 minutes until fragrant.
    • In a small bowl, add the corn starch and equal parts water. Mix until combined.
    • Turn the pot down to medium and add the milk and corn starch slurry. Mix well to combine and bring to a very light simmer.
    • Bring up to a very lightly simmer until the milk mixture thickens slightly - should take only a few minutes once it's at a light simmer. It's done when you can streak your finger through it on a spoon and it doesn't immediately run back together.
    • Take the mixture off the heat and stir in the cheese in 3 increments until fully combined. Serve immediately.

    Nutrition Estimate

    Calories: 250kcal | Carbohydrates: 12g | Protein: 13g | Fat: 17g | Saturated Fat: 11g | Polyunsaturated Fat: 1g | Monounsaturated Fat: 5g | Trans Fat: 1g | Cholesterol: 51mg | Sodium: 564mg | Potassium: 209mg | Fiber: 1g | Sugar: 5g | Vitamin A: 733IU | Vitamin C: 7mg | Calcium: 373mg | Iron: 1mg
    Course: Appetizers
    Cuisine: American, Mexican
    Keyword: Cheese dip, Jalapeño queso, Queso, spicy queso
    Author: Haley

    Chocolate Chip Walnut Blondies

    Stack of chocolate chip walnut blondies.

    These Chocolate Chip Walnut Blondies are everything you'd want from a blondie. They're perfectly golden, chewy and gooey beyond belief with a slightly crisp exterior, and loaded with melty chocolate chips and crunchy walnuts.

    [feast_advanced_jump_to]

    Ingredients

    You can make these chocolate chip walnut blondies with ingredients you more than likely already have on hand.

    • Butter: These blondies use melted butter similar to brownies for that gooey texture and crackled top.
    • Dark brown sugar: Dark brown sugar has more molasses which means more chewy and fudgy blondie with rich flavor.
    • Egg: One egg and one egg white makes for the perfect texture.
    • Flour: All purpose flour.
    • Vanilla: Reminiscent of a chocolate chip cookie and key for flavor.
    • Salt: Kosher salt to balance it all out.
    • Chocolate chips: Semi-sweet chocolate chips! I always prefer to bake with semi-sweet because they're just bitter enough and just sweet enough.
    • Chopped Walnuts: Chocolate and walnuts is one of my favorite combos, and so is nuts in cookies - so this is a win win. Chopped walnuts are best so you get little pieces scattered throughout.

    Ingredient substitutions

    • Chocolate chips: You can use any of your favorite chocolate chips. If you prefer dark chocolate or milk chocolate or even white chocolate, use that! You can also substitute chocolate chunks instead of chips.
    • Walnuts: You can sub your favorite nut if you don't like walnuts. Pecans, hazelnuts, almonds, etc.
    • Dark brown sugar: Not ideal, but you can use regular brown sugar if it's what you have.

    Difference between a blondie, cookie, brownie, and brookie

    A blondie is a mix between a cookie and a brownie. The name evolved from "blonde brownie" into blondie!

    It is a brownie that doesn't have cocoa.

    It is a cookie that only uses brown sugar and is baked all together in a pan as opposed to individually. If cookies are more your thing try these oatmeal chocolate chip cookies.

    A brookie is basically a brownie and a cookie combined - two separate batters.

    More on the difference here.

    Step by step instructions

    These chocolate chip walnut bars come together in one bowl and take just a few minutes to prep, so it's very quick from start to devour.

    Overview

    1. Whisk together butter and brown sugar.
    2. Whisk in the eggs and vanilla.
    3. Switch to a spoon or spatula and mix in the flour and salt.
    4. Fold in the chocolate chips and walnuts.
    5. Add to an 8x8 baking dish and smooth out.
    6. Bake 350℉ for 20-30 minutes until very light golden.

    Detailed steps

    The detailed steps to make these blondies with chocolate chips and walnuts are truthfully not all that different from the quick overview! That's just how simple they are.

    1. Combine butter and brown sugar. In a mixing bowl whisk together the melted butter and brown sugar until well combined.

    2. Add the eggs and vanilla. To the bowl with the brown sugar butter mixture, whisk in the egg, egg yolk, and vanilla extract to complete the wet mixture.

    3. Mix in the flour and salt. Switch to a spoon or spatula and mix the flour and salt into the wet mixture. Stop mixing when there are just a few streaks of flour left (we want to be careful to not over-mix).

    4. Add the chocolate and walnuts. Fold the chocolate chips and chopped walnuts into the batter until everything is just combined.

    5. Add to 8x8 pan. Spoon the batter into a well-greased 8x8 baking pan with parchment paper hanging over the edges. Flatten it out with your spoon so it's an even layer.

    6. Bake. Bake at 350℉ for 20-30 minutes. They are done baking when the center is just set and looks light golden, and the edges are a more noticeable golden. Allow them to cool slightly in the baking pan, this will finish baking just enough.

    Tips and tricks

    While these chocolate chip walnut blondies are a breeze to make, below are some tips to help make sure they're perfect.

    • Spoon and level the flour - do not scoop! You'll get way too much flour if you scoop and the blondies will be more cookie/cake-esque and not as gooey.
    • Do not over mix the batter. You want to be sure to just mix the batter until everything is combined. If you over mix the batter it'll start working the gluten and you'll get a tougher more cake-like blondie. It's best to stop mixing the flour right before it's fully combined then add the nuts and chocolate chips to fully incorporate everything.
    • It will be a thick batter. It's somewhere between a cookie dough and a brownie batter.
    • Add more chips and nuts on top. Before you bake, if you want to really see what's inside the bars you can sprinkle additional chocolate chips and walnuts on top.
    • Careful to not over bake! You want blondies to be gooey on the inside, and to achieve that you want them to be slightly underbaked when they come out of the oven because they'll finish off while they cool slightly in the pan. If you want them a bit more well done and cakey keep them in the oven for a few more minutes but keep an eye on them, they go from gooey to cakey very quickly.
    • Serve with ice cream!! These are SO good when served right out of the oven with a big scoop of ice cream.

    FAQs

    How do I store these blondies?

    Store them in an air tight container at room temperature for up to 4 days. I like to reheat mine in the microwave for a few seconds so they're nice and warm.

    Can I freeze these?

    Yes! Bake them, allow them to cool completely, wrap in aluminum foil and store in a freezer safe bag for up to 3 months. Warm in the microwave before eating!

    How do I double the recipe?

    Double the ingredients for the batter and bake it in a 9x13 baking pan for 25-35ish minutes. Keep an eye on it starting at 25 minutes - you want it to be lightly golden.


    📖 Recipe

    Stack of chocolate chip walnut blondies.

    Chocolate Chip Walnut Blondies

    These Chocolate Chip Walnut Blondies are everything you'd want from a blondie. They're perfectly golden, chewy and gooey beyond belief with a slightly crisp exterior, and loaded with melty chocolate chips and crunchy walnuts.
    5 from 1 vote
    Print Pin Rate
    Prep Time: 10 minutes minutes
    Cook Time: 20 minutes minutes
    Total Time: 30 minutes minutes
    Servings: 9 bars

    Ingredients

    • ½ cup unsalted butter melted
    • ¾ cup dark brown sugar
    • 1 large egg
    • 1 egg yolk
    • 1 teaspoon vanilla extract
    • 1 ¼ cup all purpose flour spooned and leveled
    • ½ teaspoon kosher salt
    • ½ cup semi-sweet chocolate chips
    • ½ cup chopped walnuts

    Instructions

    • Preheat oven to 350℉.
    • In a mixing bowl whisk together the melted butter and brown sugar until well combined.
    • To the bowl with the brown sugar butter mixture, whisk in the egg, egg yolk, and vanilla extract to complete the wet mixture.
    • Switch to a spoon or spatula and mix the flour and salt into the wet mixture. Stop mixing when there are just a few streaks of flour left (we want to be careful to not over-mix).
    • Fold the chocolate chips and chopped walnuts into the batter until everything is just combined.
    • Spoon the batter into a well-greased 8x8 baking pan with parchment paper hanging over the edges. Flatten it out with your spoon so it's an even layer.
    • Bake at 350℉ for 20-30 minutes. They are done baking when the center is just set and looks light golden, and the edges are a more noticeable golden. Allow them to cool slightly in the baking pan, this will finish baking just enough.

    Video

    Nutrition Estimate

    Serving: 1bar | Calories: 338kcal | Carbohydrates: 38g | Protein: 4g | Fat: 19g | Saturated Fat: 9g | Polyunsaturated Fat: 4g | Monounsaturated Fat: 5g | Trans Fat: 1g | Cholesterol: 68mg | Sodium: 145mg | Potassium: 141mg | Fiber: 2g | Sugar: 22g | Vitamin A: 377IU | Vitamin C: 1mg | Calcium: 39mg | Iron: 2mg
    Course: Dessert
    Cuisine: American
    Keyword: Blondie, Chocolate, Chocolate Chip, Chocolate Chip Blondies, Chocolate Chip Walnut Blondies
    Author: Haley

    Potato, Egg and Bacon Breakfast Skillet

    Close up of breakfast skillet with eggs, bacon, and potatoes.

    This Potato, Egg and Bacon Breakfast Skillet is an absolutely delicious one pan breakfast recipe with all the best breakfast foods – potatoes, eggs, bacon and onions. The potatoes are cooked in the bacon fat giving them SO much flavor, and the eggs are cooked until just set. So much goodness with so few ingredients.

    [feast_advanced_jump_to]

    Ingredients

    There really are only a few key ingredients that are needed to make this potato, egg and bacon breakfast skillet - each that carries its own weight in flavor.

    • Potatoes: I love to use a mix of sweet potatoes and yukon gold potatoes.
    • Onion: Wouldn't be a breakfast hash without an onion.
    • Bacon: Cooking the bacon first and then cooking the potatoes in the bacon fat creates SO much delicious flavor and then there's also a nice texture of crispy bacon.
    • Eggs: We make a slot in the potatoes and cook the eggs in the oven - so easy and gives you the ability to cook them for as little or long as you'd like.
    • Paprika: To season the potatoes.

    Step by step instructions

    This skillet breakfast recipe is surprisingly easy for how delicious it is, so let's dive into how to make it!

    Overview

    1. Cook the bacon and leave the bacon fat in the skillet
    2. Sauté the onions in the bacon fat
    3. Season potatoes with salt, pepper, and paprika
    4. Add the potatoes and sauté until tender
    5. Create 4 wells in the potatoes and crack an egg into each
    6. Bake in the oven at 400℉ until eggs are set – about 6-10 minutes depending on how you like them

    Detailed instructions

    1. Cook the bacon. In your skillet over medium heat cook the bacon until crisp. Remove it using a slotted spoon and put on a paper towel lined plate. Leave the bacon fat behind!

    2. Cook the onions. To the bacon fat add the onions and sauté for 2 minutes.

    3. Cook the potatoes. Sprinkle the potatoes with salt, pepper, and paprika. Add them to the skillet with the onions and mix to combine. Leave them alone for 4 minutes to get a little crispy on the bottom. Add 2 tablespoon water and cover for 10 minutes. Open and stir, and cook for another 5 minutes until tender.

    4. Cook the eggs. Make 4x wells in the skillet and crack the eggs in. Put the skillet in the oven at 400℉ until the eggs are set – about 6-10 minutes depending on how cooked you like your eggs/yolk. The earlier side will produce a runnier yolk; the longer you bake it the more the yolk will be cooked.

    5. Finish the dish. When the eggs are done cooking, take the skillet out of the oven and top with bacon and sprinkle fresh chives.

    Ingredient substitutions

    • Use frozen potatoes: If you want to skip a step with cutting the potatoes, you can use frozen cubed potatoes or even frozen shredded potatoes.
    • Use all yukon gold potatoes or all sweet potatoes: this is really up to your preference - you could go all one way or do a mix like I do.
    • Make it vegetarian: you can skip the bacon and cook the onion and potatoes in a neutral oil instead.
    • Add vegetables: you can also keep the bacon and add veggies in addition - peppers, zucchini, mushrooms, etc.
    • Use a different kind of meat: instead of bacon you can use sausage, chorizo, ground beef - whatever you like!

    Tips and tricks

    • Use a large skillet. You want one that's roughly 10-12 inches - this is a big dish!
    • Make sure your skillet can go from stovetop to oven. I used cast iron because I like how it helps everything crisp up.
    • If your potatoes start to stick or if the skillet dries up, you can add some neutral oil such as vegetable or avocado oil.
    • Let your potatoes sit untouched for the first few minutes. This will give them a nice crisp!
    • Add cheese! Before you put the skillet in the oven sprinkle some cheese on top.
    • Take it camping. This would make for a great campfire breakfast.

    Topping ideas

    While this country breakfast skillet is great on its own, there are some toppings that would really take it to the next level.

    • Avocado
    • Salsa
    • Herbs
    • Cheese
    • Jalapeños
    • Hot sauce

    How to serve

    This recipe is relatively heavy on its own, but if you're looking for some additional breakfast dishes to serve with it, I'd recommend:

    • Fruit (berries, melon, etc.)
    • Yogurt (skyr in particular is delicious and full of protein)
    • Baked oatmeal such as this strawberry baked oatmeal
    • Bread/toast/biscuits
    • Juice or smoothies

    FAQs

    Can I prep this recipe in advance?

    Truthfully, this recipe does not prep in advance very well. You can cut the onion in advance, but potatoes don't store well cut and raw. If you use frozen potatoes it makes prep much easier, though.

    How do I store this recipe?

    I like to store in individual servings (easier on the fridge space) in an air-tight container for up to 3-4 days.

    Can I cook this ahead of time?

    Yes! I'd recommend cooking all the way up to right before adding the eggs. Store in the fridge until just before you want to eat, then add the eggs reheat in the oven/cook the eggs for the first time.

    More breakfast recipes

    • Vegetarian breakfast burritos
    • Mushroom zucchini frittata
    • Homemade bacon, egg and cheese McGriddles


    📖 Recipe

    Close up of breakfast skillet with eggs, bacon, and potatoes.

    Potato, Egg and Bacon Breakfast Skillet

    This Potato, Egg and Bacon Breakfast Skillet is an absolutely delicious one pan breakfast recipe with all the best breakfast foods – potatoes, eggs, bacon and onions. The potatoes are cooked in the bacon fat giving them SO much flavor, and the eggs are cooked until just set. So much goodness with so few ingredients.
    4.72 from 7 votes
    Print Pin Rate
    Prep Time: 20 minutes minutes
    Cook Time: 40 minutes minutes
    Total Time: 1 hour hour
    Servings: 4 servings

    Ingredients

    • 2-3 yukon gold potatoes ½" pieces (if they are large you'll only need 2)
    • 1 sweet potato ½" pieces
    • 1 small yellow onion diced
    • 4 strips bacon cut into 1 ½ inch pieces
    • ½ teaspoon paprika
    • 4 large eggs
    • 1 tsp kosher salt
    • ½ teaspoon pepper
    • 1 tablespoon chives

    Instructions

    • Preheat the oven to 400℉.
    • In your skillet over medium heat cook the bacon until crisp. Remove it using a slotted spoon and put on a paper towel lined plate. Leave the bacon fat behind!
    • To the bacon fat add the onions and sauté for 2 minutes.
    • Sprinkle the potatoes with salt, pepper, and paprika.
    • Add the potatoes to the skillet with the onions and mix to combine. Leave them alone for 4 minutes to get a little crispy on the bottom.
    • Add 2 tablespoon water to the skillet and cover for 10 minutes. Open and stir, and cook for another 5 minutes until tender.
    • Make 4x wells in the skillet and crack the eggs in.
    • Put the skillet in the oven at 400℉ until the eggs are set – about 6-10 minutes depending on how cooked you like your eggs/yolk. The earlier side will produce a runnier yolk; the longer you bake it the more the yolk will be cooked.
    • When the eggs are done cooking, take the skillet out of the oven and top with bacon and sprinkle fresh chives.

    Nutrition Estimate

    Calories: 281kcal | Carbohydrates: 30g | Protein: 11g | Fat: 13g | Saturated Fat: 4g | Polyunsaturated Fat: 2g | Monounsaturated Fat: 5g | Trans Fat: 1g | Cholesterol: 178mg | Sodium: 245mg | Potassium: 700mg | Fiber: 4g | Sugar: 4g | Vitamin A: 8317IU | Vitamin C: 21mg | Calcium: 61mg | Iron: 2mg
    Course: Breakfast, Brunch
    Cuisine: American
    Keyword: Country breakfast skillet, Hashbrowns, Skillet breakfast
    Author: Haley

    Stuffed Shells with Spinach and Pesto

    Close up shot of stuffed shells being served.

    These Stuffed Shells with Spinach and Pesto are a delicious vegetarian meal with three cheeses, pesto, and frozen spinach stuffed into large shells and topped with sauce and more cheese. A hearty and cheesy meal the whole fam will love. 

    [feast_advanced_jump_to]

    What are stuffed shells?

    Stuffed shells is a dish that combines lasagna and ravioli, in a sense. It’s basically large shell pasta stuffed with a cheese mixture that sometimes contains some kind of vegetable or meat.

    The difference between stuffed shells and other stuffed pasta such as manicotti is simply the type of pasta. In this instance, it's large shells vs. manicotti (which is similar to a rigatoni but longer and with a larger hole).

    Ingredients 

    These vegetarian spinach and ricotta stuffed shells are taken up a notch with pesto!

    • Pasta: We are using the large stuffed shells for this recipe. Cook them one or two minutes short of the box instructions so they are al-dente. They’ll finish cooking in the oven.
    • Cheese: This recipe uses a combination of three cheeses: mozzarella, ricotta, and parmesan. Each one serves a different purpose, so I would not recommend skipping any.
    • Spinach: To keep things simple I use frozen spinach thawed and squeezed to get as much liquid out as possible.
    • Pesto: A bit of pesto gets added to the cheese mixture and dolloped on top prior to baking - it brings a herby and major flavor kick that is so good. Either store-bought or homemade.
    • Egg: One egg helps bind the cheese mixture together so that it doesn’t ooze out of the pasta too much. 
    • Sauce: Your favorite jarred marinara or homemade sauce will be great here. 

    Step by step instructions

    Cheesy stuffed shells really are quite simple to make, they just take a little bit of patience to actually stuff.

    Prep: defrost the frozen spinach and squeeze out as much water as you can. 

    1. Cook the pasta. In a large pot of salted water cook the pasta until al dente. Drain and set aside. 

    2. Make the cheese mixture. In a mixing bowl, combine the ricotta, shredded mozzarella, parmesan, spinach, pesto, egg, salt, and pepper. Once mixed together, transfer to a plastic bag and snip the bottom. 

    3. Stuff the shells. To a baking dish, put about ½ cup of sauce on the bottom. To each shell, squeeze in a few tablespoons of the cheese mixture and place open-side up in the baking dish. Repeat until the dish is full. 

    4. Finish assembly. Pour the remaining sauce over the shells and top with a few dollops of pesto and a sprinkle of mozzarella cheese (if you hae fresh mozzarella you can tear that on top instead).

    5. Bake. Bake for 30-40 minutes at 350℉ until the cheese is bubbly.

    Tips and tricks

    • Make sure you boil the shells to al-dente. This is usually a minute or two before the package indicates. They will finish cooking as they bake in the oven.
    • Boil a few extra shells, some may break so it’s good to have backups. 
    • Swap fresh spinach if you’d like - sauté it and squeeze out any excess moisture before adding to the cheese mixture. 
    • Add veggies or meat to the sauce - if you’re using jarred sauce you can cook the meat separately and combine it with the sauce before you assemble the dish. 
    • Instead of torn mozzarella on the top you could just add more shredded mozzarella.
    • You can use a spoon to get the filling into the shells but I find it's easier to use the bag - it gets a little messy otherwise.

    How to serve

    This dish is really hearty and filling, so I’d recommend serving with sides on the lighter side (such as salad or veggies)! This salad would be delicious, or these honey sriracha brussels sprouts. 

    FAQs

    Can I prep this ahead of time?

    Yes! You can prep the dish up to 2 days in advance. Cover and keep in the fridge until you're ready to bake. I'd recommend taking it out of the fridge about 15 minutes before you want to bake it to get the chill off.

    Can I freeze this dish?

    Yes! Prep the stuffed shells and freeze it before baking. It can stay in the freezer for up to 3 months. Reheat it in the oven at 350 for 40-45 minutes covered and 10-15 minutes uncovered.

    How do I store it?

    After baked, it can be stored in an air-tight container in the fridge for up to 5 days.

    How do I reheat it?

    If you want to reheat in the oven bake at 350 for 20-25 minutes covered.
    If you want to reheat in the microwave do so in single servings for a few minutes until heated through.

    Can I leave the egg out?

    You can but I don't recommend it. The egg is the binder of the cheese mixture, so it just might be more runny/liquidy without it.

    📖 Recipe

    Close up shot of stuffed shells being served.

    Stuffed Shells with Spinach and Pesto

    These Stuffed Shells with Pesto and Spinach is a delicious vegetarian meal with three cheeses, pesto, and frozen spinach stuffed into large shells and topped with sauce and more cheese. A hearty and cheesy meal the whole fam will love. 
    5 from 1 vote
    Print Pin Rate
    Prep Time: 20 minutes minutes
    Cook Time: 30 minutes minutes
    Total Time: 50 minutes minutes
    Servings: 4

    Ingredients

    • 10 oz frozen chopped spinach
    • 15 oz whole milk ricotta cheese (1 ¾ cups)
    • ½ cup grated parmesan
    • ½ cup shredded mozzarella cheese
    • 2 tablespoon pesto homemade or store-bought, separated
    • 1 large egg
    • 1 teaspoon kosher salt
    • ½ teaspoon pepper
    • 7 oz jumbo shell pasta (half a box)
    • 1 jar marinara sauce
    • 4 oz fresh mozzarella cheese torn
    • 1 tablespoon fresh basil chopped

    Instructions

    • Preheat your oven to 350℉.
    • In a large pot of salted water cook the pasta until al dente. Drain and set aside. 
    • In a mixing bowl, combine the ricotta, shredded mozzarella, parmesan, spinach, pesto, egg, salt, and pepper. Once mixed together, transfer to a plastic bag and snip the bottom about 1 inch deep. 
    • To a baking dish, pour ½ cup of sauce on the bottom.
    • To each cooked shell, squeeze in a few tablespoons of the cheese mixture and place it open-side up in the baking dish. Repeat until the dish is full/you are out of pasta.
    • Pour the remaining sauce over the shells and top with a few dollops of pesto and a torn mozzarella cheese.
    • Bake for 30-40 minutes at 350℉ until the cheese is bubbly. Option to broil for a few minutes to get brown on the top.

    Notes

    • Make sure you boil the shells to al-dente. This is usually a minute or two before the package indicates. They will finish cooking as they bake in the oven.
    • Boil a few extra shells, some may break so it’s good to have backups. 
    • Swap fresh spinach if you’d like - sauté it and squeeze out any excess moisture before adding to the cheese mixture. 
    • Add veggies or meat to the sauce - if you’re using jarred sauce you can cook the meat separately and combine it with the sauce before you assemble the dish. 
    • Instead of torn mozzarella on the top you could just add more shredded mozzarella.
    • You can use a spoon to get the filling into the shells but I find it's easier to use the bag - it gets a little messy otherwise.

    Nutrition Estimate

    Calories: 616kcal | Carbohydrates: 46g | Protein: 37g | Fat: 32g | Saturated Fat: 18g | Polyunsaturated Fat: 1g | Monounsaturated Fat: 8g | Trans Fat: 1g | Cholesterol: 140mg | Sodium: 1270mg | Potassium: 536mg | Fiber: 4g | Sugar: 3g | Vitamin A: 9418IU | Vitamin C: 4mg | Calcium: 695mg | Iron: 3mg
    Course: Dinner
    Cuisine: Italian
    Keyword: Pasta, Stuffed Shells
    Author: Haley

    Blood Orange Olive Oil Cake

    Slices of blood orange cake on a cutting board.

    This deliciously moist and tangy Blood Orange Olive Oil Cake is full of flavor with fresh blood orange zest and juice, with a smooth extra virgin olive oil finish. It's refreshing yet comforting finished with a tart homemade blood orange glaze on top.

    [feast_advanced_jump_to]

    Ingredients

    You really only need a few things to make this orange olive oil cake – and blood oranges are the star of the show.

    • All purpose flour: the standard flour I use when baking
    • Baking powder: reacts with the acid from the orange juice and helps make the cake rise
    • Cardamom: this gives the cake a nice warm spice flavor but it has a hint of citrus that pairs really well with the blood orange
    • Granulated sugar: a standard sugar when baking
    • Eggs: large eggs always!
    • Blood orange zest and juice: this recipe uses both the zest and the juice of the blood oranges to really get that flavor in there
    • Extra virgin olive oil: make sure it's extra virgin olive oil! It has a bolder flavor without being overwhelming, and because the cake is baked at a low temperature it doesn't burn.
    • Whole milk: definitely use whole milk! It needs the fat content with not using butter.

    Blood oranges vs. oranges

    So what's the difference between blood oranges and regular oranges?

    From the outside blood oranges look more or less like regular oranges, although sometimes they have some darker splotches. BUT on the inside, blood oranges are this really beautiful deep red color. Flavor wise, they are a bit sweeter (less tart) and have a more "berry" like flavor. 

    Step by step instructions

    To add on to all the great things this blood orange olive oil cake is, it can also be made in one bowl! Yay, we love that.

    1. Mix together zest and sugar. In a mixing bowl mix together the orange zest with the granulated sugar with your hands until very fragrant.

    2. Add the eggs. Whisk the eggs into the orange sugar until fully combined.

    3. Add the rest of the wet ingredients. To the same bowl whisk in the blood orange juice, milk, and extra virgin olive oil until well combined.

    4. Add the dry ingredients. Whisk the dry ingredients into the wet - the flour, cardamom, baking powder, and salt, until just combined.

    5. Bake. Pour the batter into a lined and greased loaf pan and bake at 325℉ for 60-70 minutes, until a cake tester comes out clean or with a few crumbs. Cool the cake in the pan for 10 minutes then transfer to a cooling rack.

    6. Make the glaze. Mix together the powdered sugar and blood orange juice to make a smooth glaze. When the cake is cooled to room temperature, pour the glaze evenly over the top.

    Tips and tricks

    Making this blood orange olive oil cake is pretty straight forward but below are some tips and tricks to help make sure you nail it.

    • Use room temperature ingredients: I know this is pretty annoying but it really makes a difference! Using room temperature ingredients when baking helps make sure they combine seamlessly which is key for a consistent and well-baked cake.
    • Extra virgin olive oil is a must!! It has a much more robust flavor but still is not overwhelming. It has just enough flavor to come through which is perfect for a citrus olive oil cake.
    • Use your fingers to mix the sugar and zest: it seems kind of strange but using your hands (make sure you wash them first!) to mix together the zest and granulated sugar really infuses the sugar with the orange flavor and therefore it gets more evenly infused throughout the cake.
    • Don't over mix the batter: you really just want to mix in the dry ingredients until they're just combined. Over mixing can cause the cake to be more dense which is not what we want - especially because olive oil cakes are a bit on the denser side by nature.
    • Bang the pan to get air bubbles out: after you pour the batter into the loaf pan (and before baking) carefully bang the the pan on the table and it'll help release some air bubbles.
    • Skip the glaze if you want: you can totally skip the glaze if that's not your style. This blood orange cake would be GREAT with just a dusting of powdered sugar or even homemade whipped cream dolloped on top.
    • Use a different cake pan: you can make this olive oil loaf cake in a different shape pan if you want - an 8-inch square or round pan would be great.

    FAQs

    How do I store this cake?

    Store it in an air-tight container either at room temperature for up to 3 days or in the fridge for up to 1 week.

    Can you freeze olive oil cake?

    You can! Wrap each individual piece in cling wrap then put in a freezer-safe bag. Can freeze for up to 3 months. Reheating is easiest in the microwave for a minute or two depending on the strength of your microwave. 

    Is olive oil cake healthier than regular cake?

    I wouldn't go as far as to say that, because it is still cake. However, butter is much higher in saturated fats than olive oil, so it is a good swap. More details on butter vs. olive oil here.

    Is the olive oil flavor too much?

    No! It's actually nice and mild but provides such a nice earthy-ness and moist texture.

    More citrus baking recipes

    • Lemon pistachio loaf cake
    • Lemon blueberry loaf cake
    • Key lime donuts


    📖 Recipe

    Slices of blood orange cake on a cutting board.

    Blood Orange Olive Oil Cake

    This deliciously moist and tangy Blood Orange Olive Oil Cake is full of flavor with fresh blood orange zest and juice, with a smooth extra virgin olive oil finish. It's refreshing yet comforting finished with a tart homemade blood orange glaze on top.
    5 from 4 votes
    Print Pin Rate
    Prep Time: 20 minutes minutes
    Cook Time: 1 hour hour 10 minutes minutes
    Total Time: 1 hour hour 30 minutes minutes
    Servings: 9 slices

    Ingredients

    • 2 cups all purpose flour
    • 2 teaspoon baking powder
    • ½ teaspoon salt
    • 1 teaspoon cardamom
    • 1 ½ cups granulated sugar
    • 3 large eggs room temp
    • 1 tablespoon blood orange zest about 1 orange worth
    • 1 cup extra virgin olive oil
    • ½ cup blood orange juice about 4 oranges
    • ½ cup whole milk room temp

    Glaze:

    • 1 tablespoon blood orange juice about ½ an orange - 1 orange
    • 1 cup powdered sugar

    Instructions

    • Preheat your oven to 325℉ and line and grease a loaf pan.
    • In a mixing bowl mix together the orange zest with the granulated sugar with your hands until very fragrant.
    • Whisk the eggs into the orange sugar until fully combined.
    • To the same bowl whisk in the blood orange juice, milk, and extra virgin olive oil until well combined.
    • Whisk the dry ingredients into the wet - the flour, cardamom, baking powder, and salt until just combined.
    • Pour the batter into a lined and greased loaf pan and bake at 325℉ for 60-70 minutes, until a cake tester comes out clean or with a few crumbs. Cool the cake in the pan for 10 minutes then transfer to a cooling rack.
    • Mix together the powdered sugar and blood orange juice to make a smooth glaze. When the cake is cooled to room temperature, pour the glaze evenly over the top.

    Nutrition Estimate

    Calories: 533kcal | Carbohydrates: 71g | Protein: 5g | Fat: 26g | Saturated Fat: 4g | Polyunsaturated Fat: 3g | Monounsaturated Fat: 18g | Trans Fat: 1g | Cholesterol: 56mg | Sodium: 252mg | Potassium: 107mg | Fiber: 1g | Sugar: 48g | Vitamin A: 139IU | Vitamin C: 10mg | Calcium: 86mg | Iron: 2mg
    Course: Brunch, Dessert
    Cuisine: American, Italian
    Keyword: Blood orange, Loaf Cake, Olive oil cake
    Author: Haley
    • « Previous Page
    • 1
    • …
    • 18
    • 19
    • 20
    • 21
    • 22
    • …
    • 32
    • Next Page »

    HEY THERE!

    Welcome to Cozy Cravings! Happy to have you. Here, you’ll find comfort food recipes & other delicious things to enjoy and devour.

    POPULAR POSTS

    • Close up of broccoli au gratin.
      Broccoli Au Gratin (Broccoli Casserole)
    • Finished french onion pasta in a bowl.
      One Pot French Onion Pasta
    • close up image of maple candied bacon on a plate.
      Maple Candied Bacon
    • Overhead image of lasagna fresh out of the oven with sage on top.
      Butternut Squash and Spinach Lasagna

    Footer

    ↑ back to top

    about

    • ABOUT
    • CONTACT
    • PRIVACY POLICY

    Let's Keep In Touch!

    Subscribe here for delicious recipes, updates & more!

    Thank you!

    You have successfully joined our subscriber list.

    .

    recipe index

    • APPETIZERS
    • BREAKFAST & BRUNCH
    • LUNCH & DINNER
    • SNACKS & SIDES
    • DESSERTS

    Copyright © 2026 · CozyCravings.com

    Rate This Recipe

    Your vote:


    A rating is required
    A name is required
    An email is required