• Recipes
  • Contact
  • About
  • Shop

Cozy Cravings

menu icon
go to homepage
  • RECIPES
  • ABOUT
  • CONTACT
  • SUBSCRIBE
    • Facebook
    • Instagram
    • Pinterest
  • subscribe
    search icon
    Homepage link
    • RECIPES
    • ABOUT
    • CONTACT
    • SUBSCRIBE
    • Facebook
    • Instagram
    • Pinterest
  • ×
    Home

    Spinach and Ricotta Puff Pastry Pinwheels

    Pile of puff pastry pinwheels on a baking sheet.

    These Spinach and Ricotta Puff Pastry Pinwheels are an easy vegetarian savory appetizer recipe. Creamy spinach, melty ricotta, salty parmesan, and earthy spinach wrapped up in flaky, buttery puff pastry. Perfect for a party or just an easy snack, it's just such a delicious recipe and kids will love it too! 

    [feast_advanced_jump_to]

    Ingredients

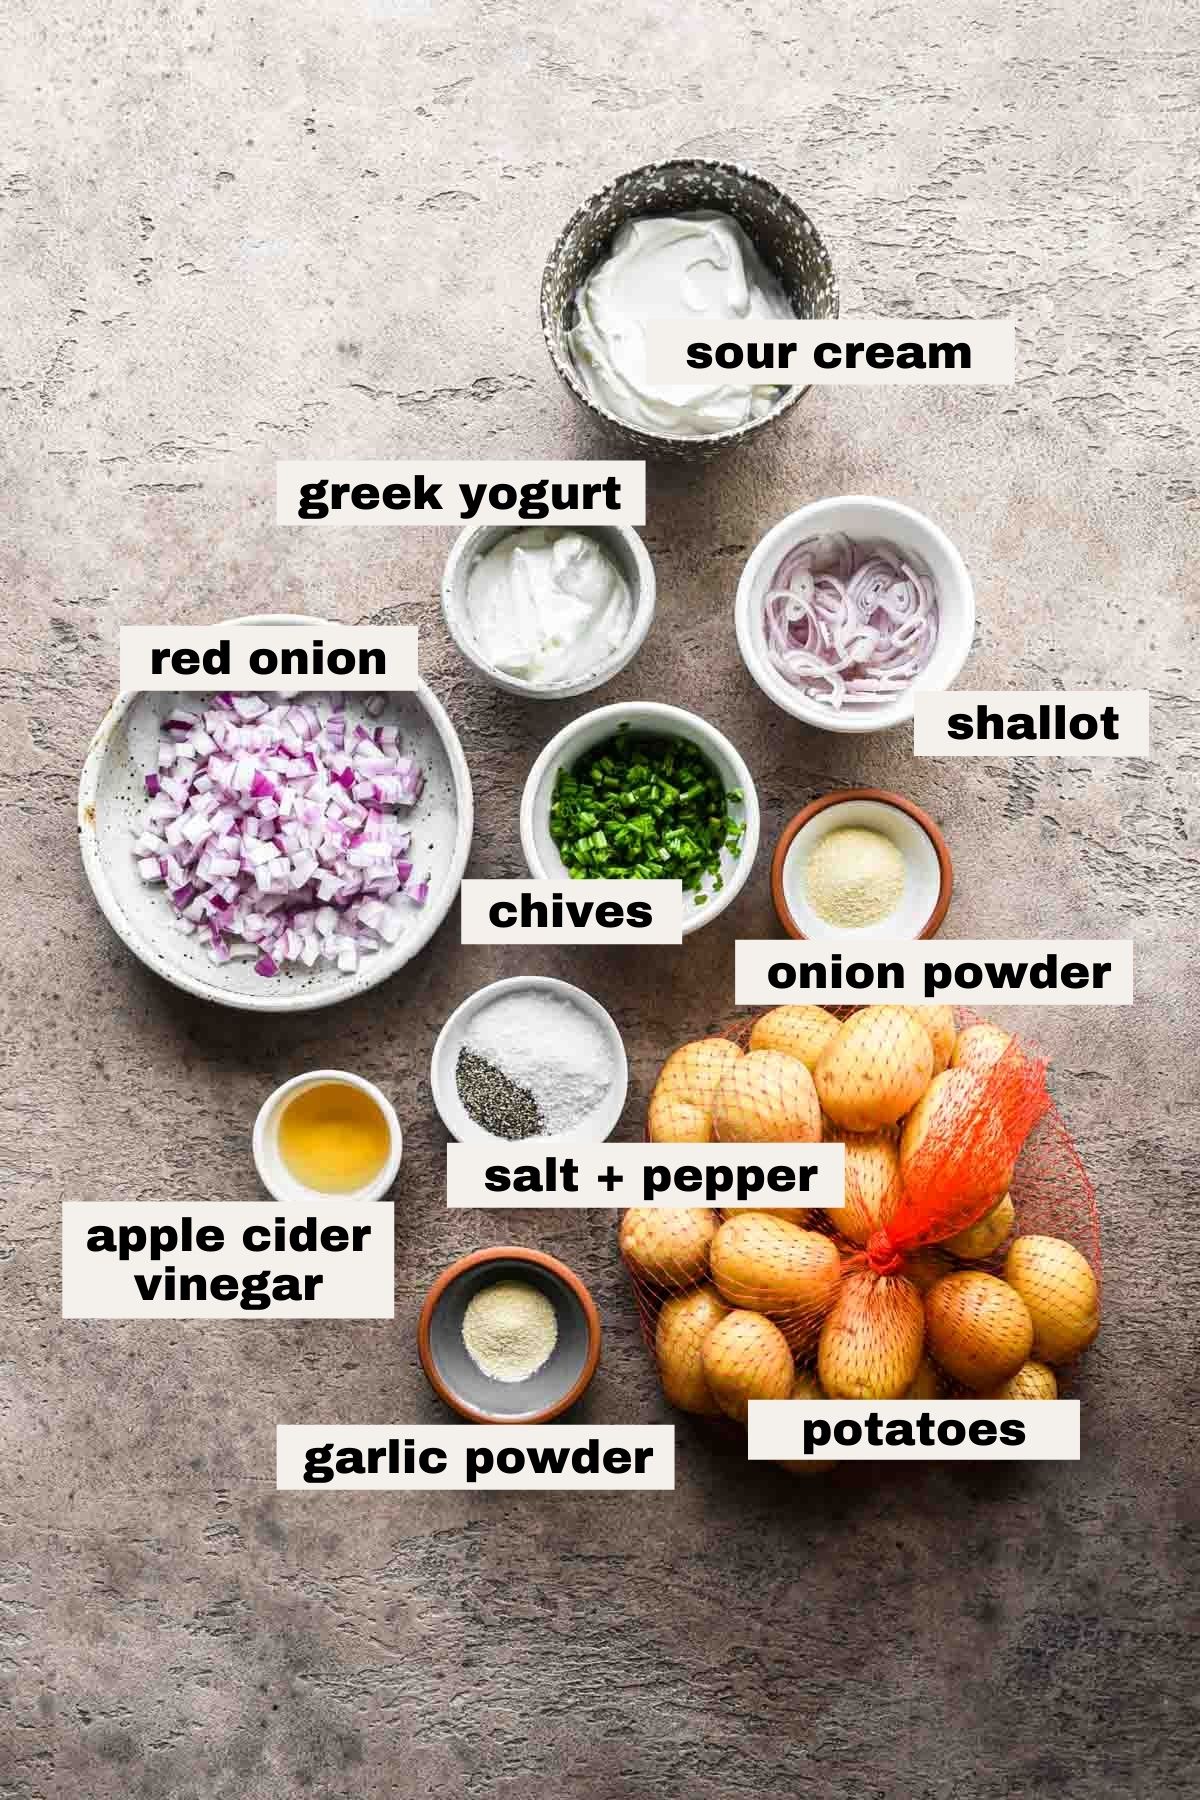
    Just a handful of ingredients to make these spinach and cheese rolls: 

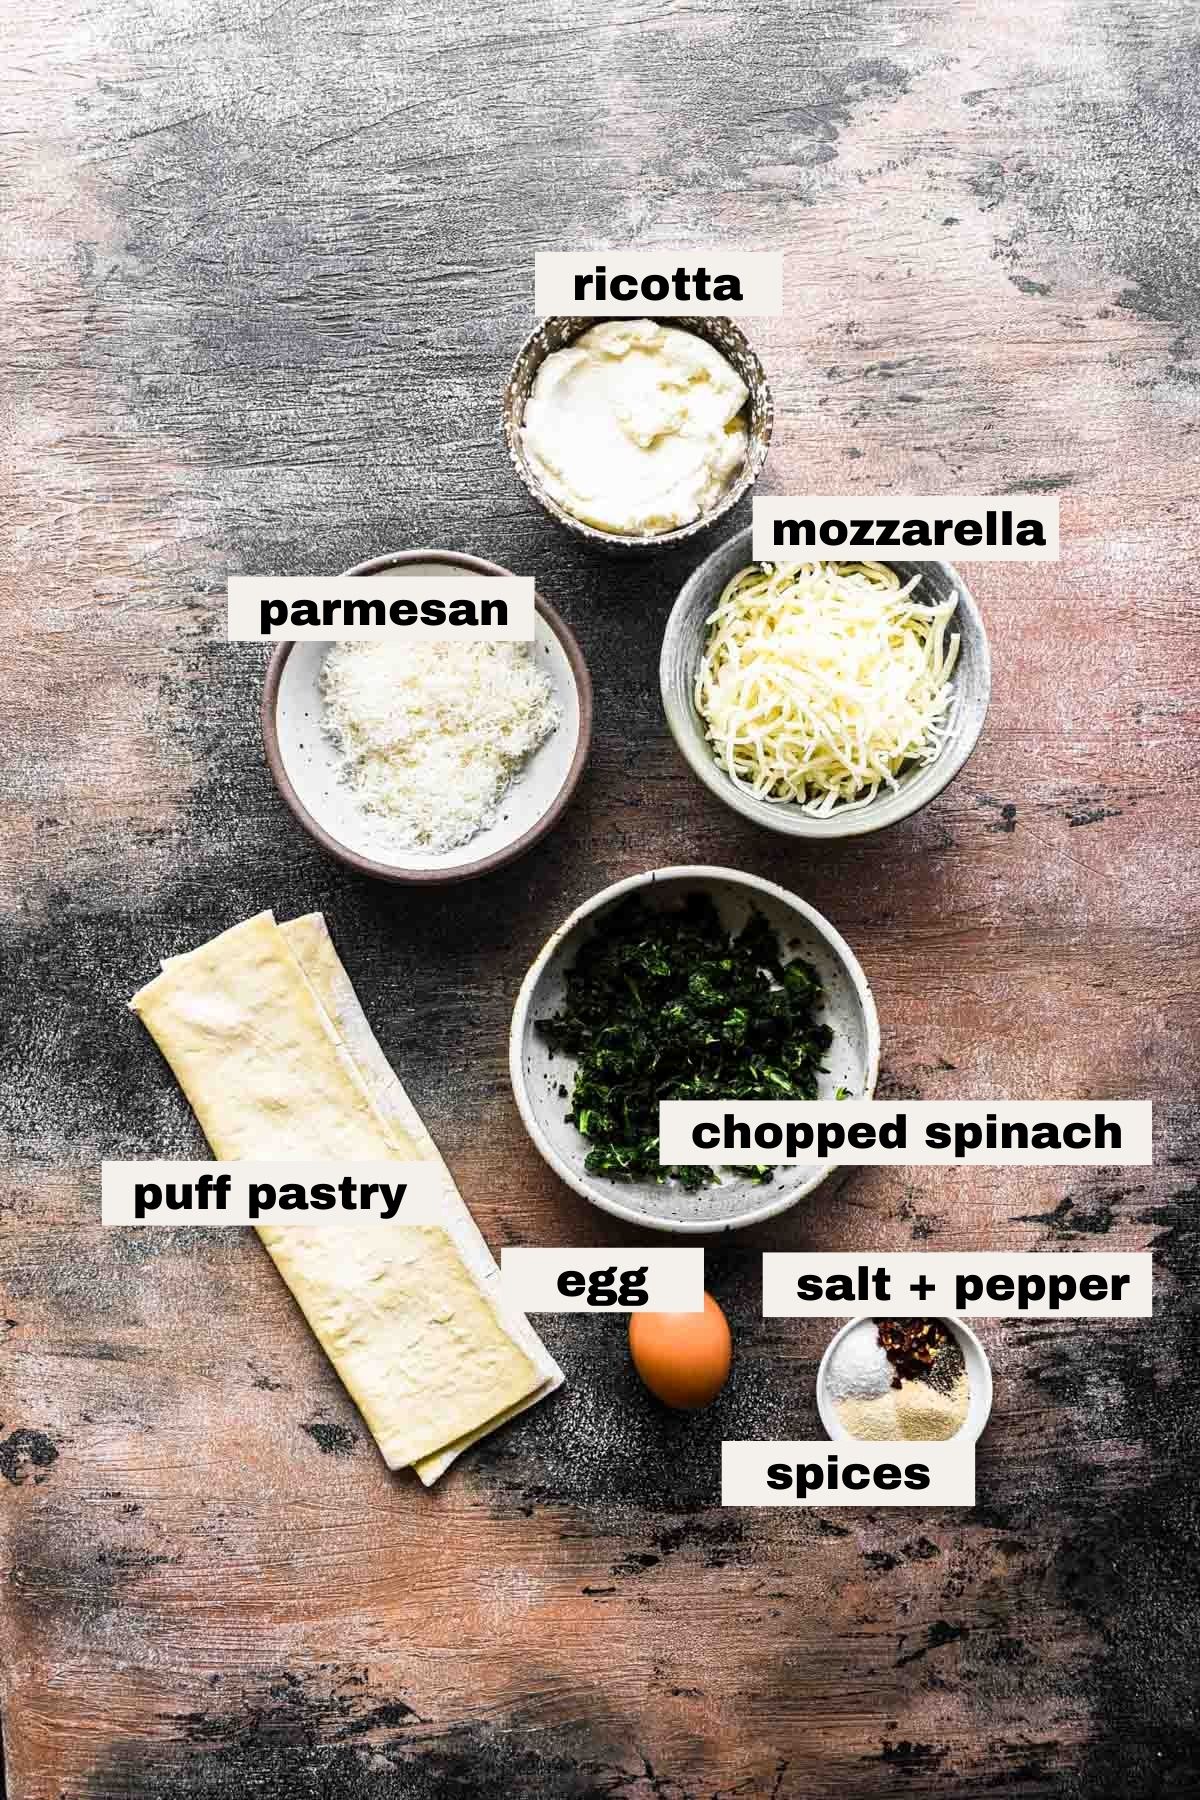
    • Puff pastry: store-bought frozen puff pastry is a perfect shortcut that still tastes absolutely delicious. For the best results I use Dufour or Pepperidge Farm – I've used them many times and they're reliable puff pastry brands.
    • Chopped spinach: I use frozen because it’s easier. Let it defrost and squeeze out the extra moisture. 
    • Ricotta cheese: Whole milk ricotta for that nice creaminess. This is one where you want regular store-bought ricotta as opposed to fresh ricotta because fresh is a bit runnier and you don’t want the cheese to run out of the pastry. 
    • Mozzarella cheese: Pre-shredded is fine!
    • Parmesan cheese: I usually always say grate it yourself but in this instance pre-grated is perfectly fine. 
    • Spices (garlic powder, onion powder, red pepper flakes): Add a bit more flavor and a little kick! If you are completely spice adverse or are feeding this to kids who may be, then just omit the red pepper flakes. 
      • If you want to use fresh garlic you can - grate a garlic clove or two into the mixture instead of the garlic powder
      • Instead of red pepper flakes you can add a few dashes of your favorite hot sauce

    Step by step instructions

    Spinach ricotta puff pastry rolls are just as they sound, spinach and cheese rolled with puff pastry to make these adorable little vegetarian pinwheels. See how to make them below:

    Prep: thaw the spinach and squeeze out the excess moisture / liquid.

    Overview

    Combine the spinach, ricotta, mozzarella, parmesan, and spices in a bowl. Spread the mixture onto rolled out puff pastry, then roll it up, slice, brush with egg wash, and bake until golden.

    Step by step

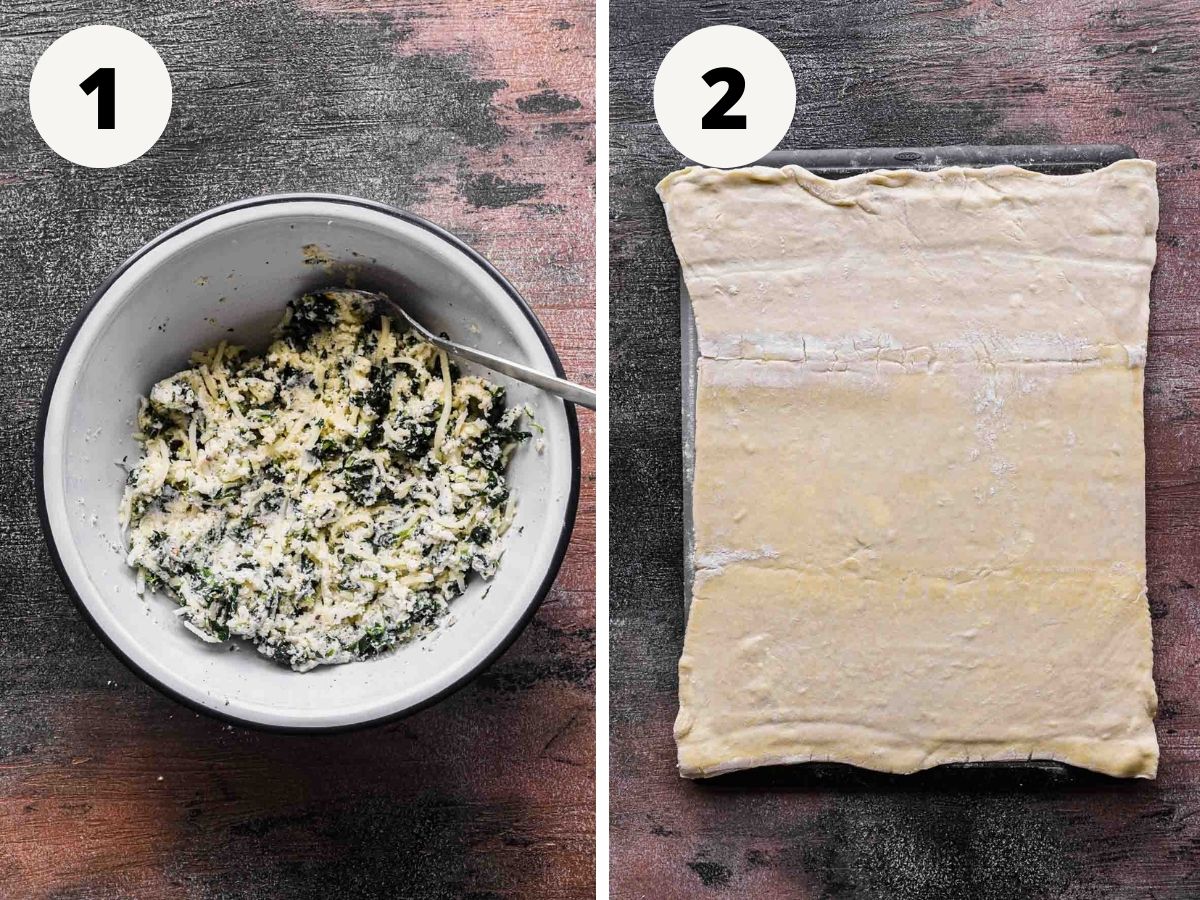
    1. Make the spinach cheese mixture. In a large bowl, combine the thawed and drained spinach with the mozzarella, ricotta, parmesan, garlic powder, onion powder, red pepper flakes, salt, and black pepper. Mix to combine. 

    2. Roll out the puff pastry. Grab your thawed puff pastry sheet and lightly flour a working surface – roll out the pastry until it’s roughly ¼” thin.

    3. Add the spinach and cheese mixture. Spread the spinach and cheese mixture on the rolled out puff pastry leaving an empty inch of pastry on top and bottom.

    4. Roll and cut. Roll the filled puff pastry as tightly as you can into a large log, gently pinching the edge together. Using a very sharp knife carefully cut the into 16-18 pieces to reveal the pinwheel shape.

    5. Place on a baking sheet and brush with egg wash. Grab a large baking tray lined with parchment paper and place the rolls on it with an inch or two of empty space between each. Make an egg wash by combining 1 egg with 1 tablespoon water and whisking with a fork. Brush the tops and sides of the rolls with the egg wash. 

    6. Bake. Bake the rolls at 400F for 20 minutes until deeply golden brown and flaky. 

    Tips and tricks

    • Don’t skip getting the excess water out of the thawed spinach - really squeeze it as much as you can. If you skip this step the spinach and cheese mixture will be too liquidy and will likely run out of your pinwheels. It'll also prevent you from getting crisp flaky pastry.
    • If you want to be extra sure the puff pastry won’t spread too much, put the slices back in the fridge for 30 minutes - 1 hour before you bake them. 
    • To most easily thaw puff pastry, put it in the fridge the day before you want to use it. To thaw it more quickly if you’re in a pinch, leave it at room temperature and keep an eye on it, try to open up the folds as they become pliable to help it thaw more evenly. 
    • If you have homemade puff pastry, definitely use that! 
    • If you want to take this more of a Greek route than an Italian route, swap in feta cheese instead of the parmesan cheese

    FAQs

    Can I make these in advance? 

    Yes! There are a few options:

    Before baking – Prep the pinwheels as far as rolling it into a log. Wrap the log in plastic wrap and store in the fridge for up to 24 hours. To bake, brush with egg wash and cook per original directions. 

    After baking – Store in an airtight container in the fridge. Warm in the oven before serving at 350F for 10 minutes.

    Can I freeze these pinwheels?

    Yes! Prep the pinwheels as far as cutting them into slices (do not brush with the egg wash). Freeze them on a baking sheet then transfer them to a freezer-safe bag for up to 3 months. To bake, brush with egg wash and bake at 400F for about 25-30 minutes until golden.

    How do I store the baked pinwheels? 

    Store in an airtight container in the fridge. 

    How do I reheat the pinwheels? 

    Warm in the oven before serving at 350F for 10 minutes. 

    Can I use fresh spinach?

    Yes - blanch about 8oz of fresh spinach, drain, squeeze out the moisture, and give it a rough chop. Or you can sauté the spinach over medium heat with a little bit of olive oil.

    Can I make these in the air fryer?

    fryer model.

    What are the nutrition benefits of spinach?

    Spinach is rich in Vitamin A, Vitamin C, Vitamin K, iron, folate, potassium, and fiber. More on this here. 

    Can I make these vegan?

    You can try! To get vegan spinach pinwheels simply use vegan ricotta, mozzarella and parmesan cheeses (or cheeses similar - such as cheddar in place of mozzarella). I haven't tried this, but worth a go!

    More vegetarian appetizer recipes

    • Tomato confit whipped ricotta toasts
    • Spicy roasted garlic white bean dip
    • Strawberry balsamic crostini
    • Zucchini corn fritters with chipotle mayo

    📖 Recipe

    Pile of puff pastry pinwheels on a baking sheet.

    Spinach and Ricotta Puff Pastry Pinwheels

    These Spinach and Ricotta Puff Pastry Pinwheels are an easy vegetarian savory appetizer recipe. Creamy spinach, melty ricotta, salty parmesan, and earthy spinach wrapped up in flaky, buttery puff pastry. Perfect for a party or just an easy snack, it's just such a delicious recipe and kids will love it too! 
    5 from 15 votes
    Print Pin Rate
    Prep Time: 15 minutes minutes
    Cook Time: 20 minutes minutes
    Total Time: 35 minutes minutes
    Servings: 16

    Ingredients

    • 1 sheet puff pastry
    • 1 cup frozen chopped spinach
    • 1 cup whole milk ricotta cheese
    • 1 cup shredded mozzarella cheese
    • ¼ cup grated parmesan cheese
    • 1 teaspoon garlic powder
    • 1 teaspoon onion powder
    • ½ teaspoon red pepper flakes
    • 1 teaspoon kosher salt
    • ½ teaspoon black pepper

    Instructions

    • Preheat your oven to 400F.
    • In a large bowl, combine the thawed and drained spinach with the mozzarella, ricotta, parmesan, garlic powder, onion powder, red pepper flakes, salt, and black pepper. Mix to combine. 
    • Grab your thawed puff pastry sheet and lightly flour a working surface – roll out the pastry until it’s roughly ¼” thin.
    • Spread the spinach and cheese mixture on the rolled out puff pastry leaving an empty inch of pastry on top and bottom.
    • Roll the filled puff pastry as tightly as you can into a large log, gently pinching the edge together. Using a very sharp knife carefully cut the into 16-18 pieces to reveal the pinwheel shape.
    • Grab a large baking tray lined with parchment paper and place the rolls on it with an inch or two of empty space between each. Make an egg wash by combining 1 egg with 1 tablespoon water and whisking with a fork. Brush the tops and sides of the rolls with the egg wash. 
    • Bake the rolls at 400F for 20 minutes until deeply golden brown and flaky. 

    Video

    Notes

    Nutrition information calculated based on 1x pinwheel.

    Nutrition Estimate

    Calories: 143kcal | Carbohydrates: 8g | Protein: 5g | Fat: 10g | Saturated Fat: 4g | Polyunsaturated Fat: 1g | Monounsaturated Fat: 4g | Cholesterol: 15mg | Sodium: 276mg | Potassium: 73mg | Fiber: 1g | Sugar: 1g | Vitamin A: 1292IU | Vitamin C: 1mg | Calcium: 96mg | Iron: 1mg
    Course: Appetizer
    Cuisine: American, Italian/American
    Keyword: Pinwheels, Puff pastry, Vegetarian
    Author: Haley

    Watermelon Salsa with Avocado

    Zoomed in image of watermelon salsa.

    This fresh Watermelon Salsa with Avocado is a perfect summer fruit salsa recipe. Loaded with juicy watermelon, creamy avocado, crisp red onions, spicy jalapeños, fresh cilantro, and tangy lime juice. It's perfect on its own with chips or even served on top of some grilled fish!

    [feast_advanced_jump_to]

    Ingredients

    Watermelon avocado salsa is just a few ingredients that all pack such delicious fresh flavor.

    • Watermelon: The main ingredient - a seedless watermelon is best. Tips on how to pick a great one below!
    • Avocado: Ripe avocado is important for the best texture! If you're shopping ahead of time, get an avocado that will ripen in time for when you need it.
    • Red onion: Diced up nice and small for a little extra flavor.
    • Jalapeño: With or without seeds to add a little kick.
    • Cilantro: What's a salsa without cilantro?!
    • Lime juice: Fresh lime juice always! Skip the bottled stuff if you can.

    Step by step instructions

    Overview
    • Chop all ingredients and combine.
    Detailed steps

    1. Cube watermelon. Cut the two ends off the watermelon, then cut it in half. Place it large cut side-down and slice off the rind. Then make ½" slab cuts, then chop into cubes from there.

    2. Dice red onion. Finely dice the red onion.

    3. Dice jalapeño. Cut in half and remove the seeds and membrane then dice into small pieces.

    4. Mince cilantro. Finely chop fresh cilantro.

    5. Cube the avocado. Remove the skin from the avocado, slice it in half lengthwise then cut into cubes.

    6. Combine. Add all ingredients to a large bowl with the juice of 1 lime and salt to taste.

    Tips and tricks

    • Leave the ribs in the jalapeño if you like a little spice.
    • Try to cut the watermelon pretty small, you want to be able to get it scooped up on a chip and ideally you get all the ingredients together in one bite!
    • If you want a higher avocado to watermelon ratio, just use more avocados!
    • To pick out the best watermelon: look for strong, consistent stripes and big yellow patch. Ribbing/veins are also a sign of a good watermelon. It should also be heavier than it looks. More info here.
    • If you don't like cilantro, try mint! It'll be a different flavor profile all together, but still delicious.
    • Add more fruits/veggies! Adding in corn, cucumber, or tomato would be great.
    • Don't want to waste the watermelon rind? Make pickled watermelon rinds!
    • If your watermelon isn't quite ripe, you can try placing it in a paper bag at room temp for a few days. However this may not work as once watermelons are picked off the vine they typically do not ripen any further.
    • As it stands, this is a watermelon salad without feta or cheese/dairy of any kind, but if you wanted to add cheese, I'd recommend feta.

    How to serve

    This watermelon salsa (which, is also kind of a watermelon pico de gallo depending on how you define the two) is such a delicious fruit salad and there are a bunch of great ways to eat it.

    • Classic tortilla chips
    • Pita chips
    • On top of any fish (eg shrimp, salmon)
    • On top of meats (eg chicken, steak)
    • Use as a topping for fish tacos
    • On toasts with some queso fresco sprinkled on top

    FAQs

    How do I store watermelon salsa?

    In an air tight container in the fridge.

    How long is watermelon salsa good for?

    I'd recommend eating within a day of making it. The lime juice will start to break down the watermelon and change its texture, and the salsa will get quite watery from the watermelon sitting.

    Can I prep this in advance?

    You can, but I'd recommend keeping all the ingredients separate until right before you serve.

    More salsa recipes

    • Mango habanero salsa
    • Pineapple pico de gallo

    📖 Recipe

    Zoomed in image of watermelon salsa.

    Watermelon Salsa with Avocado

    This fresh Watermelon Salsa with Avocado is a perfect summer fruit salsa recipe. Loaded with juicy watermelon, creamy avocado, crisp red onions, spicy jalapeños, fresh cilantro, and tangy lime juice. It's perfect on its own with chips or even served on top of some grilled fish!
    5 from 1 vote
    Print Pin Rate
    Prep Time: 15 minutes minutes
    Cook Time: 0 minutes minutes
    Total Time: 15 minutes minutes
    Servings: 6 servings

    Ingredients

    • 3 cups watermelon cubed
    • 1 red onion diced
    • 2 avocados cubed
    • 1 jalapeño diced
    • ½ cup fresh cilantro minced
    • 1 tablespoon fresh lime juice
    • 1 teaspoon kosher salt to taste

    Instructions

    • Cube the watermelon – cut the two ends off then cut it in half. Place it large cut side-down and slice off the rind. Then make ½" slab cuts, then chop into cubes from there.
    • Finely dice the red onion.
    • Remove the seeds and membrane from the jalapeño and dice it.
    • Finely chop fresh cilantro.
    • Remove the skin from the avocado, slice it in half lengthwise then cut into cubes.
    • Add all ingredients to a large bowl with the juice of 1 lime and salt to taste.

    Video

    Nutrition Estimate

    Calories: 139kcal | Carbohydrates: 14g | Protein: 2g | Fat: 10g | Saturated Fat: 1g | Polyunsaturated Fat: 1g | Monounsaturated Fat: 7g | Sodium: 394mg | Potassium: 453mg | Fiber: 5g | Sugar: 6g | Vitamin A: 647IU | Vitamin C: 18mg | Calcium: 19mg | Iron: 1mg
    Course: Appetizer, Appetizers, Side Dish
    Cuisine: American
    Keyword: fruit, Salsa, watermelon
    Author: Haley

    Creamy Mushroom Mascarpone Pasta

    Mushroom mascarpone pasta in a bowl with fresh parsley on top.

    This Creamy Mushroom Mascarpone Pasta is a delicious savory vegetarian pasta dish with caramelized mushrooms, plenty of garlic, and al dente tagliatelle pasta in a luscious creamy mascarpone sauce. Comes together in about 30 minutes, making it a perfect easy vegetarian pasta recipe.

    [feast_advanced_jump_to]

    Ingredients

    To make this mascarpone sauce with mushrooms you really just need a few key ingredients, each which pack a ton of flavor.

    • Pasta: Tagliatelle is my pasta of choice for this recipe – the pasta coats the sauce very well.
    • Mushrooms: Baby bella or cremini mushrooms (technically those are the same variety!) will be great. They are a stage older than white button mushrooms, and a stage younger than portobello mushrooms, so their flavor is perfectly robust and deep without being overwhelming.
    • Garlic: Garlic brings a lot of flavor to this recipe so we want a lot of it – four cloves to be exact.
    • Heavy cream: This is the base of the creamy mushroom sauce to make sure it gets nicceeeee and silky.
    • Mascarpone cheese: A deliciously creamy and velvety Italian cheese that lusciously melts into the heavy cream (think: Italian cream cheese)
    • Parmesan cheese: Brings a nice mild nuttiness and saltiness to the sauce.
    • Olive oil: Extra virgin olive oil is best as it'll have the most robust flavor and the mushrooms absorb some of that as they sauté.
    • Parsley: A fresh element to finish off the dish!

    Step by step instructions

    Prep: clean and slice the mushrooms, chop the garlic, grate the parmesan cheese, and chop the parsley.

    1. Cook the pasta. Bring a large pot of water to a boil over high heat. Once boiling, salt the water and cook the pasta until al dente. Reserve 1 cup pasta water.

    2. Sauté the mushrooms. Meanwhile, warm a skillet over medium heat and add the olive oil. Once the olive oil is warmed through, add the mushrooms and sauté for about 5-10 minutes until deep and rich in color.

    3. Add the garlic. Add the garlic to the skillet with the sautéd mushrooms. Sauté for 2 minutes until very fragrant.

    4. Add the heavy cream and mascarpone. To the same skillet add the heavy cream and mascarpone cheese. Stir gently until homogeneous and silky.

    5. Add the parmesan cheese. Stir in the freshly grated parmesan cheese until combined and let it all simmer together until slightly thickened and it coats the back of a spoon, 3 minutes.

    6. Add the parsley. Once thickened, add the fresh parsley and stir to combine. Season with salt and pepper.

    7. Add the pasta and reserved pasta water. Add the pasta to the sauce and ½ cup reserved pasta water. Mix together to combine and add more pasta water as needed to loosen the sauce to your preference.

    Tips and tricks

    To get this mascarpone pasta sauce just right, follow the below tips and tricks:

    • Salt your pasta water! You want it to be nearly as salty as the sea. This helps flavor your pasta.
    • Use room temperature mascarpone cheese – this will help make sure it mixes into the sauce seamlessly instead of in chunks.
    • How to clean mushrooms: Do NOT rinse off mushrooms. They will absorb the liquid. To clean mushrooms you want to very lightly dampen a paper towel and gently brush off any dirt that's on their surface.
    • Salt at the end. Because in this recipe we're adding two kinds of cheeses and when mushrooms are sautéd they'll absorb and concentrate any flavor that is on them (as they shrink up), you'll want to salt the recipe at the end to make sure that you're not over salting as ingredients continue to be added.
    • Do not rinse your pasta – this will remove the starch from them which aids in bringing the sauce together.

    Recipe variations:

    • Switch up the type of pasta! As mentioned above I love a long noodle for this recipe to slurp up the sauce such as tagliatelle that I use or pappardelle, but you could really use just about any kind of pasta. Rigatoni would be great, and so would even tortellini or ravioli.
    • Use any kind of mushroom! I really like baby bella for this mushroom sauce for the reason I listed above, but you can add really any kind of mushroom and this dish will still be delicious. Shiitake, oyster, porcini, chanterelles, morels, they'll all be good. Or use a little of them all!
      • You can even use dried mushrooms, just rehydrate them before you sauté - learn how to do that here.
    • Add veggies: Throw in some fresh spinach or arugula, or even zucchini, peas, string beans, etc.
    • Add meat: Chicken or shrimp would be a great addition. And make it simple by shredding up a rotisserie chicken and adding it right in!
    • Crisp up some prosciutto in the oven and crumble it on top right before serving!
    • Make it spicy: Add some red pepper flakes or Calabrian chili paste to add a bit of a kick.
    • Swap the herbs: Instead of parsley you could use chives, thyme, or rosemary.

    What to serve with this recipe

    This creamy mushroom pasta sauce is very decadent and pairs well with a simple arugula salad (arugula, lemon juice, olive oil, shaved parmesan cheese) and toasty garlic bread.

    FAQs

    What is mascarpone cheese?

    It's a very silky and rich cheese that originated in Italy. It's typically made with heavy cream and citric or tartaric acid. It has a consistency every so slightly thinner than cream cheese, but thicker than creme fraiche. However, it has a higher milk fat content compared to cream cheese. It's incredibly versatile and often used in both savory and sweet dishes.

    Read more on it here.

    How do I store this recipe?

    In an air-tight container in the fridge for up to 3 days.

    How do I reheat this recipe?

    Either on the stovetop or in the microwave.

    For the stovetop reheat over low heat and add some additional heavy cream as needed to loosen the sauce.

    For the microwave heat for 1 minute on high heat, stir, and heat again in 30 second increments until heated through.

    What can I use if I can't find mascarpone?

    Ricotta cheese would be my first choice for substitution, otherwise a full fat cream cheese also would work.

    Do I need to discard the stems of mushrooms?

    Not necessarily. If they are particularly tough or woodsy, you definitely can, otherwise you don't need to.

    How do I make this gluten free?

    The sauce is naturally gluten free, so you just need to swap in a gluten free pasta variety and you're all set!

    Can I prep this dish in advance?

    You can chop all the ingredients in advance, but I'd recommend making the sauce and cooking the pasta right before you want to serve.

    More vegetarian pasta recipes

    • Close up image of finished creamy pasta.
      Creamy Garlic Spring Vegetable Pasta Primavera
    • Thumbnail
      Creamy Roasted Red Pepper Pasta
    • Close up of half-eaten bowl of lemon ricotta pasta
      One Pot Lemon Ricotta Pasta
    • Finished creamy pumpkin pasta sauce in a dutch oven.
      Creamy Pumpkin Pasta Sauce

    📖 Recipe

    Mushroom mascarpone pasta in a bowl with fresh parsley on top.

    Creamy Mushroom Mascarpone Pasta

    This Creamy Mushroom Mascarpone Pasta is a delicious savory vegetarian pasta dish with caramelized mushrooms, plenty of garlic, and al dente tagliatelle pasta in a luscious creamy mascarpone sauce. Comes together in about 30 minutes, making it a perfect easy vegetarian pasta recipe.
    5 from 7 votes
    Print Pin Rate
    Prep Time: 10 minutes minutes
    Cook Time: 15 minutes minutes
    Total Time: 25 minutes minutes
    Servings: 4 servings

    Ingredients

    • 8 oz tagliatelle pasta
    • 1 tbsp extra virgin olive oil
    • 8 oz baby bella/cremini mushrooms
    • 4 cloves garlic chopped
    • ½ cup heavy cream
    • ¾ cup mascarpone cheese room temperature
    • ¼ cup freshly grated parmesan cheese
    • 1 tablespoon parsley chopped
    • 1 teaspoon kosher salt
    • ½ teaspoon black pepper

    Instructions

    • Bring a large pot of water to a boil over high heat. Once boiling, salt the water and cook the pasta until al dente. Reserve 1 cup pasta water.
    • Meanwhile, warm a skillet over medium heat and add the olive oil. Once the olive oil is warmed through, add the mushrooms and sauté for about 5-10 minutes until deep and rich in color.
    • Add the garlic to the skillet with the sautéd mushrooms. Sauté for 2 minutes until very fragrant.
    • To the same skillet add the heavy cream and mascarpone cheese. Stir gently until homogeneous and silky.
    • Stir in the freshly grated parmesan cheese until combined and let it all simmer together until slightly thickened and it coats the back of a spoon, 3 minutes.
    • Once thickened, add the fresh parsley and stir to combine. Season with salt and pepper.
    • Add the pasta to the sauce and ½ cup reserved pasta water. Mix together to combine and add more pasta water as needed to loosen the sauce to your preference.

    Video

    Nutrition Estimate

    Calories: 582kcal | Carbohydrates: 46g | Protein: 16g | Fat: 37g | Saturated Fat: 21g | Polyunsaturated Fat: 2g | Monounsaturated Fat: 6g | Trans Fat: 1g | Cholesterol: 128mg | Sodium: 729mg | Potassium: 447mg | Fiber: 2g | Sugar: 3g | Vitamin A: 1198IU | Vitamin C: 2mg | Calcium: 191mg | Iron: 2mg
    Course: Dinner
    Cuisine: Italian, Italian/American
    Keyword: mushrooms, Pasta, Vegetarian
    Author: Haley

    Pepperoncini and Onion Vegetarian Pizza

    Close up image of pizza fresh out of the oven.

    This Pepperoncini and Onion Pizza is one of my absolute favorites that I make nearly every week. It's a simple red sauce pizza topped with melty mozzarella cheese, sharp onions, bright and brine-y pepperoncini, and delicious garlic. It's a unique pizza topping pairing that you'll wish you tried sooner!

    [feast_advanced_jump_to]

    Ingredients

    This pepperoncini and onion vegetarian pizza is inspired by one of my favorites - a homemade Roberta's pizza: the Lil Stinker. It's a simple pizza made with onions and garlic; two of my favorite vegetarian pizza toppings because they pack so much flavor.

    • Pizza dough: Just a basic pizza dough. Frozen, store-bought, or homemade. Whichever you prefer (or have time for).
    • Tomato sauce: A simple jarred pizza or marinara sauce works perfectly here!
    • Mozzarella cheese: Pre-shredded mozzarella is great or you can use fresh and shred it yourself, or even do slices of fresh.
    • Pepperoncini: Jarred pepperoncini! Either whole or sliced is fine, we're going to chop it.
    • Red onion: Halved and then sliced thin. You could also use yellow onion.
    • Garlic: Loads of it! Measure with your heart. Chopped or sliced both work.
    • Olive oil: For drizzling on the crust to help it get nice and golden.
    • Parmesan cheese: A nice salty kick when the pizza comes out of the oven.

    Step by step instructions

    Prep: Slice the onion, and chop the pepperoncini and garlic.

    1. Roll and oil the dough. Roll out your dough to about 12" all around. If it's not a perfect circle that's completely fine. Transfer it to your baking sheet (lined with parchment) or pizza stone and brush the olive oil from crust to crust.

    2. Add sauce. Evenly spread the tomato sauce leaving ½" of the crust around the edges.

    3. Add toppings. Evenly sprinkle the mozzarella cheese on top of the sauce. Then follow with the onions, pepperoncini, and garlic.

    4. Bake. Bake in a 425℉ oven for 12-15 minutes until the crust is golden and the cheese is melted and bubbly. Finish with parmesan cheese and fresh oregano (optional) when it comes out of the oven.

    Tips and tricks

    Making this pepperoncini and onion pizza is pretty much a no brainer, but the below tips and tricks will help make sure it goes off without a hitch.

    • Trader Joe's pizza dough is a great pre-made option if you have a store nearby.
    • Make sure the dough is at room temperature before you roll it out. This will help make sure it's easy to stretch. If you notice it keeps shrinking back together, let it sit at room temp for a bit longer before continuing.
    • To roll out the dough use your hands (stretching it with your fingers), a rolling pin, or even a wine bottle.
    • If you can't find pizza dough at the supermarket, try your local pizza place and see if they sell it.
    • Sprinkle some flour down before you try to roll out the dough so it doesn't stick.
    • Don't skip brushing olive oil on the dough - it'll help the crust brown and get crispy.

    FAQs

    How do I store homemade pizza?

    Cut into slices and store in an air-tight container in the fridge.

    How do I reheat homemade pizza?

    Place on a baking sheet and bake at 350℉ until warmed through (roughly 10-15 minutes).

    What are pepperoncini?

    Pepperoncinis are a type of pepper that originated in Northern Europe and are a combination of sweet and heat. They're typically sold as a vibrant lighter shade of green, although if kept on the vine longer they turn red. They are more mild than a jalapeño or even a poblano, but you'll still taste a little kick.

    What's the difference between a pepperoncini and a banana pepper?

    Pepperoncini have a hint of heat and banana peppers are mild.

    More pizza recipes

    • Caramelized onion and bacon pizza
    • Herby spring ricotta pizza

    📖 Recipe

    Close up image of pizza fresh out of the oven.

    Pepperoncini and Onion Vegetarian Pizza

    This Pepperoncini and Onion Pizza is one of my absolute favorites that I make nearly every week. It's a simple red sauce pizza topped with melty mozzarella cheese, sharp onions, bright and brine-y pepperoncini, and delicious garlic. It's a unique pizza topping pairing that you'll wish you tried sooner!
    5 from 2 votes
    Print Pin Rate
    Prep Time: 15 minutes minutes
    Cook Time: 15 minutes minutes
    Total Time: 30 minutes minutes
    Servings: 4 servings

    Ingredients

    • 1 ball pizza dough
    • ¾ cup tomato sauce
    • 1 cup shredded mozzarella cheese
    • 4 cloves garlic minced
    • ½ small red onion thinly sliced
    • ¼ cup pepperoncini chopped
    • ½ cup parmesan cheese
    • 1 tablespoon fresh oregano (optional)

    Instructions

    • Preheat oven to 425℉
    • On a floured surface roll out your dough to about 12" all around. If it's not a perfect circle that's completely fine. Transfer it to your baking sheet (lined with parchment) or pizza stone and brush the olive oil from crust to crust.
    • Evenly spread the tomato sauce leaving ½" of the crust bare around the edges.
    • Evenly sprinkle the mozzarella cheese on top of the sauce. Then follow with the onions, pepperoncini, and garlic.
    • Bake for 12-15 minutes until the crust is golden and the cheese is melted, bubbly, and lightly golden brown.
    • Top the finished pizza with the parmesan and (optional) fresh oregano.

    Video

    Nutrition Estimate

    Calories: 400kcal | Carbohydrates: 54g | Protein: 19g | Fat: 13g | Saturated Fat: 7g | Polyunsaturated Fat: 1g | Monounsaturated Fat: 3g | Cholesterol: 31mg | Sodium: 1303mg | Potassium: 237mg | Fiber: 3g | Sugar: 9g | Vitamin A: 534IU | Vitamin C: 12mg | Calcium: 325mg | Iron: 4mg
    Course: Lunch/Dinner, Main Course
    Cuisine: American, Italian
    Keyword: Pizza, Vegetarian
    Author: Haley

    Roasted Plums with Whipped Greek Yogurt

    Roasted plums in a bowl with yogurt and nuts.

    These sweet oven roasted plums with whipped greek yogurt are a delicious, easy, and light dessert. Ripe plums covered in a brown sugar spice mixture roasted to tender perfection and served with whipped greek yogurt and roasted walnuts.

    [feast_advanced_jump_to]

    Ingredients

    Just a few ingredients and you'll have a delicious and seriously impressive easy fruit dessert.

    • Plums: The star of the show. Really any plum will work great but red and black are the most commonly found.
    • Light brown sugar: Brown sugar is the base of the mixture that gets sprinkled on the plums.
      • Substitution: Dark brown sugar works as well.
    • Cardamom: One of my favorite spices - earthy and warm, but also citrusy and fresh.
      • Substitution: other spices that go well with plums are cinnamon and nutmeg.
    • Orange zest: Adding this into the mixture with the brown sugar and cardamom really brightens up the dish and plays nicely with the citrusy cardamom.
    • Greek yogurt: Full fat greek yogurt is best because it'll be the creamiest and silkiest. The slight tartness from greek yogurt balances the sweetness of the baked plums nicely.
      • Substitutions: Low fat could work but is not ideal. Skyr Icelandic yogurt would also be great.
    • Heavy cream: A bit of cream mixed with the yogurt helps it whip up nice and creamy.
    • Walnuts: Topping with roasted walnuts brings the perfect crunch and texture to this otherwise silky dish. You can make them homemade or buy from the store already roasted. Salted is preferred!
      • Substitution: pecans or almonds would also be great.
    • Honey: A drizzle of honey over the dish is the perfect finishing touch.
      • Substitution: A light drizzle of pure maple syrup would also work.

    Step by step instructions

    When plums are roasted their flavor intensifies and they get nice and tender, and then served on top of whipped greek yogurt this is a lighter fruit-based dessert, so it's sure to be a favorite.

    Prep: Halve the plums and remove the pit. Roast the walnuts if they are not already.

    Overview

    • Place halved plums in a baking dish
    • Sprinkle with brown sugar, cardamom, orange zest, and salt
    • Roast 400℉ for 30 minutes
    • Whip greek yogurt with heavy cream
    • Serve over whipped yogurt with a drizzle of honey and roasted walnuts

    Detailed directions

    1. Make brown sugar mixture. In a small bowl combine the light brown sugar, orange zest, cardamom, and salt. Using your fingers, mix it together and slightly rub between your fingers as you do so. This will infuse the sugar with the flavors of the zest so it's evenly distributed.

    2. Sprinkle brown sugar mixture over plums. Place the plum halves in a buttered or non-stick baking dish cut side up. Sprinkle the brown sugar mixture evenly on the halves and bake at 400℉ for 30 minutes until the edges start to crinkle and they release their juices.

    3. Make the whipped yogurt. In a bowl combine the greek yogurt and heavy cream. Whisk together until airy and loose peaks form.

    4. Assemble. Spread some whipped yogurt on the bottom of a bowl or plate. Top with plums, a drizzle of honey, and roasted walnuts. Serve immediately.

    Tips and tricks

    • Use ripe plums, it'll be easier to get the pit out.
      • You know a plum is ripe when you gently squeeze and it has a little give, similar to an avocado
    • If your plums are rolling all over the place in your baking dish, cut a little slice off their bottoms so they sit flat.
    • Use a baking dish just big enough to fit the plums - this will also help ensure they aren't rolling all around.
    • Really massage the orange zest into the brown sugar - it may seem not necessary, but really brings to life the flavor.
    • Just whip the yogurt until you get soft peaks - you're not looking for stiff whipped cream consistency, just a bit of air in there to lighten it up.
    • Roast the plums on the grill if you want to be outside (or just not turn the oven on)! Place the plums on a grill-safe pan (such as a seasoned cast iron), follow the rest of the steps, and to "bake" simply close the lid. Keep an eye on them but it should be roughly the same amount of time as baking.
    • To roast your own walnuts, spread them in an even layer on a baking sheet and put in the oven at 400℉ (can be with the plums) for 5-8 minutes. Be careful as they can burn quickly and when they do they become bitter. I usually roast them whole and then chop after, so if they're already chopped roast for closer to 5 minutes.

    FAQs

    How do I store roasted plums?

    Honestly, they are best eaten fresh or at room temperature. I wouldn't recommend saving these in the fridge or freezer as they will get a bit soggy and not reheat well. If you're okay with that, then let them come to room temp and store in an air-tight container for up to 3 days.

    How many types of plums are there?

    When I was researching this there were actually many articles with varying answers - so ultimately there are a lot of types of plums and they are all delicious. They seem to boil down into just over a dozen more common types. Read more about it here. One of my personal favorites are the pluot - a cross between a plum and. apricot. They are beautifully speckled on the outside and deliciously sweet on the inside.

    What to serve with roasted plums

    While I love serving these tender baked plums with the whipped greek yogurt, you can also serve them with some vanilla ice cream, cinnamon ice cream, or just simply on their own. You could also make a shortcake situation out of biscuits with these easy 3 ingredient drop biscuits.

    For another simple plum-forward treat, try these plum and orange tarts.

    📖 Recipe

    Roasted plums in a bowl with yogurt and nuts.

    Roasted Plums with Whipped Greek Yogurt

    These sweet roasted plums with whipped greek yogurt are a delicious, easy, and light dessert. Ripe plums covered in a brown sugar spice mixture roasted to tender perfection and served with whipped greek yogurt and roasted walnuts.
    5 from 1 vote
    Print Pin Rate
    Prep Time: 10 minutes minutes
    Cook Time: 30 minutes minutes
    Total Time: 40 minutes minutes
    Servings: 4 servings

    Ingredients

    • 4 ripe plums
    • 2 tablespoon light brown sugar
    • ¼ teaspoon cardamom
    • 1 tablespoon orange zest
    • ½ teaspoon kosher salt
    • 1 cup full fat greek yogurt
    • ¼ cup heavy cream
    • 1 tablespoon honey
    • ¼ cup roasted walnuts chopped

    Instructions

    • Preheat your oven to 400℉.
    • Slice the plums in half and remove the pit.
    • In a small bowl combine the light brown sugar, orange zest, cardamom, and salt. Using your fingers, mix it together and slightly rub between your fingers as you do so. This will infuse the sugar with the flavors of the zest so it's evenly distributed.
    • Place the plums in a buttered or non-stick baking dish cut side up. Sprinkle the brown sugar mixture evenly on the halves and bake at 400℉ for 30 minutes until the edges start to crinkle and they release their juices.
    • In a bowl combine the greek yogurt and heavy cream. Whisk together until airy and loose peaks form.
    • Spread some whipped yogurt on the bottom of a bowl or plate. Top with plums, a drizzle of honey, and roasted walnuts. Serve immediately.

    Video

    Nutrition Estimate

    Calories: 200kcal | Carbohydrates: 21g | Protein: 7g | Fat: 11g | Saturated Fat: 4g | Polyunsaturated Fat: 4g | Monounsaturated Fat: 2g | Trans Fat: 1g | Cholesterol: 19mg | Sodium: 315mg | Potassium: 236mg | Fiber: 2g | Sugar: 19g | Vitamin A: 456IU | Vitamin C: 9mg | Calcium: 85mg | Iron: 1mg
    Course: Dessert
    Cuisine: American
    Keyword: Plums
    Author: Haley

    Chimichurri Shrimp Bowls

    Close up picture of a chimichurri shrimp bowl with all the toppings.

    These Chimichurri Shrimp Bowls are so full of flavor and so easy to make. Tons of herbs, garlic, oil, vinegar, and lime juice make a delicious sauce that is slathered over shrimp and served with quinoa, avocado and limey cabbage.

    [feast_advanced_jump_to]

    Ingredients

    Chimichurri has so many fresh ingredients it's a perfect lightened up sauce or topping. Then just add a few more and you have these chimichurri shrimp bowls loaded with flavor.

    • Shrimp: (prawns) frozen and defrosted at home or defrosted at the store are both great
    • Shallot: A bit more mild than an onion which is what makes it perfect here
    • Garlic: Gives so much flavor to the sauce, make sure to chop it up really finely
    • Fresh herbs: This recipe uses a combination of fresh parsley and cilantro – if you hate cilantro just double down on the parsley
    • Red wine vinegar: Usually you can swap around vinegars and be okay but I really do recommend using red wine vinegar specifically for this recipe
    • Lime juice: Fresh lime juice - not anything from the jar
    • Quinoa: This is my grain of choice but you can use whatever you like – rice, farro, cauliflower rice, and so on
    • Avocado: A perfect topping that adds a creamy bite
    • Cabbage: Red or white cabbage both work

    Step by step instructions

    This chimichurri shrimp comes together in just a few minutes because it uses fresh ingredients and minimal cooking. This makes it perfect for an easy weeknight meal or even weekday lunch. You can also use it for meal prep and eat throughout the week!

    Prep: cook the quinoa and squeeze some lime over the chopped cabbage.

    1. Cook the shrimp. Heat a skillet over medium heat and add 1 tablespoon olive oil. When hot, add the shrimp and cook 3-4 minutes per side until no longer translucent. Set aside.

    2. Make the chimichurri. While the shrimp are cooking, combine the shallot, garlic, cilantro, parsley, olive oil, red wine vinegar, lime, salt and pepper.

    3. Combine the shrimp and sauce. Toss the cooked shrimp with ½ of the chimichurri sauce.

    4. Serve. Serve the shrimp over cooked quinoa with avocado, limey cabbage, a drizzle of extra chimichurri sauce, and a lime wedge.

    Tips and tricks

    • Picking good shrimp:
      • Use frozen shrimp if you have access to it. Usually the shrimp that are on display at the fish counter in the grocery store are previously frozen and defrosted, so you're better off buying straight from frozen and defrosting when you need it. **Unless you have access to fresh fish, in which case buy fresh!
      • 1lb of large shrimp is usually around 15-20 shrimp
      • Get peeled and deveined shrimp with the tail-on. Cooking with the tail on helps keep a lot of flavor in.
    • Defrosting frozen shrimp:
      • Place the frozen shrimp in a plastic bag.
      • Place the plastic bag in a large bowl and fill with room temp water to fully submerge the shrimp. You may need to place a heavy object on top.
      • Leave the shrimp in the water for about 30 minutes. Check to see if it needs to be rotated and add more time as needed.
    • Make the dish spicy by adding some red pepper flakes into the chimichurri sauce.
    • Make the chimichurri in the food processor if you don't want to spend the time chopping the ingredients.
    • How to serve chimichurri shrimp: if you don't want to make this into a quinoa bowl, you can serve the shrimp over rice, polenta, pasta, grits, or simply with some roasted veggies.
    • Serve as a bowl for a main dish or simply serve the chimichurri shrimp on skewers or with little utensils as an appetizer.
    • Grill your shrimp instead of sautéing them if you're cooking outside or just prefer it that way!

    FAQs

    What is chimichurri?

    Chimichurri is an Argentinian herb sauce that is most traditionally made with parsley, oregano, garlic, olive oil, vinegar, salt and pepper, and served alongside steaks and other meats, but can also be paired with poultry or fish.

    This recipe adds some additional less traditional ingredients into the mix.

    More on the history of chimichurri here.

    How do I store chimichurri?

    Chimichurri on its own can be stored in an air-tight container in the fridge for 2-3 weeks. The vinegar will help it stay fresh.

    How do I store this dish?

    Chimichurri shrimp can be stored in an air-tight container in the fridge for a few days.

    Can I freeze chimichurri sauce?

    You can! Air-tight container for up to 3 months. Defrost by leaving it in the fridge overnight.

    More shrimp recipes

    • Finished shrimp and rice dish in a bowl with a napkin.
      One Pot Spicy Cajun Shrimp and Rice Pilaf
    • Maple Soy Shrimp
      Maple Soy Shrimp
    • Final dish on a serving platter_thumbnail.
      Spicy Garlic Butter Shrimp

    📖 Recipe

    Close up picture of a chimichurri shrimp bowl with all the toppings.

    Chimichurri Shrimp Bowls

    These Chimichurri Shrimp Bowls are so full of flavor and so easy to make. Tons of herbs, garlic, oil, vinegar, and lime juice make a delicious sauce that is slathered over shrimp and served with quinoa, avocado and limey cabbage.
    5 from 3 votes
    Print Pin Rate
    Prep Time: 15 minutes minutes
    Cook Time: 10 minutes minutes
    Total Time: 25 minutes minutes
    Servings: 2 servings

    Ingredients

    • 1 lb large shrimp peeled and deveined
    • 1 tablespoon olive oil

    For the chimichurri (makes about 1 cup):

    • 1 large shallot diced (¼ cup)
    • 3 cloves garlic diced
    • 1 cup fresh parsley
    • 1 cup fresh cilantro
    • ½ cup olive oil
    • ¼ cup red wine vinegar
    • 2 teaspoon fresh lime juice
    • ½ teaspoon kosher salt
    • ¼ tsp black pepper

    To serve:

    • 2 cups cooked quinoa
    • 1 avocado
    • ½ cup purple cabbage
    • 1 tsp fresh lime juice

    Instructions

    • Heat a skillet over medium heat and add 1 tablespoon olive oil. When hot, add the shrimp and cook 3-4 minutes per side until no longer translucent. Set aside.
    • While the shrimp are cooking, combine the shallot, garlic, cilantro, parsley, olive oil, red wine vinegar, lime, salt and pepper.
    • Toss the cooked shrimp with ½ of the chimichurri sauce.
    • Serve the shrimp over cooked quinoa with avocado, limey cabbage, a drizzle of extra chimichurri sauce, and a lime wedge.

    Video

    Nutrition Estimate

    Calories: 1126kcal | Carbohydrates: 58g | Protein: 43g | Fat: 82g | Saturated Fat: 11g | Polyunsaturated Fat: 11g | Monounsaturated Fat: 56g | Trans Fat: 1g | Cholesterol: 286mg | Sodium: 1918mg | Potassium: 1408mg | Fiber: 14g | Sugar: 5g | Vitamin A: 3886IU | Vitamin C: 70mg | Calcium: 240mg | Iron: 7mg
    Course: Dinner, Lunch/Dinner
    Cuisine: Argentinian
    Keyword: Shrimp
    Author: Haley

    Sour Cream and Onion Potato Salad {No Mayo}

    Sour cream and onion potato salad in a bowl for serving.

    This Sour Cream and Onion Potato Salad is for all the chip lovers out there (myself included). Tender gold baby potatoes covered in a creamy, tangy, oniony, mixture made with sour cream and greek yogurt that's perfectly reminiscent of the crunchy potato chip.

    Ingredients

    What's in potato salad exactly?? Well this easy potato salad is made without mayonnaise, without eggs, and with plenty of flavor. Every potato salad differs ever so slightly - some don't even have a creamy base and lean on oil and vinegar – so it's fun to try new combinations!

    • Potatoes: Baby gold potatoes are perfect for potato salad because of their creamy texture.
    • Sour cream: The base of the sauce. Full-fat is preferred.
    • Greek yogurt: The other portion of the sauce - usually you'd find this to be mayonnaise, but I wanted to make this potato salad without mayonnaise, and I think greek yogurt has a nice natural tang to it that would add to the theme well - and it did!
    • Onion: Red onion diced up really small.
    • Shallot: Another onion-y flavor, just a bit more mild. We want to really bring all the flavors here.
    • Chives: The fresh herb version of onion-y flavor.
    • Apple cider vinegar: A little splash adds the extra tang reminiscent of the chips. You definitely don't taste the vinegar per-say, just gives it that bite.
    • Garlic & Onion powders: Using a little of these makes that final drive home in flavor.

    Step by step instructions

    Just a few really simple steps to making sour cream and onion potato salad!

    Overview:

    • Boil the potatoes in salted water – start the water cold
    • Make the sauce mixture
    • Slice the potatoes and toss in the sauce

    Detailed directions:

    1. Make the boiled potatoes. Put the potatoes in a large pot and fill with cold water to cover the them plus 1 inch. Add 2x 5-finger pinches of kosher salt and bring to a boil. Once boiling, cook for 15-18 minutes until the potatoes are fork-tender. Drain and set aside to cool for 10 minutes.

    2. Slice the potatoes. Once the potatoes are cool enough to handle (about 10 minutes after draining) slice them in half or quarters, depending on their size.

    3. Make the sauce mixture. In a large bowl, combine the ¾ cup sour cream, ¼ cup greek yogurt, ½ cup chopped red onion, shallot, 1 ½ teaspoon onion powder, 1 teaspoon garlic powder, 2 teaspoon apple cider vinegar, 2 teaspoon kosher salt, and ½ teaspoon black pepper. Mix to combine.

    4. Sauce the potatoes. Add the potatoes to the bowl with the sauce mixture and mix to combine.

    5. Add the chives. Add ⅓ cup fresh chives to the potatoes and gently mix to combine. We do this separately because we're trying to not completely squash the chives, but you could add them when you make the sauce.

    (OPTIONAL) 6. Cover and refrigerate. Cover the mixture with a lid or plastic wrap and refrigerate for at least 30 minutes to let the flavors meld and soak into the potatoes.

    Tips and tricks

    • The best potatoes for potato salad is really a subjective thing. Baby gold potatoes and baby red-skinned potatoes are two of the most common options. You can use either in this recipe.
    • Serve at any temp you like! Sour cream and onion potato salad can be served warm, at room temp, or chilled.
    • If you have time and like a chilled potato salad, letting this sit in the fridge for a bit before you serve (or even overnight!) really helps the flavors meld together.
      • This is perfect if you're serving for a barbecue, summer get-together, game night, holiday, etc., because you can prep ahead!
    • Cut or smash the potatoes. I did a rough cut with some different sizes, but you can cut the potatoes really small, mash them, or even keep them whole.
    • Use the fork test! Don't just follow the clock for potato cooking time - the potatoes are done cooking when you can easily insert a fork into their center.

    FAQs

    How long does potato salad last in the fridge?

    It's best eaten within 3 or 4 days.

    How do I store potato salad?

    Air-tight container in the refrigerator.

    How long do I boil potatoes for potato salad?

    With mini potatoes, start them in cold water and once boiling they'll cook in about 15-18 minutes.

    Can you freeze potato salad?

    I wouldn't recommend it for this recipe. The "sauce" will not freeze well.

    Can I make potato salad in the instant pot?

    You can boil the potatoes in the instant pot for sure! How-to here. Then can make the sauce mixture in a separate bowl and follow my instructions from there.

    More potato recipes

    • Finished mashed potatoes in a serving bowl with melted butter.
      Garlic Red Skin Mashed Potatoes
    • Close up image of spoon in potatoes.
      Twice Baked Mashed Potatoes
    • Close up image of the roasted spicy miso sweet potatoes
      Spicy Miso Sweet Potatoes

    📖 Recipe

    Sour cream and onion potato salad in a bowl for serving.

    Sour Cream and Onion Potato Salad {No Mayo}

    This Sour Cream and Onion Potato Salad is for all the chip lovers out there (myself included). Tender gold baby potatoes covered in a creamy, tangy, oniony, mixture made with sour cream and greek yogurt that's perfectly reminiscent of the crunchy potato chip.
    5 from 2 votes
    Print Pin Rate
    Prep Time: 15 minutes minutes
    Cook Time: 15 minutes minutes
    Resting:: 40 minutes minutes
    Total Time: 1 hour hour 10 minutes minutes
    Servings: 6 people

    Ingredients

    • 1.5-2 lbs baby gold potatoes
    • ¾ cup sour cream
    • ¼ cup whole milk plain greek yogurt
    • ½ cup red onion minced
    • 1 shallot sliced
    • 1 ½ teaspoon onion powder
    • 1 teaspoon garlic powder
    • 2 teaspoon kosher salt
    • ½ teaspoon black pepper
    • 2 teaspoon apple cider vinegar
    • ⅓ cup fresh chives chopped

    Instructions

    • Put the potatoes in a large pot and fill with cold water to cover them plus 1 inch. Add 2x 5-finger pinches of kosher salt and bring to a boil. Once boiling, cook for 15-18 minutes until the potatoes are fork-tender. Drain and set aside to cool for 10 minutes.
    • Once the potatoes are cool enough to handle (about 10 minutes after drained) slice them in halves or quarters, depending on their size.
    • In a large bowl, combine the ¾ cup sour cream, ¼ cup greek yogurt, ½ cup minced red onion, sliced shallot, 1 ½ teaspoon onion powder, 1 teaspoon garlic powder, 2 teaspoon apple cider vinegar, 2 teaspoon kosher salt, and ½ teaspoon black pepper. Mix to combine.
    • Add the potatoes to the bowl with the sauce mixture and mix to combine.
    • Add ⅓ cup fresh chives to the potatoes and gently mix to combine.
    • Cover the mixture with a lid or plastic wrap and refrigerate for at least 30 minutes to let the flavors meld and soak into the potatoes.

    Nutrition Estimate

    Calories: 162kcal | Carbohydrates: 24g | Protein: 4g | Fat: 6g | Saturated Fat: 3g | Polyunsaturated Fat: 1g | Monounsaturated Fat: 1g | Cholesterol: 17mg | Sodium: 796mg | Potassium: 580mg | Fiber: 3g | Sugar: 3g | Vitamin A: 280IU | Vitamin C: 25mg | Calcium: 62mg | Iron: 1mg
    Course: Side Dish
    Cuisine: American
    Keyword: Potato Salad, Potatoes
    Author: Haley
    • « Previous Page
    • 1
    • …
    • 16
    • 17
    • 18
    • 19
    • 20
    • …
    • 32
    • Next Page »

    HEY THERE!

    Welcome to Cozy Cravings! Happy to have you. Here, you’ll find comfort food recipes & other delicious things to enjoy and devour.

    POPULAR POSTS

    • Close up of broccoli au gratin.
      Broccoli Au Gratin (Broccoli Casserole)
    • Finished french onion pasta in a bowl.
      One Pot French Onion Pasta
    • close up image of maple candied bacon on a plate.
      Maple Candied Bacon
    • Overhead image of lasagna fresh out of the oven with sage on top.
      Butternut Squash and Spinach Lasagna

    Footer

    ↑ back to top

    about

    • ABOUT
    • CONTACT
    • PRIVACY POLICY

    Let's Keep In Touch!

    Subscribe here for delicious recipes, updates & more!

    Thank you!

    You have successfully joined our subscriber list.

    .

    recipe index

    • APPETIZERS
    • BREAKFAST & BRUNCH
    • LUNCH & DINNER
    • SNACKS & SIDES
    • DESSERTS

    Copyright © 2026 · CozyCravings.com

    Rate This Recipe

    Your vote:


    A rating is required
    A name is required
    An email is required