• Recipes
  • Contact
  • About
  • Shop

Cozy Cravings

menu icon
go to homepage
  • RECIPES
  • ABOUT
  • CONTACT
  • SUBSCRIBE
    • Facebook
    • Instagram
    • Pinterest
  • subscribe
    search icon
    Homepage link
    • RECIPES
    • ABOUT
    • CONTACT
    • SUBSCRIBE
    • Facebook
    • Instagram
    • Pinterest
  • ×
    Home

    Easy Whipped Goat Cheese with Roasted Grapes

    Whipped goat cheese on a serving platter with bread and crackers.

    This Whipped Goat Cheese with Roasted Grapes is a delicious creamy dip recipe – it's sweet, salty, tangy, and just all around perfect. The whipped goat cheese element on its own is the perfect base for so many topping ideas (suggestions below), but I particularly love the roasted grapes. 

    Whipped goat cheese on a serving platter with bread and crackers.

    Ingredients

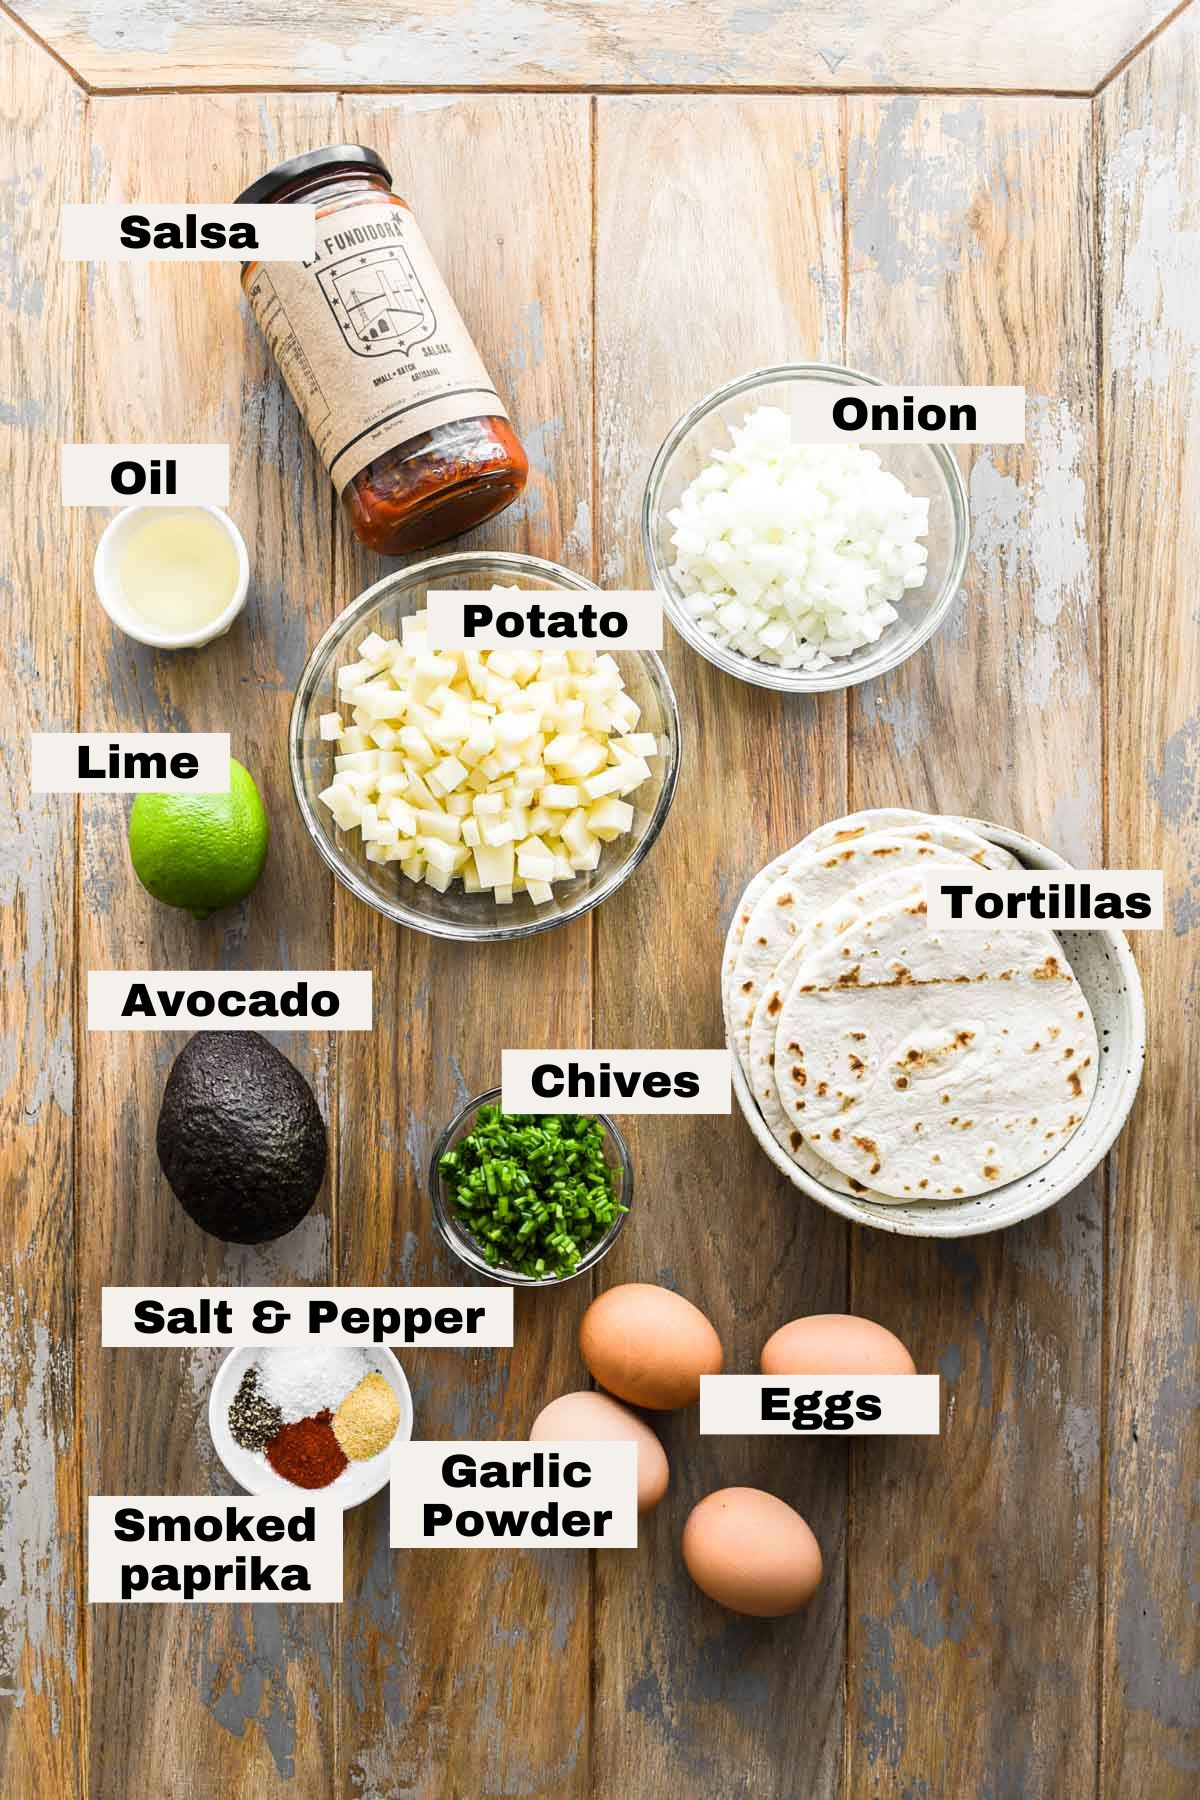
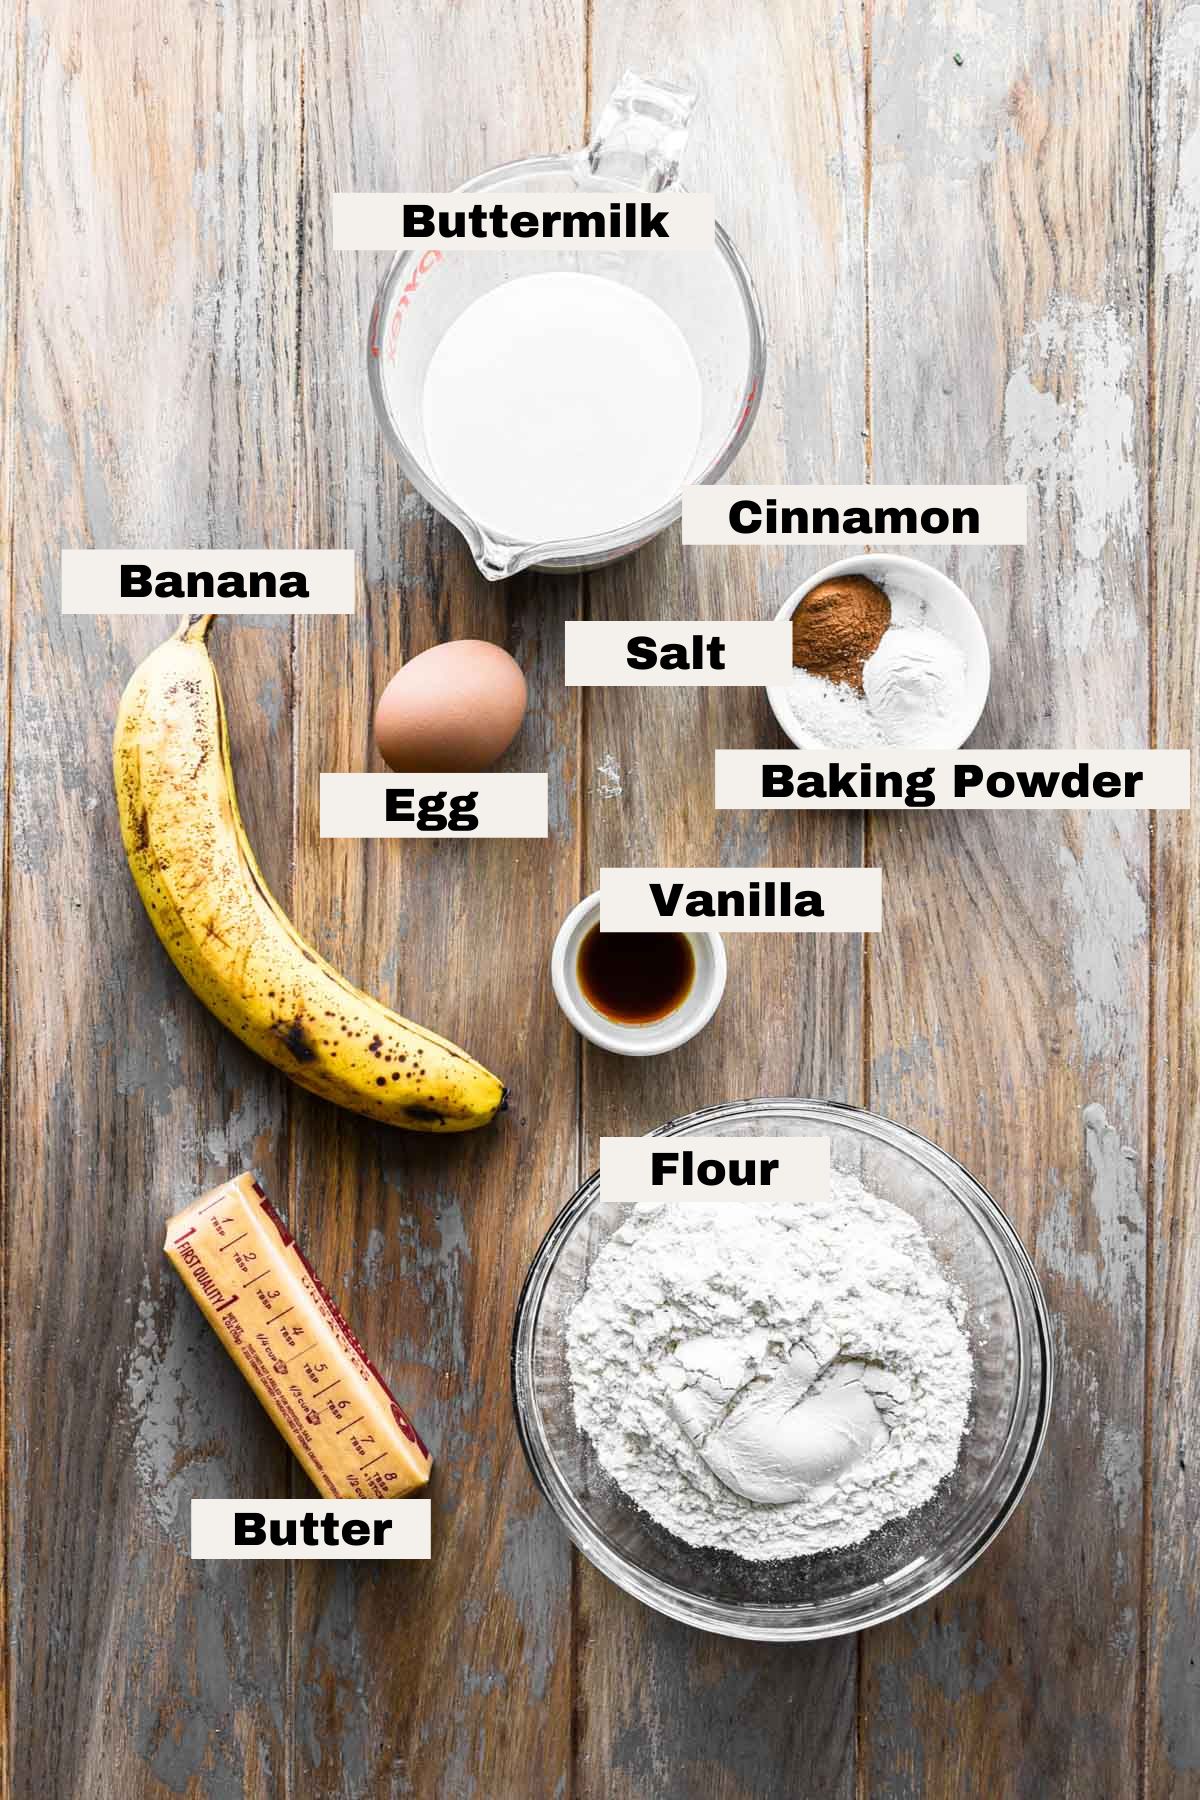
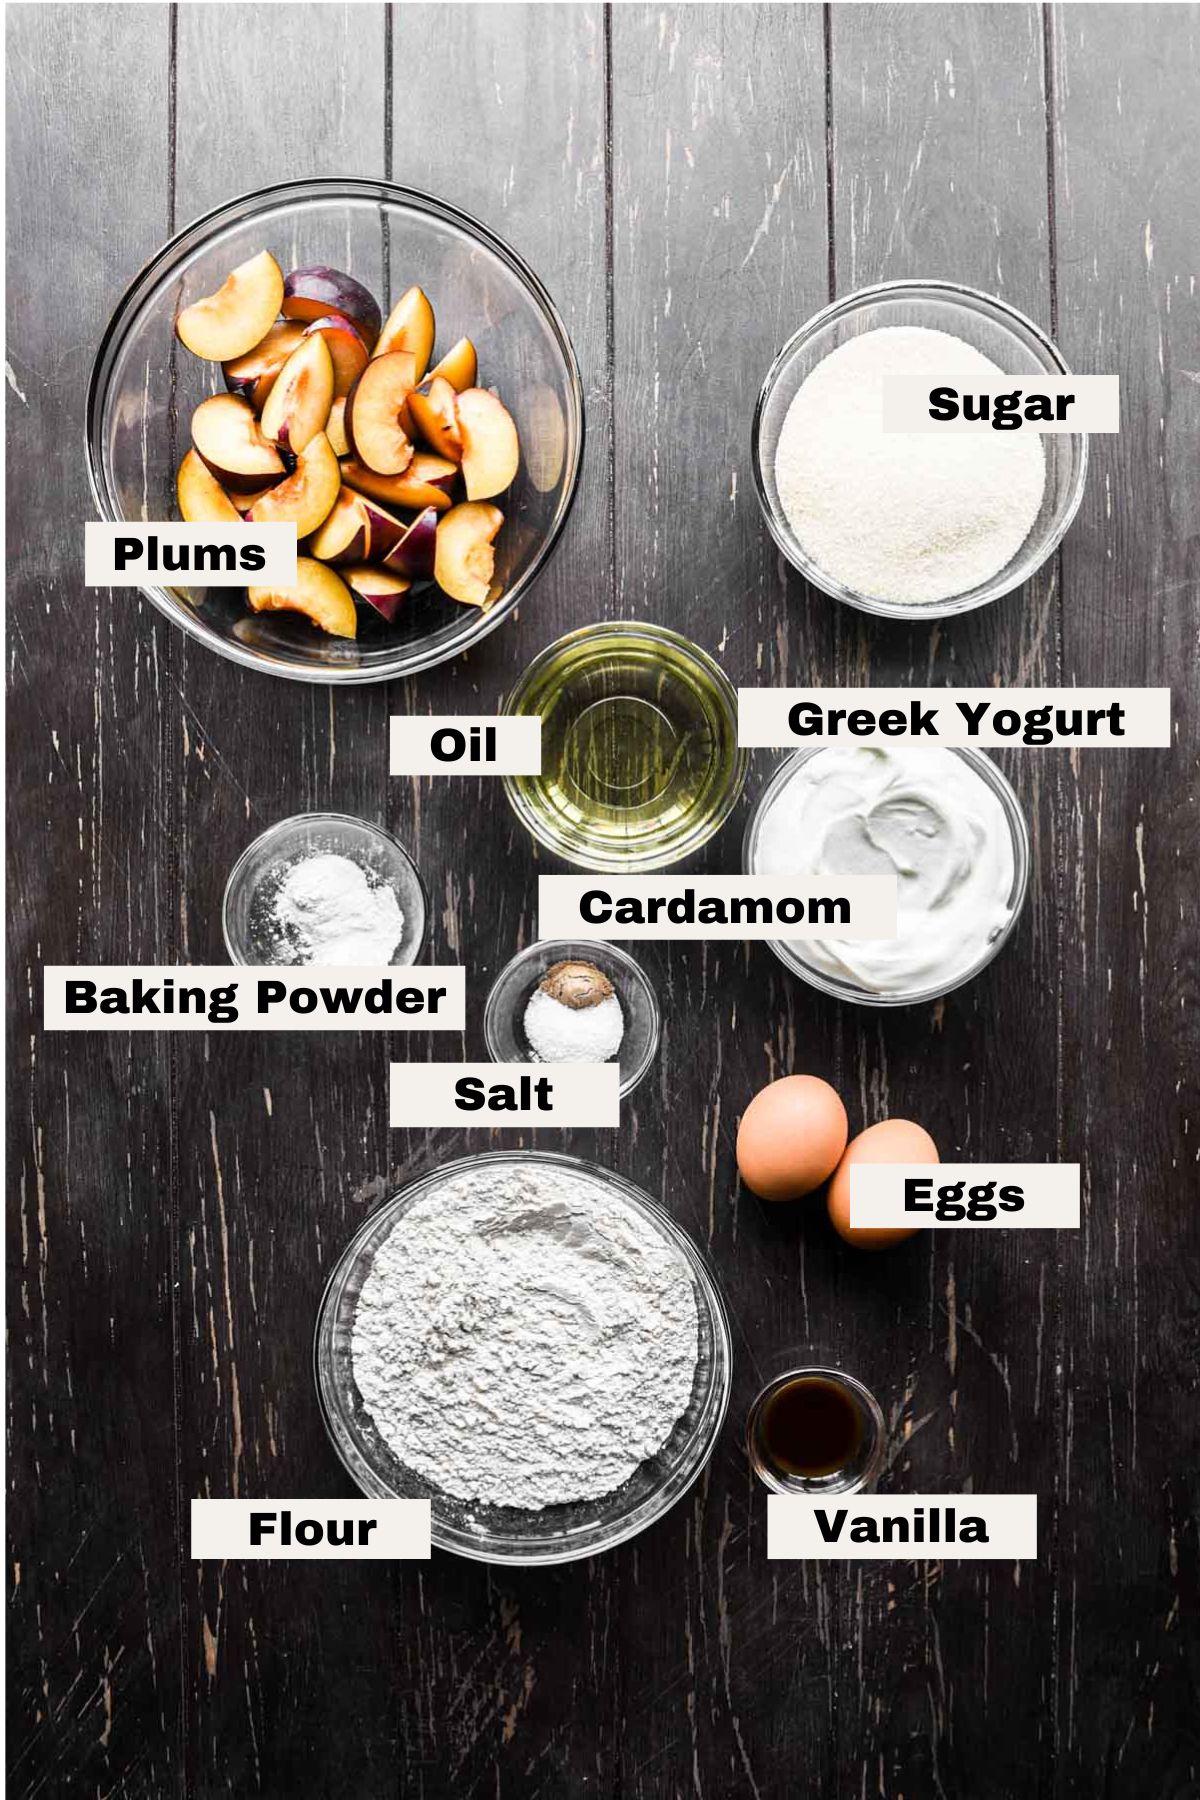
    Because this goat cheese appetizer uses such few and simple ingredients, try to find good quality options, especially for the cheese. 

    Ingredients on a table for whipped goat cheese with roasted grapes.
    • Goat cheese: Plain, fresh goat cheese. If you can find local goat cheese even better. You can also look for Chèvre, which is the French word for goat cheese and is often found on packaging in the US. Vermont Creamery makes a great one and so does Trader Joe’s.
      • To keep the flavors simple and pure, this whipped goat cheese recipe is made without cream cheese. 
    • Extra virgin olive oil: Added to help the goat cheese whip together, and is drizzled over the grapes before roasting. Given these simple applications, you want to use an extra virgin olive oil so the flavor is richer. 
    • Grapes: Seedless red grapes are ideal. They are a bit sweeter and less bitter than green grapes.
      • Regardless of if you use red or green grapes, definitely use seedless. 
    • Honey: Any lighter colored honey is great. Local honey helps fight allergies, so use it if you can find it!
    • Lemon zest: Freshly zested lemon brightens up the whipped goat cheese in a very simple yet delicious way. 
    • Basil: Fresh basil is the perfect herbaceous finishing element. 
    • Kosher salt and black pepper: These both add flavor and bring out the natural flavors of the ingredients involved. 
    • Bread: to serve! I like sourdough. 

    Step by step instructions

    Just a few quick steps to make this amazing creamy whipped goat cheese dip with bursting sweet roasted grapes. Full recipe can be found at the end of this page. 

    Whipped cheese in the food processor.

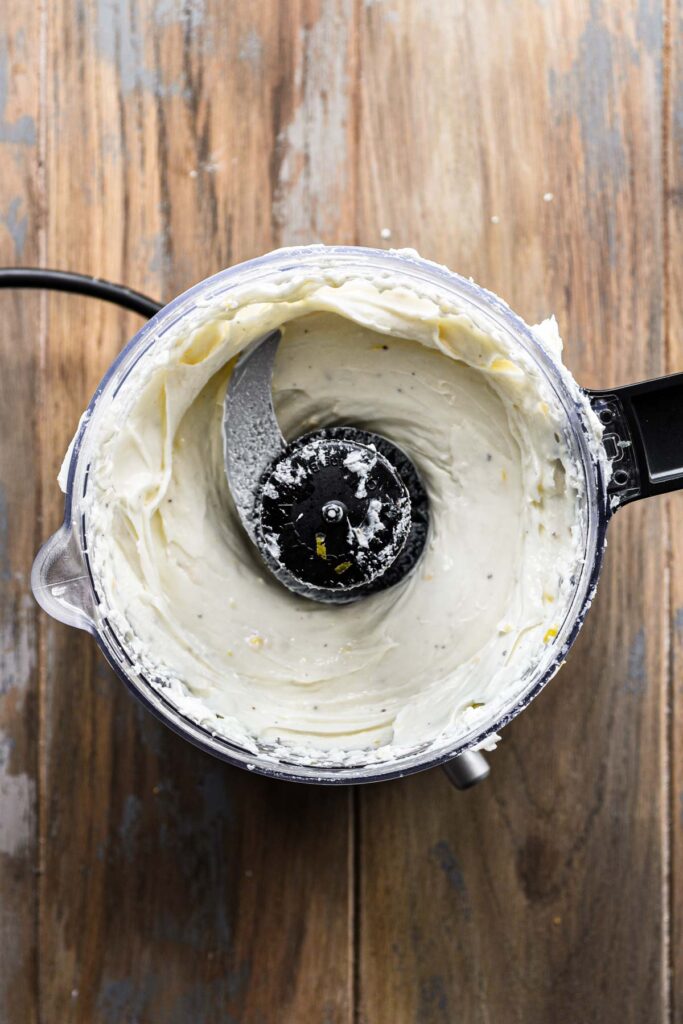
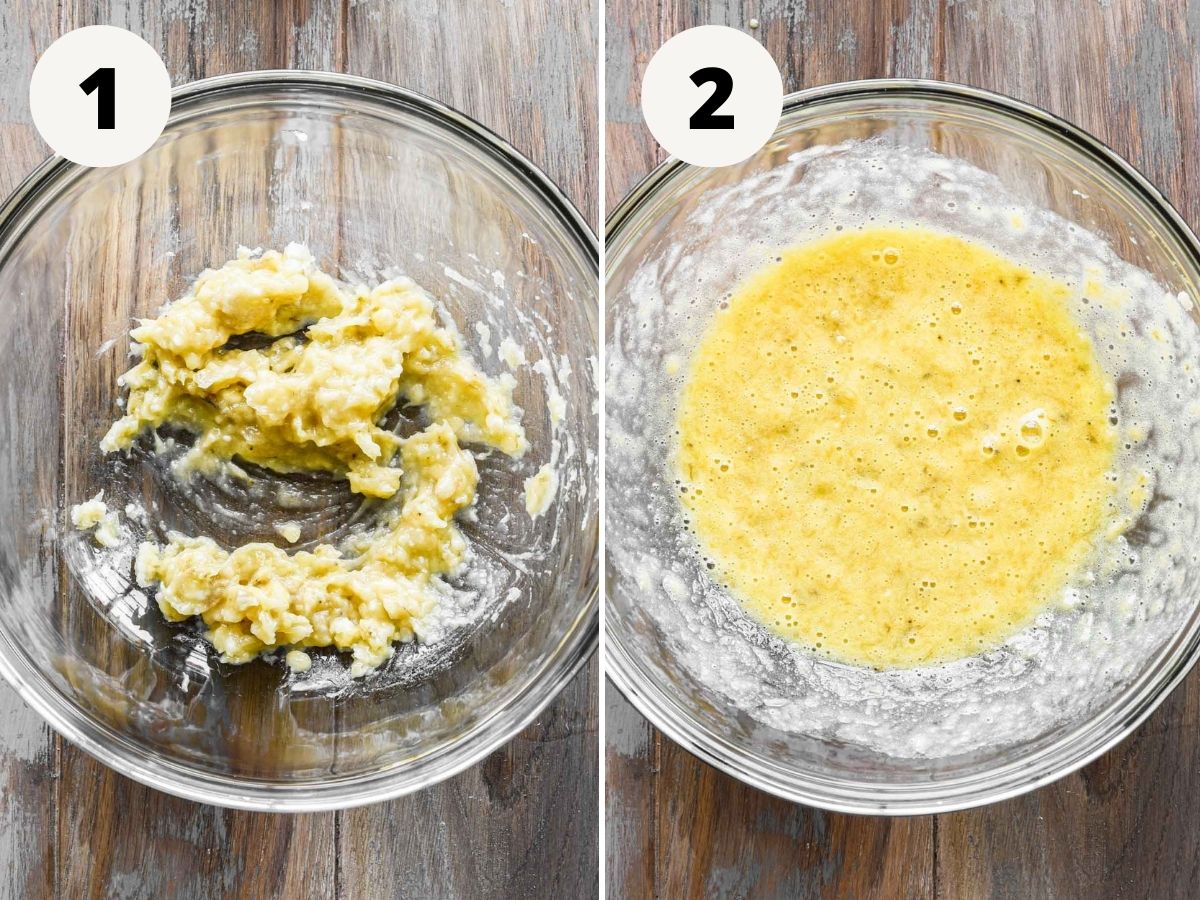
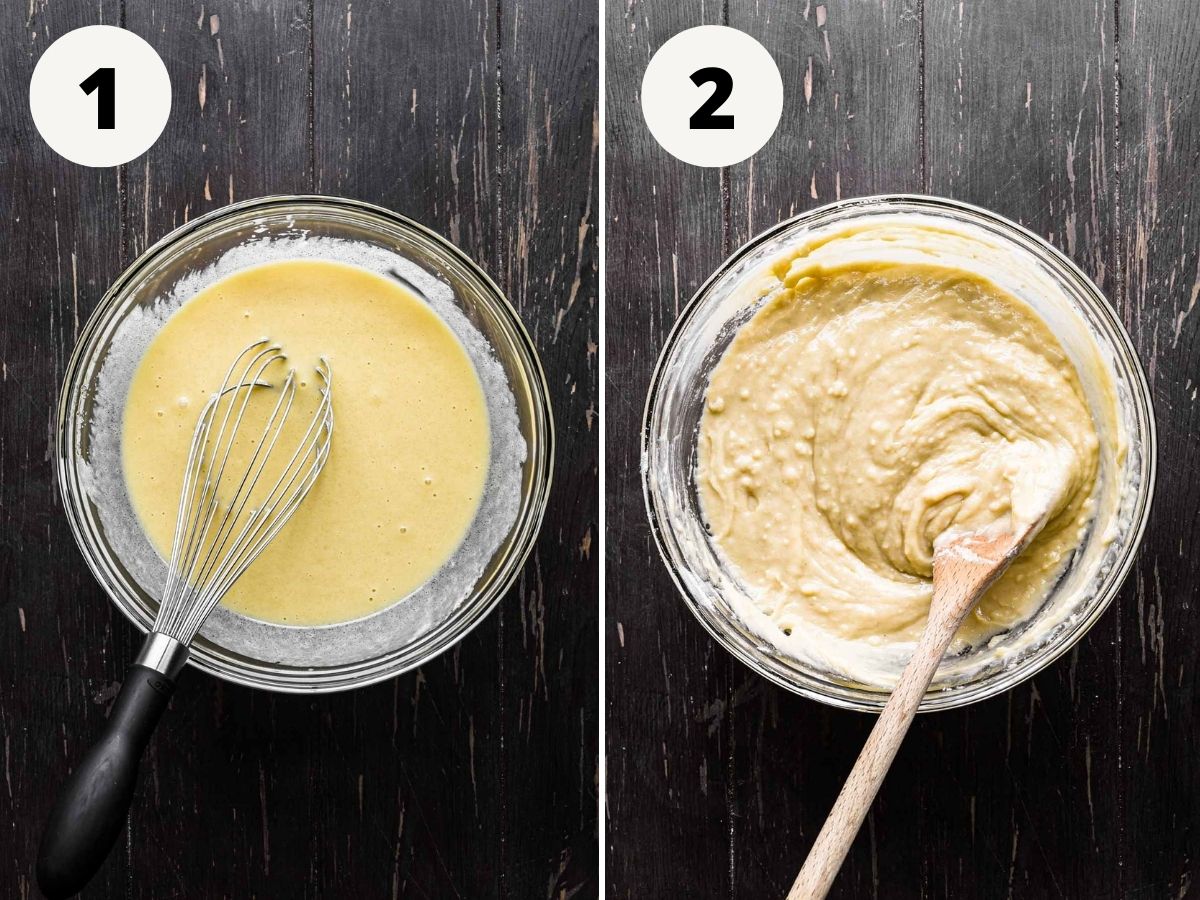
    1. Whip the goat cheese. To a food processor, add the goat cheese, extra virgin olive oil, honey, lemon zest, salt, and pepper. Whip together for 30-45 seconds, scraping down the edges half way through, until you get a smooth, creamy texture.

    Roasted grapes in a small baking dish.

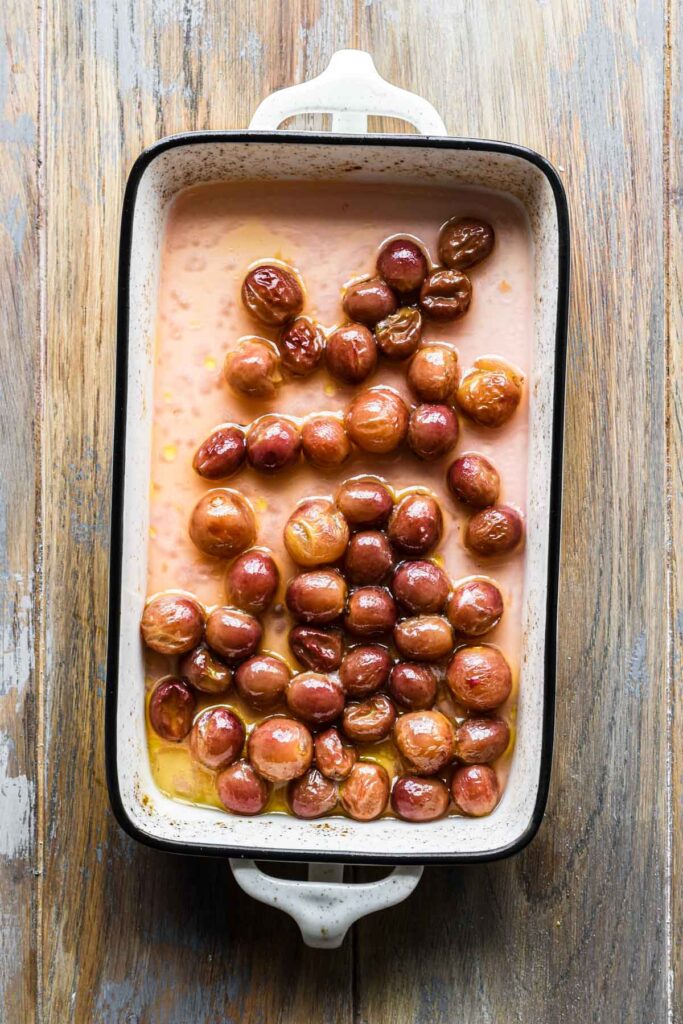
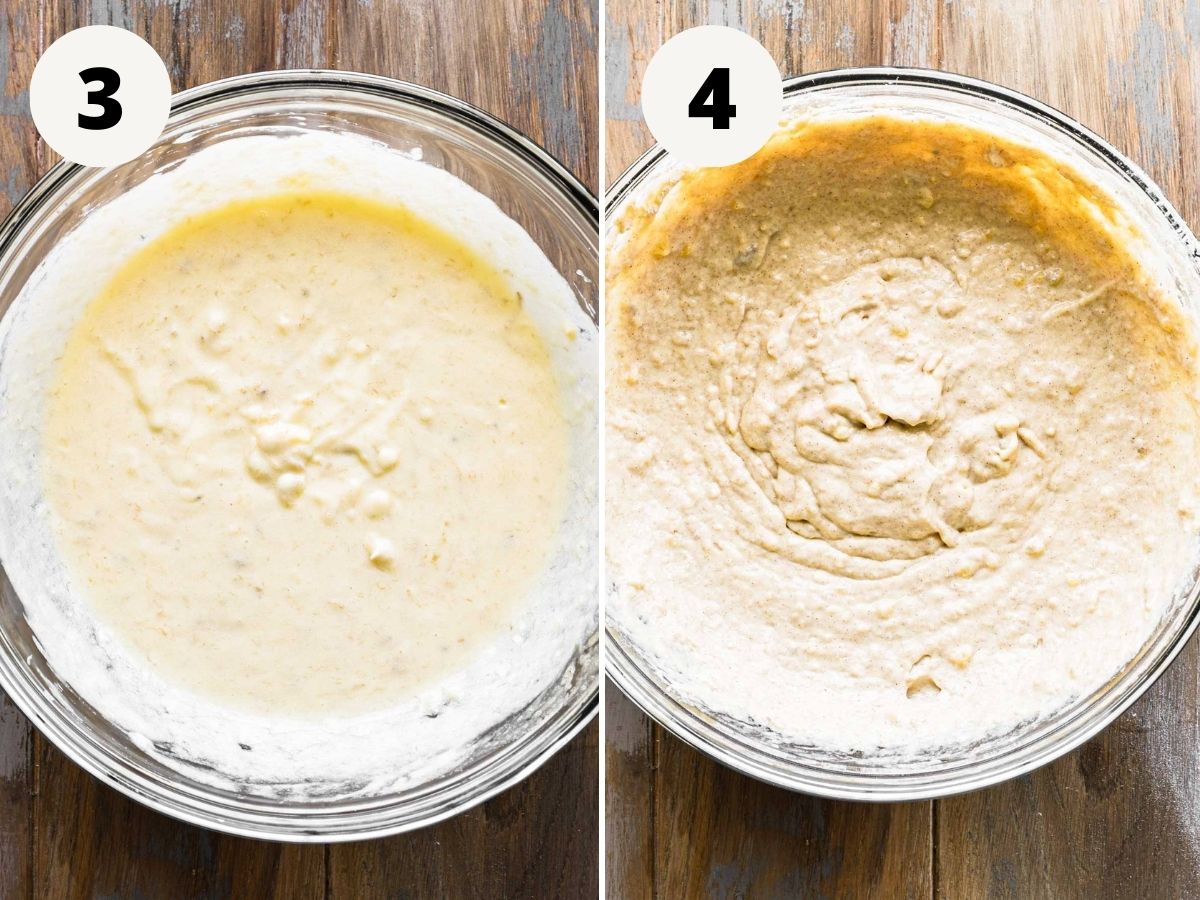
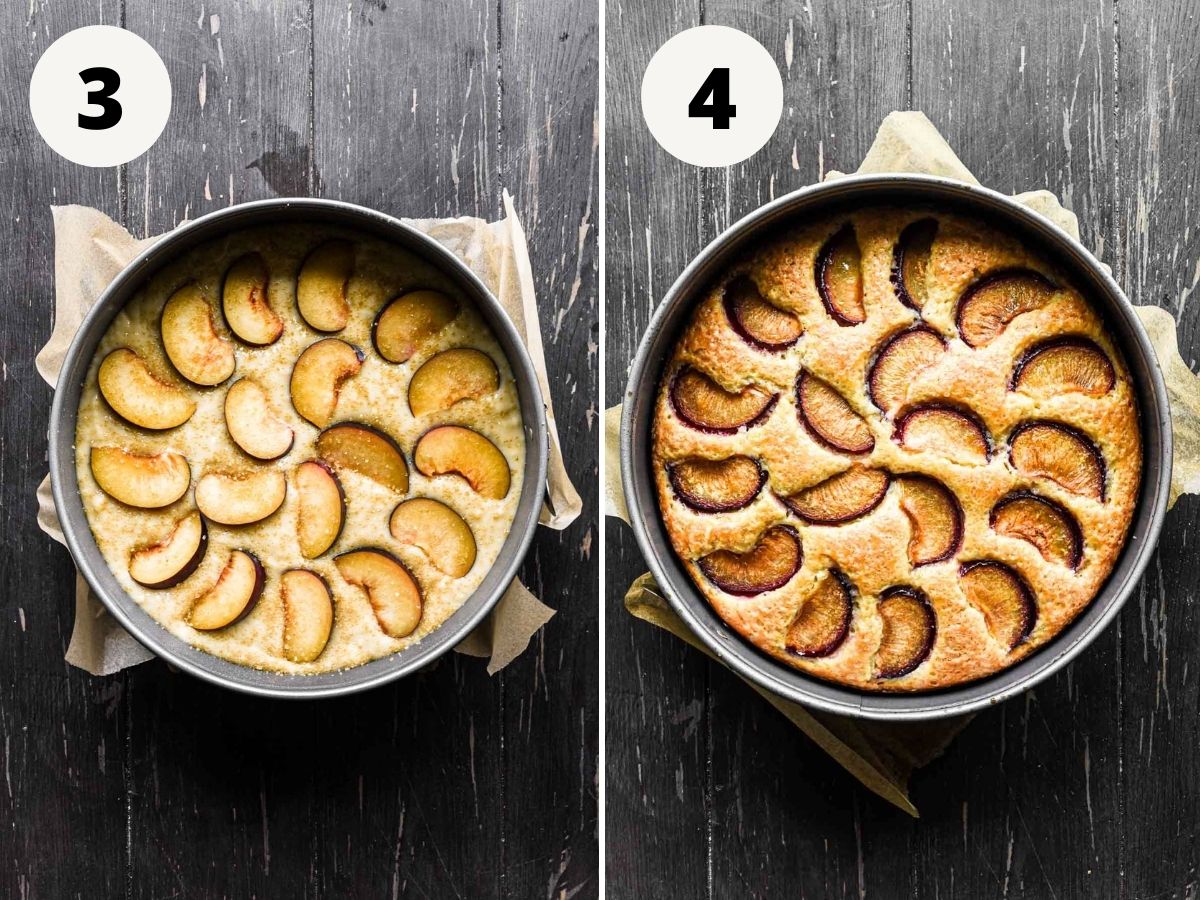
    2. Roast the grapes. In a small baking dish or on a baking sheet, toss the grapes with extra virgin olive oil and salt. Roast at 425°F for 15 minutes until they just start to burst.

    Whipped goat cheese on a plate with roasted grapes and basil on top.

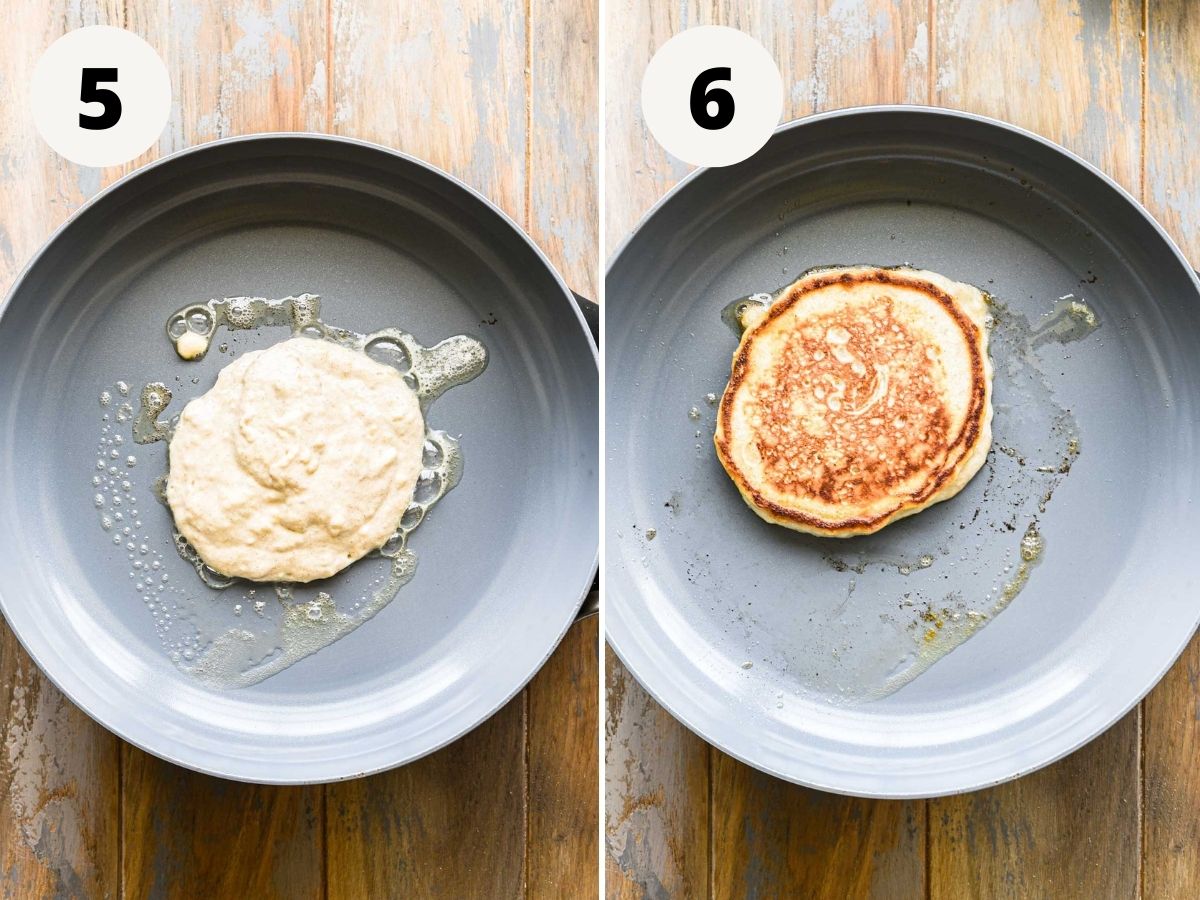
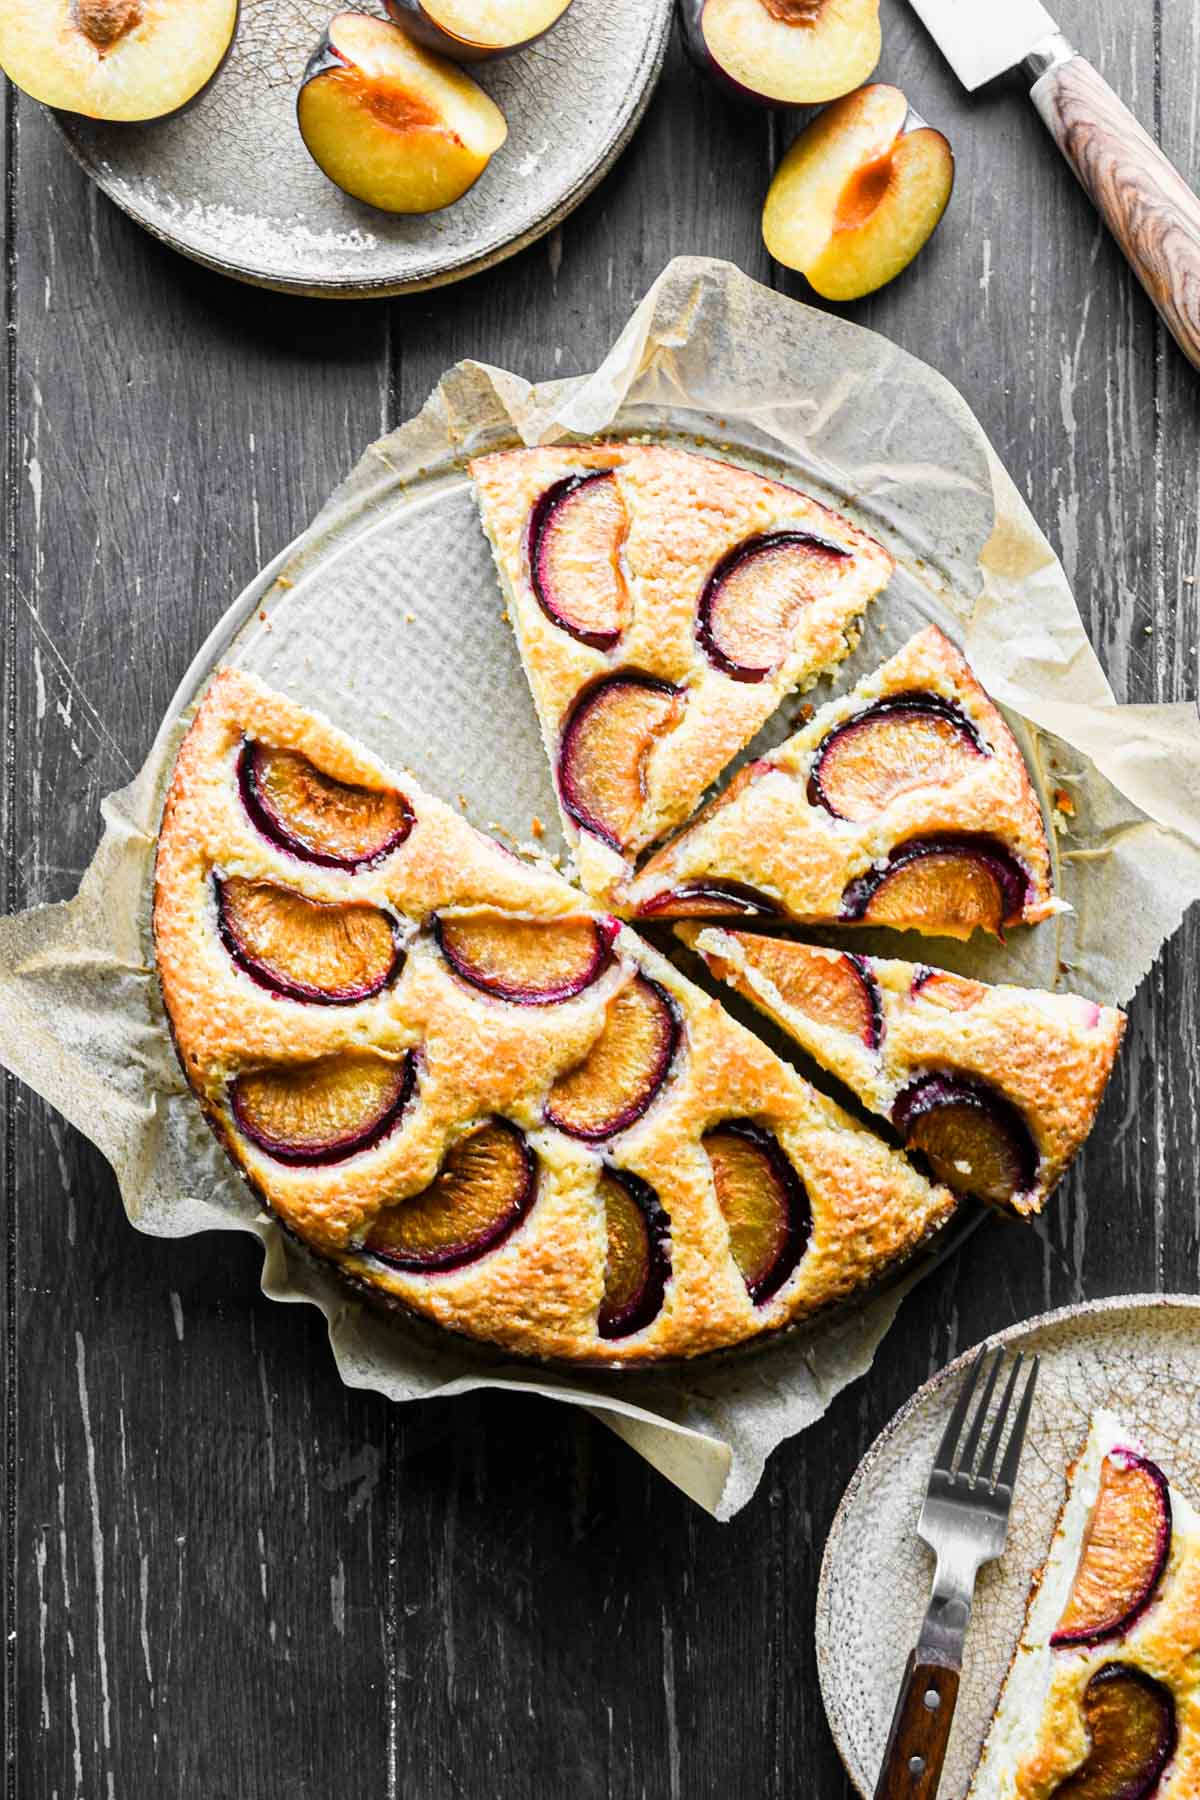
    3. Serve. Transfer the whipped goat cheese mixture to a plate with a rim or a shallow bowl, then spoon the roasted grapes over top. Sprinkle with fresh basil and a drizzle of honey or olive oil.

    Tips and tricks

    A few things to consider as you’re making this recipe! 

    • Let the goat cheese soften to room temperature for about 20-30 minutes before you whip it to help ensure it gets to the ultra creamy consistency.
    • Using a food processor will get you the smoothest whipped goat cheese, but you could also use a hand mixer/stand mixer or a whisk and some elbow grease. 
    • If you want the whipped goat cheese to stay pretty thick, skip the olive oil. 
    • This recipe can be served at room temperature or while the grapes are still warm.
    • Serve with freshly toasted bread, crackers, pita chips, or fresh veggies. You can also serve this dish crostini-style and spread the cheese on pieces of baguette and top each with a few grapes.

    Recipe variations

    While I love this recipe as is, you can play with the toppings for various occasions, peak produce timing, and the holiday season. Add or swap ingredients to mix it up or based on what’s available in your area / what you have on hand. Some suggestions are below!

    • Add toasted nuts on top such as walnuts or pecans 
    • Try roasted cherries, fruit preserves (such as fig jam or raspberry jam), or fresh fruit (such as figs or peaches)
    • Try other fresh herbs such as fresh thyme or fresh rosemary 
    • It is a whipped goat cheese recipe so making this swap will change the crux of the it but you could use ricotta instead 
    • Lean full-on into savory flavors and use caramelized onions, roasted garlic, roasted tomatoes, or roasted beets instead of grapes
    • Use hot honey or red pepper flakes to add a bit of spice
    • Add sour cream, greek yogurt, or cream cheese to the goat cheese (although I don't think it's needed!)

    Storage & make ahead

    • This recipe can be stored in the fridge for up to 2 days in an airtight container. 
    • If you need to prep in advance, you can whip the goat cheese and roast the grapes but store them separately until you’re ready to serve. And let the goat cheese come to room temp before you plate & serve so it loosens back up. 
    Dish on a serving platter with some scoops taken out.

    FAQs

    Is goat cheese vegetarian?

    Most are, but double check that it doesn’t have animal “rennet” in the ingredients. 

    Is goat’s cheese healthier than cow’s cheese?

    Goat cheese has more vitamins and minerals, and is a good source of calcium and healthy fats. It also is more easily digested than cow’s cheese, and tends to have less lactose. Sources: StyleCraze

    Are red or green grapes healthier?

    Red grapes are higher in antioxidants, but all grapes are pretty high in fiber and sugar. 

    Is goat cheese spreadable?

    Yes! More so when room temperature. But remember: goat cheese does not melt in a similar fashion to mozzarella or cheddar. 

    More dip recipes 

    • Feta dip in a bowl with honey and pistachios on top.
      Honey Whipped Feta Dip
    • Up close image of finished spinach artichoke dip.
      Baked Spinach Artichoke Dip (No Mayo)
    • Cannellini bean dip in a bowl.
      Spicy Cannellini Bean Dip
    • Close up shot of queso in a bowl surrounded by chips.
      Spicy Jalapeño Corn Queso Dip

    Did you make this recipe? Leave a rating and review below and tag me on social!

    📖 Recipe

    Whipped goat cheese on a serving platter with bread and crackers.

    Whipped Goat Cheese with Roasted Grapes

    This Whipped Goat Cheese with Roasted Grapes is a delicious creamy dip recipe – it's sweet, salty, tangy, and just all around perfect. The whipped goat cheese element on its own is the perfect base for so many topping ideas (suggestions below), but I particularly love the roasted grapes. 
    5 from 1 vote
    Print Pin Rate
    Prep Time: 10 minutes minutes
    Cook Time: 15 minutes minutes
    Total Time: 25 minutes minutes
    Servings: 4 servings

    Equipment

    • Food processor

    Ingredients

    For the whipped goat cheese

    • 8.5 oz goat cheese
    • 1 tbsp extra virgin olive oil
    • 2 tablespoon honey
    • ½ lemon zested
    • ½ teaspoon kosher salt
    • ½ teaspoon black pepper

    For the roasted grapes & topping

    • 1 cup grapes
    • 1 tablespoon extra virgin olive oil
    • ½ teaspoon kosher salt
    • 2 tablespoon fresh basil chopped

    Instructions

    • Preheat your oven to 425°F.
    • Whip the goat cheese. To a food processor, add the goat cheese, extra virgin olive oil, honey, lemon zest, salt, and pepper. Whip together for 30-45 seconds, scraping down the edges half way through, until you get a smooth, creamy texture.
    • Roast the grapes. In a small baking dish or on a baking sheet, toss the grapes with extra virgin olive oil and salt. Roast at 425°F for 15 minutes until they just start to burst.
    • Serve. Transfer the whipped goat cheese mixture to a plate with a rim or a shallow bowl, then spoon the roasted grapes over top. Sprinkle with fresh basil and a drizzle of honey or olive oil.

    Video

    Nutrition Estimate

    Calories: 284kcal | Carbohydrates: 17g | Protein: 12g | Fat: 20g | Saturated Fat: 10g | Polyunsaturated Fat: 1g | Monounsaturated Fat: 8g | Cholesterol: 28mg | Sodium: 805mg | Potassium: 118mg | Fiber: 1g | Sugar: 15g | Vitamin A: 704IU | Vitamin C: 9mg | Calcium: 96mg | Iron: 2mg
    Course: Appetizer, Snack
    Cuisine: American
    Keyword: Cheese, Cheese dip, goat cheese
    Author: Haley

    Easy Scrambled Egg Tacos

    Close up image of tacos on a platter.

    These easy homemade Scrambled Egg Tacos are so delicious and a perfect quick and easy breakfast. They’re made with fluffy scrambled eggs and a potato onion hash, and then served with avocado, salsa, and a drizzle of your favorite hot sauce. 

    Close up image of tacos on a platter.
    [feast_advanced_jump_to]

    Ingredients

    Some very simple ingredients come together to make delicious potato and egg breakfast tacos!

    Ingredients for scrambled egg tacos laid out on a table.
    • Tortillas: Flour tortillas and corn tortillas both work for this recipe! Corn tortillas are a bit more fragile, and flour are a bit more doughy. It’s personal preference, but for me, I’ll usually go flour tortilla for breakfast tacos. 
    • Eggs: Large pasture raised eggs. The best eggs to get are organic pasture raised eggs - which means the chickens are fed organic food, and have the ability to roam around outside on a large pasture. Free range does not necessarily mean the chickens are outside, and if they are, it’s still a smaller confined space. Free range is still better than cage free or caged. 
    • Potato: One average sized russet potato. Peeled! 
    • Onion: Half a yellow onion, minced very finely. This gets sautéd with the potatoes. 
    • Avocado: A nice soft avocado to serve. 
    • Salsa: Your favorite salsa - either homemade or store bought - is great here. Or leave it off if you don’t want it! 
    • Spices: Kosher salt, black pepper, smoked paprika, and garlic powder to flavor the potatoes. The smoked paprika in particular gives great color and a warm smokiness that pairs deliciously with salsa. 
      • If you don't have smoked paprika you could use a bit of chili powder or chipotle powder. 
    • Optional: chives (or green onions) and lime juice are great to sprinkle and squeeze on top. 

    Step by step instructions

    These delicious breakfast tacos come together super quick, instructions can be found below and in the recipe card below with quantities. 

    Sautéd onions and potatoes in a skillet.

    1. Cook the potatoes and onions. In a large skillet (stainless steel or non stick are best), warm the oil on medium heat on the stove top. Add the diced potato, minced onion, salt, pepper, smoked paprika, and garlic powder. Cook until the potatoes are golden brown and tender - about 15 minutes. Remove and set aside.

    Scrambled eggs in a skillet.

    2. Cook the eggs. To the same skillet, add the eggs and gently scramble right in the pan using a rubber spatula. Add a pinch of salt and pepper. Cook for a few minutes, stirring constantly, until the egg whites and yolks are set. 

    Assembled scrambled egg tacos.

    3. Assemble. Once everything is cooked, distribute evenly amongst the tortillas and top with avocado slices and a drizzle of salsa. Top with a squeeze of lime and a sprinkle of chives if desired. 

    Tips and tricks

    These are some easy breakfast tacos that are only made easier with the tips and tricks below. 

    • I do a cheat scramble for these scrambled egg tacos which means I crack the eggs right into the pan and basically scramble gently with the spatula. You could alternatively crack the eggs into a small bowl and whisk together for a full scramble but I didn’t want to dirty another bowl. 
    • If you want to speed up cooking the potatoes: add a tablespoon or two of water, put a lid on, and turn the heat to low to let them steam. 
      • Similarly, if the pan gets too many little burnt bits, add a bit of water to deglaze and scrape it up.
    • A non stick pan or properly heated stainless steel skillet will be best to use for this so the eggs don’t stick (or at least stick as little as they can). 
    • To test if the potatoes are tender, poke one or two with a fork - if it slides in easily, they’re ready to go! You could also just try one for texture. 
    • Pro tip: warm the tortillas to take these to the next level. It seems menial, but makes all the difference! You could also char the tortillas on an open flame. 
    • If you have time, making your own tortillas is very worth it.

    Recipe customizations

    This scrambled egg taco recipe is super flavorful and is a great base - add to it some more of your favorite things to take it up another notch.

    • Fry your eggs instead of scrambling - one egg per tortilla 
    • Add a bit of cheese - cheddar or queso fresco would be great
    • Add a bit of meat - chorizo, breakfast sausage (or your favorite type of sausage) or bacon would be delicious
    • Use cilantro instead of chives 
    • Serve with sour cream or a lime crema 
    • Add some pickled red onions, black beans, pico de gallo, or any of your other favorite toppings
    • A drizzle of hot sauce is great to add a little kick and wake you up. I love Cholula. 

    Storage 

    • Store leftovers in an airtight container in the fridge for up to 4 days.
    • Reheat in the microwave for 1-2 minutes until warmed through.
    • To freeze - only freeze with the tortilla, eggs, and potato mixture. Let them cool completely and wrap tightly in tin foil. Freeze for up to 3 months. To defrost - unwrap and warm in the microwave. 

    FAQs 

    Is a flour or corn tortilla healthier?

    Corn tortillas tend to be a bit healthier because they are typically made with whole grains as opposed to flour.

    Are corn tortillas gluten free?

    Yes, they are naturally gluten free. There are also great gluten free flour tortilla options on the market right now, such as from the brand Siete. 

    More easy breakfast recipes 

    • Stack of banana buttermilk pancakes.
      Banana Buttermilk Pancakes
    • Close up of breakfast skillet with eggs, bacon, and potatoes.
      Potato, Egg and Bacon Breakfast Skillet
    • straight-on image of a slice of brioche french toast casserole with blueberries.
      Brioche French Toast Casserole
    • Close up image of the finished dutch baby with whipped cream and berries.
      Fluffy Buttermilk Dutch Baby Pancake

    Did you make this recipe? Leave a rating and review below and tag me on social!

    📖 Recipe

    Close up image of tacos on a platter.

    Easy Scrambled Egg Tacos

    These easy homemade Scrambled Egg Tacos are so delicious and a perfect quick and easy breakfast. They’re made with fluffy scrambled eggs and a potato onion hash, and then served with avocado, salsa, and a drizzle of your favorite hot sauce. 
    5 from 2 votes
    Print Pin Rate
    Prep Time: 10 minutes minutes
    Cook Time: 20 minutes minutes
    Total Time: 30 minutes minutes
    Servings: 3 servings

    Ingredients

    • 6 flour tortillas street taco size
    • 4 large eggs
    • 1 russet potato peeled and diced
    • ½ yellow onion minced
    • 2 teaspoon kosher salt divided
    • 1 teaspoon black pepper
    • ½ teaspoon smoked paprika
    • ½ teaspoon garlic powder
    • 1 avocado
    • ¼ cup salsa
    • 2 teaspoon chives
    • fresh lime

    Instructions

    • In a large skillet warm the oil on medium heat on the stove top. Add the diced potato, minced onion, 1 teaspoon salt, pepper, smoked paprika, and garlic powder. Cook until the potatoes are golden brown and tender - about 15 minutes. Remove and set aside.
    • To the same skillet, add the eggs and gently scramble right in the pan using a rubber spatula. Add remaining teaspoon of salt and pepper. Cook for a few minutes, stirring constantly, until the egg whites and yolks are set. About 3-5 minutes.
    • Once everything is cooked, distribute evenly amongst the tortillas and top with avocado slices and a drizzle of salsa. Top with a squeeze of lime and a sprinkle of chives if desired. 

    Video

    Notes

    • I do a cheat scramble for this recipe which means I crack the eggs right into the pan and basically scramble gently with the spatula. You could alternatively crack the eggs into a small bowl and whisk together for a full scramble but I didn’t want to dirty another bowl. 
    • If you want to speed up cooking the potatoes: add a tablespoon or two of water, put a lid on, and turn the heat to low to let them steam. 
      • Similarly, if the pan gets too many little burnt bits, add a bit of water to deglaze and scrape it up.
    • A non stick pan or properly heated stainless steel skillet will be best to use for this so the eggs don’t stick (or at least stick as little as they can). 
    • To test if the potatoes are tender, poke one or two with a fork - if it slides in easily, they’re ready to go! You could also just try one for texture. 
    • Pro tip: warm the tortillas to take these to the next level. It seems menial, but makes all the difference! You could also char the tortillas on an open flame. 

    Nutrition Estimate

    Calories: 449kcal | Carbohydrates: 53g | Protein: 16g | Fat: 20g | Saturated Fat: 5g | Polyunsaturated Fat: 4g | Monounsaturated Fat: 10g | Trans Fat: 0.02g | Cholesterol: 218mg | Sodium: 2227mg | Potassium: 884mg | Fiber: 9g | Sugar: 5g | Vitamin A: 717IU | Vitamin C: 13mg | Calcium: 154mg | Iron: 4mg
    Course: Breakfast
    Cuisine: American, Mexican
    Keyword: Breakfast, Eggs, Tacos
    Author: Haley

    Easy Shredded Rotisserie Chicken Sliders

    Overhead close up shot of two sliders on their side.

    These Shredded Rotisserie Chicken Sliders could not be easier or more delicious. They’re made by layering spicy mayo, shredded chicken, cheese, onion, pickles, and tomatoes. They’re then topped with an out-of-this-world herb garlic butter and baked to perfection. These toppings are a fun approach that’s a bit different than the classic BBQ chicken sliders or buffalo chicken sliders. 

    Close up image of two sliders on their side in baking dish.
    [feast_advanced_jump_to]

    Ingredients

    A bunch of store bought ingredients come together to make these absolutely astounding easy shredded chicken sliders. They are also relatively customizable so it's a great way to use up leftover produce that's nearing its end in the fridge. 

    Ingredients needed for rotisserie chicken sliders.
    • Kings Hawaiian rolls: One package of the standard size original sweet Hawaiian rolls. These rolls are a little sweet and so buttery, they’re so good and perfect slider buns.
    • Rotisserie chicken: A simple store-bought rotisserie chicken. You could also use any other leftover chicken, just shred it up. This is a great way to reinvigorate leftover chicken breasts or chicken thighs. 
    • Chipotle mayo: Grab a chipotle mayo / spicy mayo / sriracha mayo at your grocery store - anything in this realm will be great. You could also make it yourself by combining mayo and a hot sauce such as sriracha. Start 50/50 then adjust to taste.  
    • Cheese: I used smoked provolone cheese, but any cheese that melts well would be great here. Regular provolone, cheddar cheese, pepper jack cheese, monterey jack cheese, mozzarella cheese, swiss cheese, etc. You could do slices of cheese or shredded cheese. 
    • Pickles: Sliced rounds are ideal shape wise for this recipe, but flavor wise, use your favorite! Bread and butter pickles would be great, and I used horseradish pickles for a  little extra kick. 
    • Onion: Thinly sliced red onions. Yellow onion is also fine. 
    • Tomatoes: One big beefsteak or heirloom tomato sliced thinly. 
    • Butter: Unsalted butter is ideal. If you only have salted, just omit the added salt. 
    • Garlic: Minced pretty finely or grated. Garlic powder is also fine if need be. 
    • Parsley: Fresh parsley is ideal but dried also works. 2 tablespoon fresh parsley = 2 teaspoon dried parsley. Italian seasoning would also be fine. 

    Step by step instructions

    This recipe is really all about assembly - so perfect for hosting a crowd, game day, or even an easy dinner. Plus, you’ll have some great leftovers. 

    1. Cut the bread. Using a serrated knife, cut the Kings Hawaiian rolls in half lengthwise. Place in a baking dish

    2. Add spicy mayo. Spread an even layer of spicy mayo on the bottom half of the bread. 

    Slicing the bread and adding the spicy mayo.

    3. Add the chicken. Scatter the shredded rotisserie chicken evenly over the top of the spicy mayo.

    4. Add the cheese. Place the sliced cheese on top of the chicken.

    Adding shredded chicken and cheese.

    5. Add the rest of the toppings. Layer on the sliced tomatoes, onions, and pickles.

    6. Make the butter mixture. In a small bowl, combine melted butter, grated garlic, fresh chopped parsley, and salt. 

    Adding the remaining toppings and making garlic butter.

    7. Top the rolls. Put the top half of the rolls on. Then spread the garlic butter evenly on top of the rolls using a pastry brush.

    8. Bake! Cover the baking dish with aluminum foil and bake at 350°F for 20 minutes covered, and then 5 minutes uncovered until golden brown. 

    Before and after baking sliders.

    Tips and tricks

    Tips, tricks, and some customizations can be found below for these rotisserie chicken Hawaiian sliders! 

    • Tips to shred chicken easily – you could classically use two forks or your fingers, but if you have a hand mixer or stand mixer that also works really well. 
    • The order of the toppings ultimately doesn’t matter, I just find the sliders are easier to handle in the order that I’ve outlined above. 
    • If you’re planning ahead, experiment with using homemade pickles! 
    • If rotisserie chicken isn’t your thing, some sliced meats would also be great on here. Roast beef, prosciutto, ham, salami, etc. 
    • This recipe easily doubles if you’re serving a large crowd. 
    • I don't think it needs it, but if you're so inclined, mix the rotisserie chicken with your favorite bbq sauce or buffalo sauce. 
    • Add some poppy seeds to the garlic butter mixture if you like that look.

    Sides for chicken sliders 

    These rotisserie chicken sliders are quite filling, but if you’re serving a crowd, the whole family, or any other situation in which you're using them for a complete meal, below are some other dishes that are great to serve alongside. 

    • Go on the lighter side with a salad - caesar salad or arugula salad
    • Some snackable items such as mango habanero salsa 
    • Another carby item such as these puff pastry spinach and ricotta pinwheels 
    • Add a veggie like these honey sriracha brussels sprouts 

    Storage and reheating

    • Store in an airtight container in the fridge for up to 5 days.
    • Reheat in the oven at 350°F covered for 10-15 minutes.
    Rotisserie chicken sliders on a plate.

    FAQs

    Is rotisserie chicken healthy?

    Rotisserie chicken is a healthier option to some other methods of cooking. However, when you buy store-bought, it’s hard to regulate just how healthy it is. 

    Is the slider the same thing as a burger?

    Sliders are mini burgers aka a cute little mini sandwiches. 

    Can I prep these in advance? 

    Yes, they can be prepped 1 day in advance. Store covered in the fridge. The next day take them out of the fridge 30 minutes before you are going to bake them, then bake as instructed. 

    More chicken recipes

    • Finished chicken and leeks in a bowl.
      Baked Chicken and Leeks
    • Close up shot of finished dish with a slice removed.
      Puff Pastry Chicken Pot Pie
    • Up close of the wings on a round serving plate.
      Air Fryer Lemon Pepper Chicken Wings
    • Thumbnail
      Instant Pot Pulled BBQ Chicken

    📖 Recipe

    Overhead close up shot of two sliders on their side.

    Easy Shredded Rotisserie Chicken Sliders

    These Shredded Rotisserie Chicken Sliders could not be easier or more delicious. They’re made by layering spicy mayo, shredded chicken, cheese, onion, pickles, and tomatoes. They’re then topped with an out-of-this-world herb garlic butter and baked to perfection.
    5 from 5 votes
    Print Pin Rate
    Prep Time: 15 minutes minutes
    Cook Time: 25 minutes minutes
    Total Time: 40 minutes minutes
    Servings: 12 servings

    Ingredients

    • 1 package Sweet Hawaiian rolls
    • 1 rotisserie chicken shredded
    • 3 tablespoon spicy mayo
    • 4 slices smoked provolone cheese
    • ¼ cup sliced pickles
    • 1 tomato thinly sliced
    • ½ red onion thinly sliced
    • 2 tablespoon unsalted butter
    • 2 cloves garlic grated
    • 2 tablespoon fresh parsley chopped
    • ½ teaspoon kosher salt

    Instructions

    • Preheat your oven to 350°F.
    • Using a serrated knife, cut the Kings Hawaiian rolls in half lengthwise. Place in a baking dish.
    • Spread an even layer of spicy mayo on the bottom half of the bread. 
    • Scatter the shredded rotisserie chicken evenly over the top of the spicy mayo.
    • Place the sliced cheese on top of the chicken.
    • Layer on the sliced tomatoes, onions, and pickles.
    • In a small bowl, combine melted butter, minced garlic, fresh chopped parsley, and salt. 
    • Put the top half of the rolls on. Then spread the garlic butter evenly on top of the rolls using a pastry brush.
    • Cover the baking dish with aluminum foil and bake at 350°F for 20 minutes covered, and then 5 minutes uncovered until golden brown. 

    Video

    Notes

    • Tips to shred chicken easily – you could classically use two forks or your fingers, but if you have a hand mixer or stand mixer that also works really well. 
    • The order of the toppings ultimately doesn’t matter, I just find the sliders are easier to handle in the order that I’ve outlined above. 
    • If you’re planning ahead, experiment with using homemade pickles! 
    • If rotisserie chicken isn’t your thing, some sliced meats would also be great on here. Roast beef, prosciutto, ham, salami, etc. 
    • This recipe easily doubles if you’re serving a large crowd. 
    • I don't think it needs it, but if you're so inclined, mix the rotisserie chicken with your favorite bbq sauce or buffalo sauce. 
    • Add some poppy seeds to the garlic butter mixture if you like that look.

    Nutrition Estimate

    Calories: 153kcal | Carbohydrates: 2g | Protein: 16g | Fat: 9g | Saturated Fat: 4g | Polyunsaturated Fat: 0.1g | Monounsaturated Fat: 1g | Trans Fat: 0.1g | Cholesterol: 59mg | Sodium: 375mg | Potassium: 49mg | Fiber: 0.3g | Sugar: 1g | Vitamin A: 261IU | Vitamin C: 3mg | Calcium: 54mg | Iron: 0.1mg
    Course: Appetizer, Dinner
    Cuisine: American
    Keyword: Chicken, rotisserie chicken, sliders
    Author: Haley

    Spicy Pickled Red Onions

    Spicy pickled red onions in a jar.

    These Spicy Pickled Red Onions are the perfect crunchy tangy hit of flavor that is a delicious topping on so many dishes. These in particular are a little spicy thanks to an extra kick from jalapeños, and they turn a beautiful pink color. 

    Spicy pickled red onions in a jar.
    [feast_advanced_jump_to]

    Ingredients

    Simple recipe, simple ingredients! See them all below:

    Spicy pickled red onions ingredients.
    • Red onion: One medium or two small red onions sliced – ¼” thin.
    • Jalapeño: Depending on the spice level you want, use either part of or one full jalapeño sliced thin. If you want it to be spicier, use a habanero. I used half a large jalapeño. 
    • Water: To make half of the base of the pickling liquid.
    • Vinegar: To make the other half of the pickling liquid, vinegar brings the tangy flavor. I like a combination of classic distilled white vinegar and apple cider vinegar which adds a little more flavor.
    • Garlic: Add in a single crushed garlic clove so its flavor infuses in.
    • Sugar: A bit of granulated sugar balances the tartness of the vinegar. You could use pure maple syrup or honey instead. 
    • Salt: Kosher salt is preferred. Salt brings out the flavor in everything, including pickled onions. 

    Step by step instructions

    Pickling vegetables is one of the easiest things, it just takes a little preparation and planning to make it the day before you want to eat them! Below are step by step instructions. 

    1. Make the pickling liquid (aka pickling brine). In a small sauce pan, combine the water, distilled vinegar, apple cider vinegar, sugar, and salt. Warm on medium heat until the sugar dissolves. Take it off the heat and let it cool to room temperature.

    2. Combine. In a large enough jar with a tight fitting lid, add all the sliced onions, jalapeño, and smashed garlic. Pour over the cooled pickling brine. Push the onions down if needed to cover them fully in the liquid. Place in the fridge. 

    Making the pickling brine and combining it with the onions and jalapenos.

    3. Wait. Let the pickling do its thing for at least 24 hours. Then enjoy! 

    Onions in a jar to be pickled.

    Tips and tricks

    Making this pickled onion recipe is hopefully an easy process, but if you’re unsure about anything, read the tips and tricks below!

    • The simplest way to avoid crying while cutting onions is to use a sharp knife. 
    • If you’re not confident in your knife skills, try using a mandoline to slice the onion. 
    • The thinner you slice your onions the quicker they’ll pickle. I like to do roughly ¼ inch thin because they pickle in about 24 hours and are thick enough to keep their texture. 
    • To get consistent slices, cut the onion in half, cut off the root and tip, then peel back the outer layer. Place the halves center down and slice against the grain (so not where the initially established opening is). 
      • If you cut the open side, you’ll get some slices that are really long and some that are really short.
    • Any glass jar with a lid works, but I specifically like to use wide mouth mason jar or weck jar for pickling. 
    • If you want the flavor of the jalapeño but not the spice, slice the pepper in half and take out the seeds and ribs before adding into the jar. 
    • Make sure the onions and jalapeños are fully submerged in the pickling liquid before storing away. 
    • If you need pickled onions quick, check out this quick pickled red onions recipe. 

    What to eat pickled red onions with

    My oh my pickled red onions are good on so many foods. Below are some favorites:

    • Breakfast sandwich 
    • Avocado toast
    • Pulled pork sandwich 
    • Veggie burger 
    • Shrimp tacos or chicken tacos  
    • Buddha bowls or burrito bowls

    Recipe customizations

    There are a few things you could add to this spicy pickled red onions recipe to make it more your own, below are some suggestions. 

    • ​Add more garlic cloves
    • Use a different pepper or even red pepper flakes 
    • Add whole spices such as black peppercorns, cloves, or bay leaf 
    • Add fresh herbs such as dill or oregano 
    • Play around with different types of vinegar - rice vinegar or red wine vinegar are other good options 

    Storage

    Keep in an airtight container in the fridge.

    FAQs

    How long do pickled onions last?

    They last up to 3 weeks in the fridge. If you do a proper pickling process they can last unopened for 1 year. Check out more about how to can here. 

    Can I use white onions or yellow onions for pickling?

    Yes - they just won’t have the same vibrant pink color as red onions. 

    How spicy are jalapeño peppers?

    Jalapeños are medium-spicy compared to other peppers. They are 2,500 to 5,000 on the Scoville scale. Poblanos are milder, cayenne is spicier. 

    More onion recipes

    • Finished french onion pasta in a bowl.
      One Pot French Onion Pasta
    • Sour cream and onion dip in a bowl with a ruffled chip dipped in.
      Sour Cream and Onion Dip
    • Sour cream and onion potato salad in a bowl for serving.
      Sour Cream and Onion Potato Salad {No Mayo}
    • Thumbnail
      Caramelized Onion and Bacon Pizza

    Did you make this recipe? Leave a rating and review below and tag me on social!

    📖 Recipe

    Spicy pickled red onions in a jar.

    Spicy Pickled Red Onions

    These Spicy Pickled Red Onions are the perfect crunchy tangy hit of flavor that is a delicious topping on so many dishes. These in particular are a little spicy thanks to an extra kick from jalapeños, and they turn a beautiful pink color. 
    5 from 1 vote
    Print Pin Rate
    Prep Time: 10 minutes minutes
    Resting time: 1 day day
    Total Time: 1 day day 10 minutes minutes
    Servings: 10 servings

    Ingredients

    • ½ cup water
    • ¼ cup distilled white vinegar
    • ¼ cup apple cider vinegar
    • 1 tablespoon granulated sugar
    • 1 teaspoon kosher salt
    • 1 medium red onion sliced ¼" thin
    • 1 garlic clove smashed
    • ½ jalapeño sliced

    Instructions

    • Make the pickling liquid – In a small sauce pan, combine the water, distilled vinegar, apple cider vinegar, sugar, and salt. Warm on medium heat until the sugar dissolves. Take it off the heat and let it cool to room temperature.
    • In a large enough jar with a tight fitting lid, add all the sliced onions, jalapeño, and smashed garlic. Pour over the cooled pickling brine. Push the onions down if needed to cover them fully in the liquid. Place in the fridge. 
    • Let the pickling do its thing for at least 24 hours. Then enjoy! 

    Video

    Notes

    • The simplest way to avoid crying while cutting onions is to use a sharp knife. 
    • If you’re not confident in your knife skills, try using a mandoline to slice the onion. 
    • The thinner you slice your onions the quicker they’ll pickle. I like to do roughly ¼ inch thin because they pickle in about 24 hours and are thick enough to keep their texture. 
    • To get consistent slices, cut the onion in half, cut off the root and tip, then peel back the outer layer. Place the halves center down and slice against the grain (so not where the initially established opening is). 
      • If you cut the open side, you’ll get some slices that are really long and some that are really short.
    • Any glass jar with a lid works, but I specifically like to use wide mouth mason jar or weck jar for pickling. 
    • If you want the flavor of the jalapeño but not the spice, slice the pepper in half and take out the seeds and ribs before adding into the jar. 
    • Make sure the onions and jalapeños are fully submerged in the pickling liquid before storing away. 

    Nutrition Estimate

    Calories: 12kcal | Carbohydrates: 2g | Protein: 0.1g | Fat: 0.02g | Saturated Fat: 0.01g | Polyunsaturated Fat: 0.004g | Monounsaturated Fat: 0.001g | Sodium: 234mg | Potassium: 24mg | Fiber: 0.2g | Sugar: 2g | Vitamin A: 8IU | Vitamin C: 2mg | Calcium: 4mg | Iron: 0.05mg
    Course: Condiment
    Cuisine: American
    Keyword: Pickled, Pickled Onions
    Author: Haley

    Banana Buttermilk Pancakes

    Stack of banana buttermilk pancakes.

    These Banana Buttermilk Pancakes are so fluffy and perfectly tender. They’re made from a simple pancake batter that has mashed bananas so the banana flavor is evenly dispersed throughout – with no added sugar, the bananas sweeten it up just enough. Serve with a pat of butter and some maple syrup for a perfectly simple breakfast. 

    Stack of banana buttermilk pancakes.
    [feast_advanced_jump_to]

    Ingredients

    Most ingredients for these easy banana pancakes you’ll likely have on hand. If anything you’ll probably have to buy some buttermilk! The biggest planning element is getting your bananas just ripe enough.

    Ingredients for buttermilk banana pancakes.
    • Bananas: Half a cup of mashed banana so it incorporates into the batter and sweetens it up! Either one large banana or two small. Similar to banana bread, you want to use overripe bananas for this - so ones with a bunch of brown specks. As bananas ripen, they get even sweeter and the texture is more mashable. 
    • Flour: Standard all purpose flour. Spoon and level to measure! 
    • Baking powder: This is the leavening agent in the recipe. Baking powder has both the sodium bicarbonate and the acid (whereas baking soda just has the sodium bicarbonate), but the amount of buttermilk we use doesn’t offset the acidity enough, so we need a little more from the baking powder. 
    • Buttermilk: A little thick, a little tangy, it’s a perfect balance with the sweet bananas. 
    • Cinnamon: This warm spice makes all pancakes better in my opinion. 
    • Vanilla extract: Similar to cinnamon, just to bring a little warm flavor. 
    • Egg: One large egg to bind everything together.
    • Salt: A bit of kosher salt to balance out and bring out the flavors.
    • Butter: Unsalted butter gets used to cook the pancakes. 

    Step by step instructions

    Instructions below will teach you how to make the best buttermilk banana pancakes. Full ingredient quantities are in the recipe card at the end of this post. 

    Overview: make the buttermilk batter by mixing all ingredients together in a large bowl. Melt butter over medium heat. Add ⅓ cup of batter, cook 3 minutes on both sides. 

    1. Mash the banana. Place the banana in a medium bowl. Smush it with the back of a fork until fully mashed. 

    2. Add the egg. Crack the egg into the bowl with the banana. Whisk until well combined. 

    Mashing bananas and mixing with eggs.

    3. Add the rest of the wet ingredients. To the bowl with the banana mixture, add the buttermilk and vanilla. Whisk until well combined. 

    4. Add the dry ingredients. Add the flour, baking powder, cinnamon, and vanilla. Whisk until just combined - it’ll be a little lumpy because of the texture from the banana. 

    Mixing and making the batter.

    5. Pour the batter. Heat a medium sized non-stick pan over medium heat. Add a bit of butter to the hot skillet. Once the butter is melted and sizzling gently, scoop ⅓ cup of batter into the skillet. Cook on this side for about 3 minutes – until the edges have set, a few little bubbles are forming on the surface, and the side that is down is golden brown. 

    6. Flip. Once it's ready, carefully flip the pancake to cook the second side. Cook about 3 minutes and remove once golden brown. Add more butter if needed, and repeat until you've worked through all the batter.

    Cooking and flipping the pancakes.

    Tips and tricks

    • To mash the bananas use either the back of a fork or a mini potato masher. 
    • Don’t over mix the batter! If you over mix, you'll have flatter, more rubbery pancakes. Mix until everything is just combined and a few small lumps remain. 
    • If the butter starts to brown or burn in the pan, wipe it out with a dry paper towel then replace it by adding a bit more.
    • Watch the temperature of your skillet – if the butter immediately browns when it goes into the pan your pan is too hot. Lower the temperature. You'll want to be around medium / medium-low heat to make pancakes. 
    • Pancakes are ready to flip when the edges are set and a few small bubbles start to form on the surface. 
    • To make homemade buttermilk – add 1 tablespoon of lemon juice to a measuring cup, then add just enough whole milk or 2% milk to hit the 1 cup mark. Stir it together, and let it sit for 10 minutes. Then it’s ready to use! 
    • If you have a non-stick griddle, definitely use that instead of a skillet! There's more surface area so you can cook more pancakes at a time.
    • If you don't want to use butter you could alternatively spray a bit of nonstick cooking spray. 

    Banana pancake mix-ins

    I like to keep these banana pancakes as is and play with the toppings (see below for some suggestions), but if you want to spice them up a bit below are some mix-ins you could add into the batter. 

    • Semisweet chocolate chips 
    • Chopped nuts such as pecans or walnuts
    • Chocolate or rainbow sprinkles 
    • More fruit such as blueberries or cut up strawberries
    • In the fall add some pumpkin pie spice 
    • Peanut butter

    Banana pancake toppings

    Similar to the mix-ins, you could totally play around with what you top these pancakes with! Below are some suggestions. 

    • Pat of butter
    • Powdered sugar
    • Warm maple syrup 
    • Fruit such as blueberries, strawberries, kiwi, or double-down and top with some banana slices
    • Chopped nuts – walnuts, pecans 
    • Homemade whipped cream 
    • Caramel sauce 
    • Fruit jam or compote 
    Banana Buttermilk stack with bite cut out.

    Storing and reheating 

    • Storage: Keep any leftover pancakes wrapped tightly or in an airtight container in the fridge for up to 3 days.
    • Reheating: Warm in the microwave for a few minutes. 
    • Freezing: Cooked pancakes can be stored in the freezer for up to 3 months. Wrap them individually and keep in an airtight container. Thaw in the fridge and warm in the microwave. 

    FAQs

    Can I ripen bananas quickly? 

    A banana will ripen more quickly if you put it in a closed paper bag. To speed it up even further, add an apple, pear, or avocado in the bag with it.

    Can I use frozen bananas? 

    You can, just defrost them first. 

    What if I don’t have enough banana? 

    You can round it out with some applesauce. 

    What is buttermilk?

    Buttermilk is essentially fermented milk – it’s used often in baking because it helps produce a tender result. More on what buttermilk is here. 

    Did you make this recipe? Leave a rating and review below and tag me on social!

    More pancake recipes

    • 1:1 shot of the pancakes with a pour of maple syrup.
      Fluffy Almond Milk Pancakes
    • Close up of pancakes with a pat of butter and pure maple syrup.
      Buttermilk Pancakes for Two
    • Close up image of the finished dutch baby with whipped cream and berries.
      Fluffy Buttermilk Dutch Baby Pancake

    📖 Recipe

    Stack of banana buttermilk pancakes.

    Banana Buttermilk Pancakes

    These Banana Buttermilk Pancakes are so fluffy and perfectly tender. They’re made from a simple pancake batter that has mashed bananas so the banana flavor is evenly dispersed throughout – with no added sugar, the bananas sweeten it up just enough. Serve with a pat of butter and some maple syrup for a perfectly simple breakfast. 
    5 from 2 votes
    Print Pin Rate
    Prep Time: 15 minutes minutes
    Cook Time: 30 minutes minutes
    Servings: 2 servings

    Ingredients

    • ½ cup mashed banana from 1-2 bananas
    • 1 large egg
    • 1 cup buttermilk
    • 1 tsp vanilla extract
    • 1 ¼ cup all purpose flour
    • 1 teaspoon baking powder
    • 1 teaspoon cinnamon
    • ½ teaspoon kosher salt
    • 2 tablespoon unsalted butter

    Instructions

    • Place the banana in a medium bowl. Smush it with the back of a fork until fully mashed. 
    • Crack the egg into the bowl with the banana. Whisk until well combined. 
    • To the bowl with the banana mixture, add the buttermilk and vanilla. Whisk until well combined. 
    • Add the flour, baking powder, cinnamon, and vanilla. Whisk until just combined - it’ll be a little lumpy because of the texture from the banana. 
    • Heat a medium sized non-stick pan over medium heat. Add a bit of butter to the hot skillet. Once the butter is melted and sizzling gently, scoop ⅓ cup of batter into the skillet. Cook on this side for about 3 minutes – until the edges have set, a few little bubbles are forming on the surface, and the side that is down is golden brown. 
    • Once it's ready, carefully flip the pancake to cook th e second side. Cook about 3 minutes and remove once golden brown. Add more butter if needed, and repeat until you've worked through all the batter.

    Video

    Notes

    • To mash the bananas use either the back of a fork or a mini potato masher. 
    • Don’t over mix the batter! If you over mix, you'll have flatter, more rubbery pancakes. Mix until everything is just combined and a few small lumps remain. 
    • If the butter starts to brown or burn in the pan, wipe it out with a dry paper towel then replace it by adding a bit more.
    • Watch the temperature of your skillet – if the butter immediately browns when it goes into the pan your pan is too hot. Lower the temperature. You'll want to be around medium / medium-low heat to make pancakes. 
    • Pancakes are ready to flip when the edges are set and a few small bubbles start to form on the surface. 
    • To make homemade buttermilk – add 1 tablespoon of lemon juice to a measuring cup, then add just enough whole milk or 2% milk to hit the 1 cup mark. Stir it together, and let it sit for 10 minutes. Then it’s ready to use! 
    • If you have a non-stick griddle, definitely use that instead of a skillet! There's more surface area so you can cook more pancakes at a time.
    • If you don't want to use butter you could alternatively spray a bit of nonstick cooking spray. 

    Nutrition Estimate

    Calories: 550kcal | Carbohydrates: 80g | Protein: 15g | Fat: 18g | Saturated Fat: 10g | Polyunsaturated Fat: 1g | Monounsaturated Fat: 5g | Trans Fat: 0.5g | Cholesterol: 125mg | Sodium: 955mg | Potassium: 488mg | Fiber: 4g | Sugar: 13g | Vitamin A: 706IU | Vitamin C: 5mg | Calcium: 296mg | Iron: 5mg
    Course: Breakfast
    Cuisine: American
    Keyword: banana, Pancakes
    Author: Haley

    Spinach and Feta White Pizza

    Close up of sliced spinach and feta pizza.

    This Spinach and Feta Pizza is a delicious vegetarian pizza topped with salty feta cheese, creamy mozzarella cheese, and a garlicky spinach and red onion mixture. Top with fresh dill for a bright herby finish. The pizza tastes similar to the Greek dish spanakopita, so if you love that, you’ll love this!

    Close up of sliced spinach and feta pizza.
    [feast_advanced_jump_to]

    Ingredients

    Below is an overview of the ingredients used for this Greek-inspired feta pizza. A full list with quantities can be found in the recipe card at the end of this post. 

    Ingredients for spinach and feta pizza on a table.
    • Pizza dough: Any works! I love to use the one from the refrigerator section in Trader Joe’s, it’s perfect in a pinch and a very versatile crust. You could also make homemade dough, or even use frozen (you just need to defrost it the night before).
    • Spinach: 6oz of fresh baby spinach. It looks like a lot going into the pan, but it wilts down quite a bit. 
    • Red onions: Sliced red onion gets sautéd with the spinach. One big or two small. 
    • Garlic: With tomato sauce on this pizza, I wanted to still bring that garlicky flavor. So adding a few sliced cloves in with the spinach mixture is great.
    • Feta cheese: Salty, briney, so good. Look for the PDO mark (protected designation of origin) to ensure it’s authentic. 
    • Mozzarella: A little bit of fresh mozzarella cheese to bring some of the melt factor. 
    • Olive oil: Drizzling olive oil on the dough before baking helps it get golden and crisp. 
    • (optional) Fresh dill: A sprinkling of fresh dill after it’s baked to top it off and bring a fresh element. 

    Ingredient substitutions

    You could swap any of the below ingredients for their above listed counterparts and this recipe would still work out great. 

    • Spinach: You can use frozen spinach. Once defrosted, squeeze out as much excess liquid as possible. Separately sauté the garlic and onion, and then combine with defrosted spinach. 
    • Onion: You can use a yellow onion.
    • Mozzarella: Pre-shredded is totally fine. 
    • Fresh dill: You can use parsley or oregano.

    Step by step instructions

    Making white feta pizza is quick and painless, steps listed out below!

    Overview: Sauté spinach with onions and garlic, add cheese and toppings to the pizza, bake! 

    1. Sauté spinach, onions, and garlic. In a skillet, warm olive oil over medium heat. Add the onions and cook for 10 minutes. Then add in the garlic and spinach. Cook for a few minutes more until the garlic is fragrant and the spinach is wilted, then add the salt and pepper. 

    2. Prep the pizza. Roll or stretch out the dough until it’s about 12-inches wide. Transfer dough to a parchment paper lined baking sheet and drizzle all over with olive oil. Dot with the mozzarella cheese, then distribute the spinach onion mixture, then top with the feta. 

    Side by side of sautéd onions and spinach, and prepping the pizza.

    3. Bake! Bake for 10-15 minutes in a 425°F oven until the pizza crust is golden brown and the mozzarella cheese is melted. 

    Freshly baked pizza.

    Tips and tricks 

    Some tips below for making this feta spinach pizza recipe.

    • If you are buying fresh spinach in a bundle and it still has stems, cut them off. 
    • Let your dough come to room temperature before stretching it out. If you don’t, it’ll be much more difficult and will constantly retract into itself.
    • If you’re using frozen spinach, make sure you squeeze out as much excess liquid as possible, it could make the dough soggy. 
    • Buy a block of feta in brine, not pre-crumbled. Pre-crumbled is often a bit chalkier and has more stabilizers. 
    • Bake this in a preheated cast iron skillet for a thicker crust. 
    • Definitely use a pizza stone if you have one! 
    • Use more or less garlic to your liking. 
    • Add a little spice by sprinkling some red pepper flakes over top. 

    More topping ideas

    This recipe is a great veggie pizza option, and below are even more that you could add on. 

    • ​Fresh tomatoes
    • Sundried tomatoes 
    • Bell peppers / poblano pepper
    • Parmesan cheese
    • Ricotta cheese
    • Pine nuts for some crunch
    • If you really wanted sauce and to dive into the white pizza thing, I'd recommend using a béchamel sauce / alfredo sauce

    FAQs

    Does feta melt?

    No, not really at all. While it doesn’t melt, it still is very soft. But also that’s why I like adding the mozzarella as well to get more of the classic pizza cheesiness. 

    What kind of dairy is feta?

    Feta cheese is made from either solely sheep’s milk, or a combination of sheep’s milk and goat’s milk. 

    Is feta cheese healthy?

    Feta cheese is lower in fat and calories than aged cheeses (e.g., parmesan), but cheese is cheese, I wouldn’t say it’s healthy. 

    More delicious pizza recipes

    • Up close of finished pizza cut into squares.
      Zucchini and Stracciatella Pizza
    • Close up image of pizza fresh out of the oven.
      Pepperoncini and Onion Vegetarian Pizza
    • Thumbnail
      Caramelized Onion and Bacon Pizza

    📖 Recipe

    Close up of sliced spinach and feta pizza.

    Spinach and Feta White Pizza

    This Spinach and Feta pizza is a delicious vegetarian pizza topped with salty feta cheese, creamy mozzarella cheese, and a garlicky spinach and red onion mixture. Top with fresh dill for a bright herby finish. The pizza tastes similar to the Greek dish spanakopita, so if you love that, you’ll love this!
    5 from 4 votes
    Print Pin Rate
    Prep Time: 20 minutes minutes
    Cook Time: 15 minutes minutes
    Total Time: 35 minutes minutes
    Servings: 4 servings

    Ingredients

    • 1 lb pizza dough
    • 6 oz fresh spinach
    • 1 red onion sliced
    • 4 cloves garlic sliced
    • 8 oz mozzarella shredded
    • 6 oz block feta cheese crumbled
    • 2 tablespoon olive oil
    • 2 tablespoon fresh dill optional

    Instructions

    • Preheat oven to 425°F.
    • In a skillet, warm olive oil over medium heat. Add the onions and cook for 10 minutes. Then add in the garlic and spinach. Cook for a few minutes more until the garlic is fragrant and the spinach is wilted, then add the salt and pepper. 
    • Roll or stretch out the dough until it’s about 12-inches wide. Transfer dough to a parchment paper lined baking sheet and drizzle all over with olive oil. Dot with the mozzarella cheese, then distribute the spinach onion mixture, then top with the feta. 
    • Bake for 10-15 minutes until the pizza crust is golden brown and the mozzarella cheese is melted. 

    Video

    Nutrition Estimate

    Calories: 649kcal | Carbohydrates: 62g | Protein: 29g | Fat: 33g | Saturated Fat: 15g | Polyunsaturated Fat: 2g | Monounsaturated Fat: 11g | Cholesterol: 83mg | Sodium: 1696mg | Potassium: 360mg | Fiber: 3g | Sugar: 9g | Vitamin A: 4566IU | Vitamin C: 15mg | Calcium: 550mg | Iron: 5mg
    Course: Dinner
    Cuisine: American
    Keyword: Pizza, Vegetarian
    Author: Haley

    Yogurt Plum Cake

    Plum cake with a slice taken out.

    This Yogurt Plum Cake is incredibly tender and moist, and deliciously flavored with a bit of cardamom, then topped with juicy sweet plums that get perfectly soft as they bake. It’s a must make this plum season. 

    Plum cake with a slice taken out.
    [feast_advanced_jump_to]

    Ingredients

    This easy plum cake comes together with some pretty standard cake ingredients, plus a special one or two.

    Ingredients on a table to make yogurt plum cake.
    • Plums: You’ll need 3-4 fresh plums for this recipe. You want slightly under-ripe ones for baking. They should be mostly firm, with a little give. If they are too ripe they will not hold up when baking, and if they are too under-ripe they won’t be sweet enough. 
    • Oil: Any neutral oil works for this. I use canola oil, but you can also use vegetable oil or grapeseed oil. 
    • Greek yogurt: whole milk / full fat plain yogurt is what you want for this recipe. 
    • Sugar: Standard granulated sugar. 
    • Eggs: Two large eggs. Ideally at room temperature.
    • Vanilla: Either vanilla extract or vanilla bean paste. 
    • Cardamom: A little bit goes a long way. Cardamom is so good in baked goods, it is in the ginger family and has an almost citrusy flavor while still holding a good amount of spice. (not spice meaning spicy, spice in the same way that ginger has spice). 
    • All purpose flour: Standard baking flour. Unbleached if you can find it. 
    • Baking powder: The leavening agent. Check your expiration date!
    • Kosher salt: Always a bit of salt to balance out the sweetness and awaken the flavors. 

    Step by step instructions

    Plums are my absolute favorite summer fruit – I could eat literally 3 a day. They are so juicy and delicious. So this cake is basically amazing because it’s more ways to eat plums. Even better, it comes together in just one bowl. 

    Overview: whisk wet ingredients, fold in dry ingredients, transfer to prepared cake pan, top with plums, bake. 

    1. Whisk the wet ingredients. In a large mixing bowl, whisk together the oil, yogurt, sugar, eggs, and vanilla. 

    2. Fold in the dry ingredients. To the bowl, add the cardamom, flour, baking powder, and salt. Gently mix or fold together until just combined. It’s okay if there are some smaller lumps. 

    SIde by side images of making the yogurt plum cake batter.

    3. Pour into pan and top with plums. Pour the cake batter into a prepared baking pan (lined with parchment paper, sprayed or buttered as needed). Use a rubber spatula to spread the batter into an even layer. Place the sliced plums in a circular pattern on top of the cake.

    4. Bake. Pop the cake into a preheated 350°oven and bake for 50 minutes until golden brown and a toothpick comes out dry with only a few crumbles. 

    Before and after of baking the cake.

    Tips and tricks

    A few little tricks for this recipe are below to help you make it the best it can be.

    • Measuring ingredients: Measure dry ingredients for baking using a scale!! If you don’t have one, use the spoon and level method. Do not scoop your flour, you’ll get too much flour and it’ll be a dry cake.
    • Use an oven thermometer: ovens are wildly unreliable in their temperature, and it's important to be as accurate as possible with baking. I recommend getting or using an over thermometer so you can ensure it's at the right temperature.
    • To quickly get your eggs to room temperature: Fill a cup with room temperature/slightly warm water and submerge the eggs for 15 minutes. The chill on the eggs should be gone after this, and then you're good to go.
    • The easiest way to slice a plum:
      • Slice inward with a pairing knife vertically until you hit the pit, then rotate the plum so the knife fully slices around the pit 
      • Twist the plum open and pull the pit out 
      • Cut the halves into 4 equal slices (so you’ll end up with 8 slices per plum)
    • Cake pan type and size: I like to use a 9” round springform pan so there is plenty of surface area for plums and I can just pop the sides off and not have to worry about flipping the cake over to get it out of the pan. 
      • You can use an 8” round pan, just bake for a little longer. You can also use a square pan, either 8" or 9". 
    • Lining a cake pan: I like to lightly spray the pan, and then line it with parchment paper higher up than the sides so you can pull it out.
    • Coarse sugar: An optional step is to sprinkle a bit of coarse raw sugar (such as turbinado or demerara) on top before baking. This will give the cake an almost crust-like texture on top. It’s amazing. 

    Types of plums

    There are a variety of plums out there – they are most commonly categorized into red plums and black plums, and either works great for this recipe. 

    If you’re looking for plums that have red flesh, look for Santa Rosa Plums or Blood Plums. These have a maroon/reddish skin (which can often be confused with black plums, but they are a little lighter). Interestingly, the plum called a red plum is redder on the skin, but the inside is typically more yellow. 

    There are also these plum and apricot cross-fruits called plumcots / apriums and if you find them in your store you MUST use them. They are my favorite thing in the world. 

    Cake with fork and slices.

    Recipe variations

    • Use a mild flavored olive oil.
    • Other stone fruit you could use: peaches, nectarines, etc. 
    • You can remove or swap out the cardamom. If you want to swap, I’d recommend a bit of cinnamon or nutmeg. 
    • Use almond extract in place of vanilla extract. 
    • Add some lemon zest or orange zest. 
    • Use sour cream in place of yogurt.

    Serving suggestions

    This cake is delicious as is, fresh out of the oven. But if you’d like, it’s great served with whipped cream, a scoop of vanilla ice cream, or a dusting of powdered sugar (icing sugar). 

    Storage

    Yogurt plum cake can be stored at room temperature for up to 3 days, either tightly wrapped with plastic wrap or in an airtight container. 

    You can also freeze this cake, although not ideal. Wrap it tightly and freeze for up to 3 months. Defrost in the fridge and then warm in the microwave. 

    Regardless of which method you use, let the cake cool completely before you store it. 

    Overhead image of sliced yogurt plum cake.

    FAQs

    What does Greek yogurt do in a cake?

    Using yogurt helps make sure you get a moist cake while also adding a very mild tang reminiscent of buttermilk. 

    Can I make this cake dairy free?

    Yes - use full fat plain coconut yogurt!

    Do I need to peel the plums?

    Nope! Plum skin is thin and totally edible.

    More cake recipes

    • Thumbnail
      Lemon Pistachio Loaf Cake
    • Peach Olive Oil Cake
      Peach Olive Oil Cake
    • Raspberry Almond Crumb Cake
      Raspberry Almond Crumb Cake
    • Slices of blood orange cake on a cutting board.
      Blood Orange Olive Oil Cake

    Did you make this recipe? Leave a rating and review below and tag me on social!

    📖 Recipe

    Plum cake with a slice taken out.

    Yogurt Plum Cake

    This Yogurt Plum Cake is incredibly tender and moist, and deliciously flavored with a bit of cardamom, then topped with juicy sweet plums that get perfectly soft as they bake. It’s a must make this plum season. 
    5 from 1 vote
    Print Pin Rate
    Prep Time: 20 minutes minutes
    Cook Time: 50 minutes minutes
    Total Time: 1 hour hour 5 minutes minutes
    Servings: 8 servings

    Ingredients

    • 3 plums sliced into 8 pieces each
    • ½ cup canola oil
    • 1 cup full fat plain greek yogurt
    • 1 cup granulated sugar
    • 2 large eggs
    • 1.5 teaspoon vanilla extract
    • ½ teaspoon cardamom
    • 2 cups all purpose flour
    • 1 ½ teaspoon baking powder
    • 1 teaspoon kosher salt
    US Customary - Metric

    Instructions

    • Preheat your oven to 350°F.
    • In a large mixing bowl, whisk together the oil, yogurt, sugar, eggs, and vanilla. 
    • To the bowl, add the cardamom, flour, baking powder, and salt. Gently mix or fold together until just combined. It’s okay if there are some smaller lumps. 
    • Pour the cake batter into a prepared baking pan (lined with parchment paper, sprayed or buttered as needed). Use a rubber spatula to spread the batter into an even layer. Place the sliced plums in a circular pattern on top of the cake.
    • Pop the cake into a preheated oven and bake for 50 minutes until golden brown and a toothpick comes out dry with only a few crumbles. 

    Video

    Notes

    • Measuring ingredients: Measure dry ingredients for baking using a scale!! If you don’t have one, use the spoon and level method. Do not scoop your flour, you’ll get too much flour and it’ll be a dry cake.
    • Use an oven thermometer: ovens are wildly unreliable in their temperature, and it's important to be as accurate as possible with baking. I recommend getting or using an over thermometer so you can ensure it's at the right temperature.
    • To quickly get your eggs to room temperature: Fill a cup with room temperature/slightly warm water and submerge the eggs for 15 minutes. The chill on the eggs should be gone after this, and then you're good to go.
    • The easiest way to slice a plum:
      • Slice inward with a pairing knife vertically until you hit the pit, then rotate the plum so the knife fully slices around the pit 
      • Twist the plum open and pull the pit out 
      • Cut the halves into 4 equal slices (so you’ll end up with 8 slices per plum)
    • Cake pan type and size: I like to use a 9” round springform pan so there is plenty of surface area for plums and I can just pop the sides off and not have to worry about flipping the cake over to get it out of the pan. 
      • You can use an 8” round pan, just bake for a little longer. You can also use a square pan, either 8" or 9". 
    • Lining a cake pan: I like to lightly spray the pan, and then line it with parchment paper higher up than the sides so you can pull it out.
    • Coarse sugar: An optional step is to sprinkle a bit of coarse raw sugar (such as turbinado or demerara) on top before baking. This will give the cake an almost crust-like texture on top. It’s amazing. 

    Nutrition Estimate

    Calories: 381kcal | Carbohydrates: 53g | Protein: 8g | Fat: 16g | Saturated Fat: 2g | Polyunsaturated Fat: 4g | Monounsaturated Fat: 9g | Trans Fat: 0.1g | Cholesterol: 48mg | Sodium: 398mg | Potassium: 128mg | Fiber: 1g | Sugar: 28g | Vitamin A: 154IU | Vitamin C: 2mg | Calcium: 86mg | Iron: 2mg
    Course: Dessert
    Cuisine: American
    Keyword: cake, Plums, yogurt cake
    Author: Haley
    • « Previous Page
    • 1
    • …
    • 9
    • 10
    • 11
    • 12
    • 13
    • …
    • 32
    • Next Page »

    HEY THERE!

    Welcome to Cozy Cravings! Happy to have you. Here, you’ll find comfort food recipes & other delicious things to enjoy and devour.

    POPULAR POSTS

    • Close up of broccoli au gratin.
      Broccoli Au Gratin (Broccoli Casserole)
    • Finished french onion pasta in a bowl.
      One Pot French Onion Pasta
    • close up image of maple candied bacon on a plate.
      Maple Candied Bacon
    • Overhead image of lasagna fresh out of the oven with sage on top.
      Butternut Squash and Spinach Lasagna

    Footer

    ↑ back to top

    about

    • ABOUT
    • CONTACT
    • PRIVACY POLICY

    Let's Keep In Touch!

    Subscribe here for delicious recipes, updates & more!

    Thank you!

    You have successfully joined our subscriber list.

    .

    recipe index

    • APPETIZERS
    • BREAKFAST & BRUNCH
    • LUNCH & DINNER
    • SNACKS & SIDES
    • DESSERTS

    Copyright © 2026 · CozyCravings.com

    Rate This Recipe

    Your vote:


    A rating is required
    A name is required
    An email is required